# Introduction
**Please note that this wiki is still heavily in development.**
Videogame corruptions, or the act of "corrupting games", is the process of purposely breaking a game, usually with a program called a corruptor. This program can modify a game's data, and sometimes memory, to produce unexpected [graphics](https://youtu.be/1YCfk1FZ7I8?t=215), [gameplay](https://youtu.be/H_jvZQgLyaE?t=195), or [audio](https://www.youtube.com/watch?v=CzKD52Vvxd8). Often resulting in [hilarity](https://www.youtube.com/watch?t=198\&v=W545DP8CmWQ) and or [invoking Satan](https://youtu.be/wtql-ZllYZ8?t=9).
Of importance though is that due to the random nature of corruptions, screen flashing is common. **If you are epileptic, corruptions might not be for you.**
## Types of corruption
### Visual
2D and 3D visuals can be affected by corrupting a game. For example, if you were to corrupt a sprite on the SNES it could result in different colors, offset pixels, flipped textures, or a change in hue. If you were to corrupt a model in a 3D game it could result in stretched, distorted, flat, or just plain broken polygons and mesh.
####
{% embed url="" %}
Mario's head mesh totally mashed up from Super Mario 64 on the N64. Source: (from Vinesauce in 2013)
{% endembed %}
### Audio
Corrupting a game can modify its audio and music, depending on how you corrupted the game. For example, if you corrupted a SNES ROM and modified music data it can crackle, scramble, pitch up or down, slow down, speed up, change the track entirely, or all at the same time.
{% embed url="" %}
The startup music to Donkey Kong Country for the SNES corrupted. Source: (From Vinesauce in 2013)
{% endembed %}
### Gameplay
Gameplay corruptions happen when a gameplay mechanic is altered by a corruption which can result in anything from misplaced characters to the player being able to jump 10 times higher than usual. Gameplay corruptions are not as common as audio and video corruptions because it requires game code to be altered while still run correctly.
{% embed url="" %}
"The car shouldn't have phased through those trucks like that". Source: (From BitRain in 2016)
{% endembed %}
## A warning
While corruptions are great fun, they can be a great danger to both you and your computer.
Sometimes when corrupting games a wild stretching polygon or a broken color palette can fill your screen and flash rapidly, which could cause epilepsy in some people. **If you are epileptic, corruptions might not be for you.**
When corrupting certain games on certain platforms you may encounter a blue screen of death (BSOD), while these are very rare and don't have any major adverse effects on your computer, nothing gets in the way of a BSOD and it will restart your computer. Be sure to save anything you are doing prior to corrupting.
Corrupting system processes? Not a good idea. If you really wanted to, do it in a virtual machine.
**Never ever corrupt an online game**. Doing so will adversely effect the experience of other players, lead to the banning of your account, and harms the reputation of RTC and corruptions as a whole.
# Communities
Some of the various communities and corruption-focused youtube/twitch channels of the world
## Active Corruption Communities
### Redscientist Labs (RTC Dev)
\
Operating mostly from Discord, the RTC Dev Discord is currently the most active corruption-focused community and is where corruption research happens. This discord server is where all operations for Corruption Shows (for Vinesauce streams) and music corruptions for Chip Furnace take place.
### Vinesauce
\
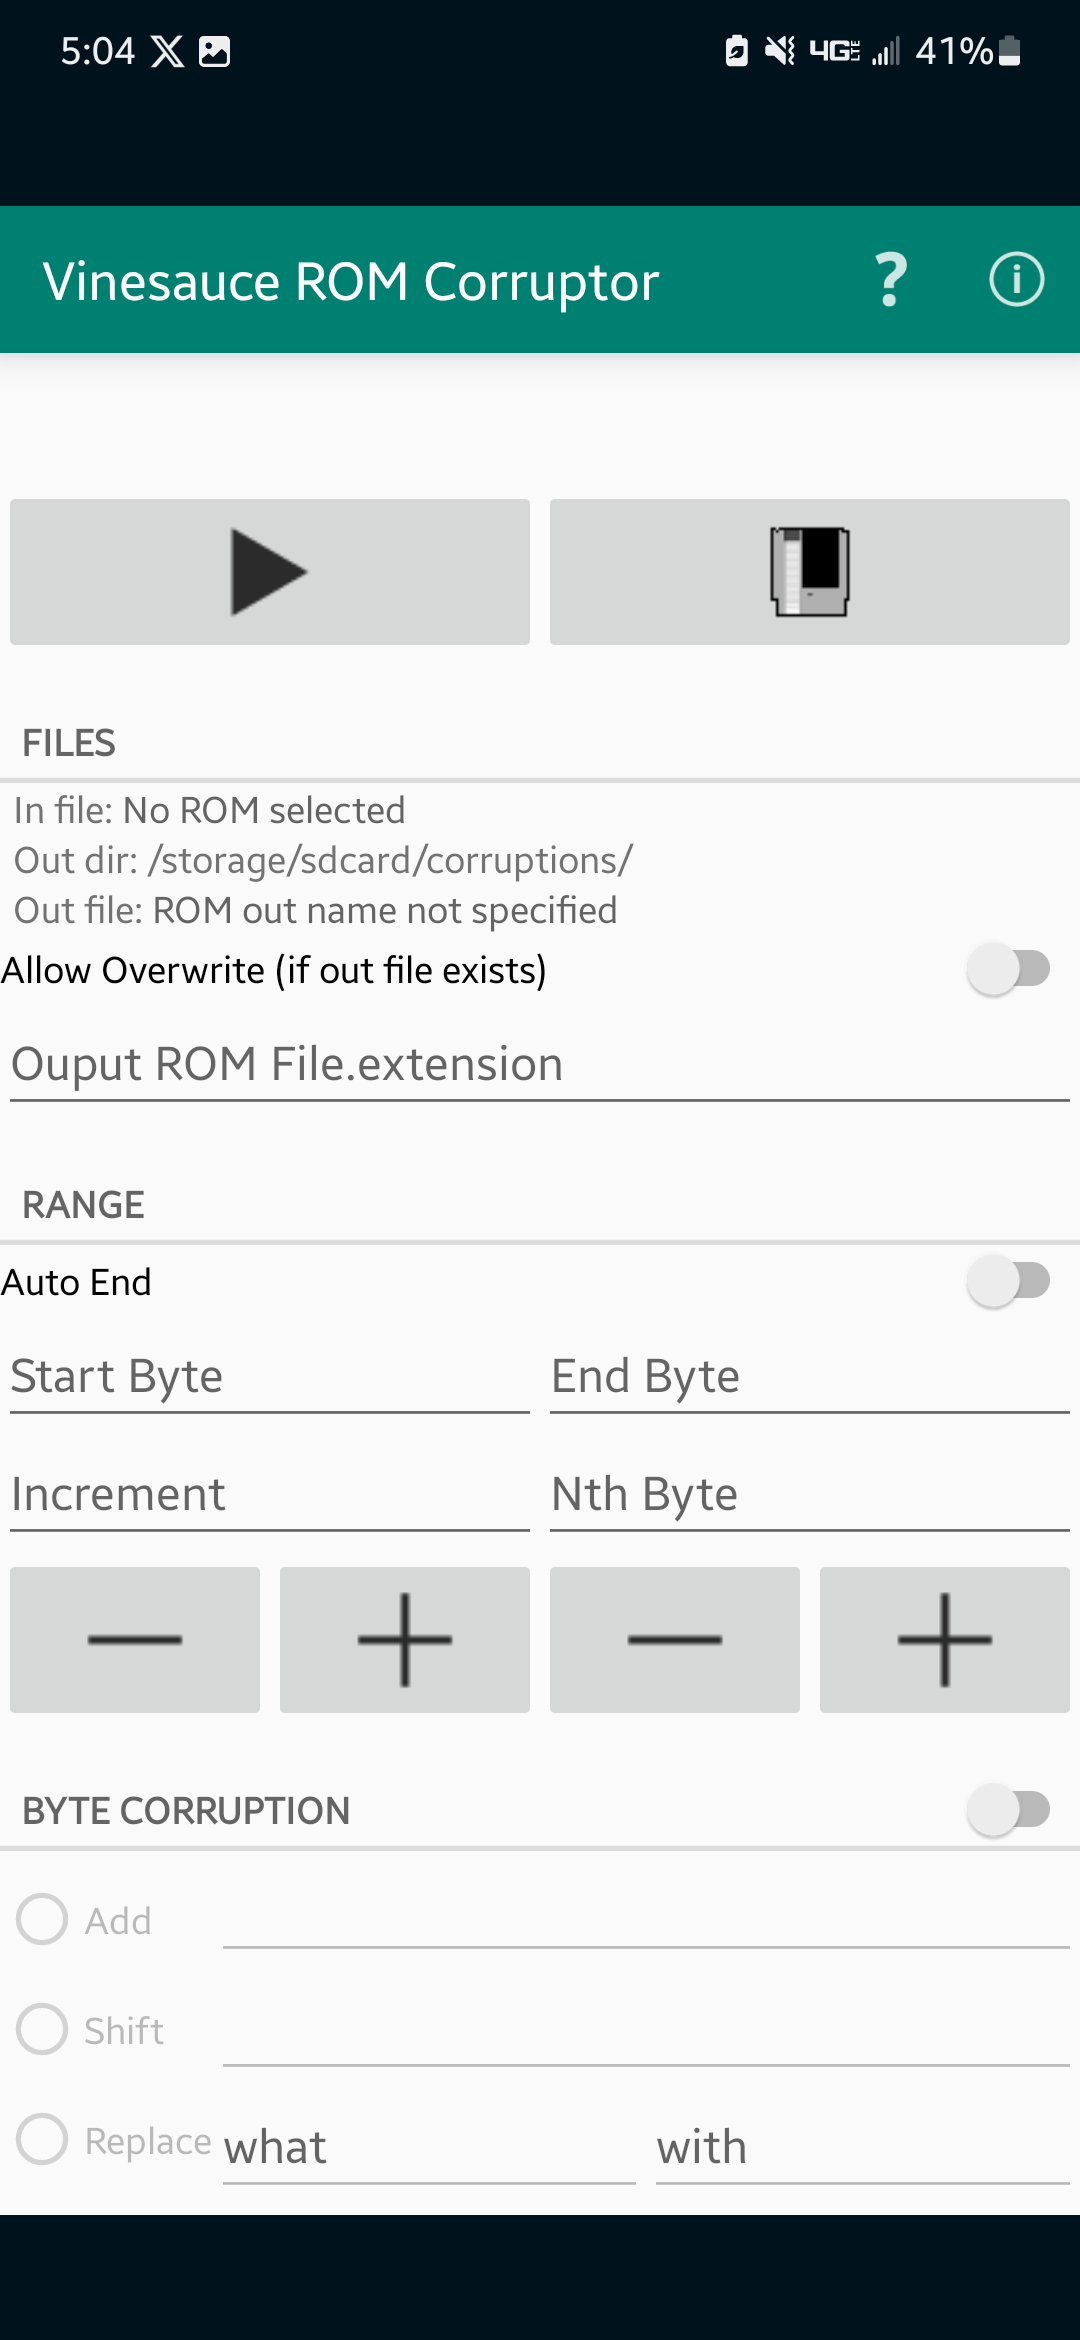
Vinesauce is a popular streamer on Twitch and YouTube, known for their corruptions, playing bad games and making funny voices. Most of the videos you see on their YouTube channel are cut and edited from their live streams. Vinny Vinesauce started doing corruptions using a tool called "Corrupt" which was extremely basic. The Vinesauce Rom Corruptor was then developed for them by Rikerz. Vinesauce exploded in popularity following the release of their "SNES Corruptions" video.
### Killysunt
\
Killysunt is a YouTuber and Twitch Streamer that uploads gameplay videos, mainly poorly translated games, corruptions and modded games. His corruption videos involve him playing a game while using the real-time corruptor. This style of video tends to be his most viewed, and the most viewed of which include corrupting a PlayStation 1 Bios, and various Wii games such as Wii Music and Wii Party.
### Brad Corrupts
\
Brad Corrupts uses his homemade Python script to corrupt different games from various systems such as the NES, Sega Genesis, PlayStation, and TurboGrafx-16. The channel uploads videos in a consistent format, and in high quality with proper pixel aspect ratio. The channel also employs crash mitigation techniques that make the games last longer when corrupted, for some systems such as the Sega Genesis. The channel is also known for its strong anti-apple message.
### Gruz
\
Formarly known as "Killgruz", this channel is known for weird mario mods, hacks and game genie codes. Gruz makes videos where he corrupts mario games by adding multiple effects, intentionally, using game genie codes.
### MaskOfBrutality
\
This youtube channel publishes semi-regular corruptions videos and has been doing Nintendo 3DS corruptions well before it was possible to do it with RTC.
## Less Active Corruption Communities
### Zer0DucksGiven
\
Formarly known as WelshGamer, Scott helped testing RTC while streaming, which often resulted in hilarious software crashes.
### Scares009
\
Scares009, also known as cocoatwix, is a Corruptor from Canada who also developped their own corruptor, the Scares Scrambler. Scares gained fame with a YouTube video "Gamecube BIOS Corruptions" in 2017, inspired by ZeroDucksGiven. His content ranges from corruptions to essays, with separate YouTube and Twitch (Cocoatwix) communities. Despite university, he's active on Discord and makes videos at a slower pace.
### Jordan
\
Also known as "Mama Ava" on discord, is the author if the infamous Wii Bios corruption series. These series were so successful that it was almost impossible to dissociate the channel from corruptions for a certain period of time.
### Digital Doofus
\
Not a lot is publicly known about Digital Doofus but they mainly do Wii corruptions.
## Cheatbug community
チートバグ : The Japanese scene
{% embed url="" %}
The Japanese Cheatbug scene is a fascinating subculture within the video game corruption community, where enthusiasts manipulate games to create glitch-filled videos. This article explores the origins, terminology, methods, and cross-cultural collaborations that make this scene unique.
["What is a cheatbug?" ](https://dic.nicovideo.jp/a/%E3%83%81%E3%83%BC%E3%83%88%E3%83%90%E3%82%B0%E5%8B%95%E7%94%BB)
Terminology and Origins:
* "cheatbug" : Japanese term for "Corruptions". Comes from the fact that corruptions in the cheatbug community are mainly created by modifying software using cheats (such as the Game Genie cheats)
* "Nishikigao" : Used when talking about corrupted faces created through cheats. Originated from a Famicom Captain Tsubasa game where a corruption made a character retain a funny face while saying "Nishikigaoka Koukou"
* "Kireboshi" : Originated from a FC Dragon Quest IV game cheat-bug video, where text saying "ばしゃと ききゅうが そとで まっております" (A carriage and a hot-air balloon wait outside) and "あ ながれぼし!" (Oh, a shooting star!) merged, resulting in "ばしゃと きれぼし!" (A carriage and kireboshi). "Kireboshi" didn't have a meaning, but since this was from an early cheat-bug, it became a tradition to meme it. It is now used as a community greeting.
* "Generation center" : A now-defunct website for generating cheat codes.
* "Seisei" (生成) : Originated from a Captain Tsubasa where the text turned into "sei sei sei". Means "Generating a coruption.
Methods and Tools:
* Standard Debuggers used: Code searching on PS2 with PCSX2, Cheat Engine and no$ emulator series.
* ["cep補助ツール" : Tool for generating cheats for PSX ](http://drhell.web.fc2.com/labo/index.html)
* ["mecc": Soft Vector search for windows](https://www.vector.co.jp/soft/winnt/hardware/se476625.html)
* "CCCFR": Tool for generating cheat codes and exploring memory edits for DS.
* [The lost corruption tool "urajijo" ](https://cdn.discordapp.com/attachments/279664862836031488/835743912232484915/urajijo.zip)
[Cheatbug wiki](https://wikiwiki.jp/htrespect/)
The Enigma of "Hitman Respect":
* Hitemman Respect had a significant impact on the community.
* Hitemann apparently does not do corruption videos anymore (since 2012).
* There has been a problem with reuploaded videos using Hittemann Respect tags (See wiki for more info)
* [Hitemann Respect on the cheatbug Wiki](https://wikiwiki.jp/htrespect/%E3%83%92%E3%83%86%E3%83%83%E3%83%9E%E3%83%B3%E3%83%AA%E3%82%B9%E3%83%9A%E3%82%AF%E3%83%88)
Interesting Facts:
* The cheatbug Discord community has about 200 members, indicating an active and engaged group of enthusiasts interested in video game corruptions.
* Cheatbug videos on Nico Nico Douga, a popular Japanese video sharing website, have garnered significant views, indicating a level of popularity and interest in the genre.
* The most popular cheatbug videos are the ones featuring JoJo's Bizarre Adventure games
* The japanese cheatbug community also has done Switch corruptions
* While cheatbug videos have gained popularity on platforms like Nico Nico Douga, the genre remains relatively niche within the gaming community, and there are discussions about its decreasing excitement in recent times.
* Like in the western corruptions community, the Japanese cheatbug scene also faces challenges in maintaining interest when corrupting the same games repeatedly.
* The cheatbug community utilizes various software and tools based on the hardware and games they are working with. For PlayStation 2 corruptions, the PCSX2 emulator with debugger functionality is employed, while older games might be debugged using the "no$" series of debugging emulators.
* Cheatbug videos often require extensive research and experimentation to achieve the desired glitched effects. The creators carefully manipulate graphics, memory, and code to produce glitch-filled content that captivates viewers.
* Certain terms like "Nishikigao" and "Kireboshi" originated from specific cheat-bug videos and have become widely adopted within the community, showcasing how memes and unique language have integrated into cheatbug culture. They are essentially the japanese equivalent of "SPEEN", "One note orchestra" and "Mario turns pink and dies"
* Besides memory-based corruptions, some cheatbug enthusiasts explore hardware-level modifications, like physically modifying consoles to achieve specific glitch effects, leading to unique and innovative approaches to video game corruptions.
The Japanese Cheatbug scene thrives on creativity, collaboration, and fascination with glitched video game content. Enthusiasts from different backgrounds come together, pushing the boundaries of video game corruptions. As this subculture evolves, it leaves an indelible mark on the gaming world, captivating fans and fostering a shared passion for the wonders of cheatbug creations.
# Safety and Ethics of Corruptions
While corrupting is fun it is important to remember that at core corruption is a form of destructive data manipulation. Thus it is **imperative** to remember to be safe and ethical in corrupting.
## Never corrupt data that you are not prepared to permanently lose.
When corrupting with any software (VSRC, SSRC, VineCorrupt, etc.) or Vanguard (FileStub) that directly targets raw files you should **assume that the file you are corrupting will be lost**. Never put full stake into FileStub's vault, **always make a manual back up of the data you intend to corrupt.**
## Prepare before corrupting critical software.
When using any software (Cheat Engine) or Vanguard (ProcessStub) that targets running processes make sure that it is safe to corrupt the process you intend to. **Randomly corrupting Windows processes is a very dumb game to play**, especially on your main device. If you don't know what you're doing **make a VM, or prepare a burner PC.** This is less important when targeting games, but **it never hurts to be safe**.
## Never corrupt uncontrolled local environments
Do not ever run RTCV on a device where you are not the administrator, or do not have permission from the administrator.
Do not run RTCV on work, school, or public devices.
if the answer to the question: "*Do I own this device?*" Is no, then you should not be corrupting it.
## Never corrupt uncontrolled online environments
**Never corrupt any online game that connects to a larger server.** \
This means no Roblox, no Fortnite, no Temtem, no Overwatch, etc. \
**Corrupting these games is worse then hacking them.** It's not just you that gets in trouble, **you risk getting the whole of the corruption community in trouble.**
**You risk the livelihood of everyone in this community. You risk destroying and obliterating the whole corruptions scene by giving it bad rep.**
Much like hacking or cheating in a game, corrupting online games like can and will **harm the playing experience of other players.**
**You may not be able to observe the damage done on the other side.**\
**You can and will get banned from these games.**
Doing this **leads to RTCV being labelled as a tool for online disruption,** and leads to things such as **antivirus software marking RTCV as unsafe.** **This also ruins peoples first time impressions of RTCV.**\
\
**Demonstration of any uncontrolled online corrupting in the various Corruptions communities will get you banned as this is generally deemed as a grave offense.**
## Performing safe online corrupting
Client/Server games where you can host your own server should be safe to corrupt. Make sure you disable any anti-cheat option while creating your own private server (such as VAC).
**The only safe online games to corrupt are ones which you control the whole environment and where everyone involved is aware.** As long as all server members know, games such as Counter-Strike, Minecraft and Terraria should be fine to corrupt.\
Similarly, games that use a peer-to-peer system such as Doom should also be safe to corrupt as long as all users are aware.
**The bottom line is: as long as you control the whole online environment of the game, and all users have consented to the experience it is okay to corrupt the game.**
As a final note, we the developers of RTCV ask you to keep videos of online corruptions to a minimum (or avoid them) and to explain in the video or in it's accompanying description what you have done to make sure that you are corrupting in a controlled environment. \
Thank you.
# What makes a good corruption?
A guideline for beginners on how to make the funny
This article is based on research a project by JezzDawga. The art or creating videogame corruptions is something that is normally influenced by one's skills and tastes. Because of that fact, what we consider a good corruption is completely subjective and greatly varies with every individual.
*Simply consider the information on this page as a representation of the community's general taste in corrupted videogames.*
**Contributors:**
* JezzDawga
* Dr. RNG
* Mr.HexTheGhost
* allegedgamer
* Brad Corrupts
* Unbyte
* Ircluzar
* Anom
## Positives
This chapter covers content that helps make a Corruption stand out and be interesting.
{% hint style="info" %}
We suggest getting as many different types of Positives as possible (and as aesthetically appropriate), but also to avoid overusing the same Positives consecutively.
{% endhint %}
*In short, have variety.*
The following content has been determined to make the Funny, with some of the best examples shown on Vinesauce for each:
| **Content** | **Example/s** |
| -------------------------------------------------------------------------------------------------------------------------------------------------------------------------------------------------------------------------------------------------------------------------------------------------------------------------------------------------------------------------------------------------------- | ------------------------------------------------------------------------------------------------------------------------------------------------------------------------------------------------------------------------------------------------------------------------------------------------------------------------------------------------------------------------------------------------------------------------------------------------------------------------------------------------------------------------------------------------------------------------------------------------------------------------ |
| The corruption modifies the core gameplay of the game. | [\[Vinesauce\] Vinny - Corruption Stockpile 19](https://www.youtube.com/watch?v=Zapc0DidHFs\&t=732s) |
|
The corruption is based on something. This “something” could be:
a Theme (Spooky Horror),
an Event (Christmas),
a Meme (Amogus),
or really anything referential outside of the vanilla game itself.
|
| The corruption contains irony. | [\[Vinesauce\] Vinny - Corruption Stockpile #46](https://www.youtube.com/watch?v=_NYZBO6DzUA\&t=6720s) |
| The corruption or game builds up to something and then a reveal is made, similar to a typically constructed joke with a punchline. |
|
| The corruption takes a familiar situation (or a situation where the expected outcome is obvious) from the game, but then turns expectations on their head (via reversal or otherwise unexpected surprise). |
|
| The corruption continuously raises the stakes, getting better and better / worse and worse as time goes on. | [\[Vinesauce\] Vinny - You are not ready, RUN](https://www.youtube.com/watch?v=wtql-ZllYZ8) |
| The corruption applies to an obscure / unique game (or game genre) and/or showcases features that haven’t been performed before. | [\[Vinesauce\] Vinny - Corruption Stockpile #63](https://www.youtube.com/watch?v=3sDzSs_xOiA\&t=3496s) |
| The corruption features comedic spontaneity (funny jumpscare). | [\[Vinesauce\] Vinny - Corruption Stockpile 22 + Wii Virtual Console Corruptions](https://www.youtube.com/watch?v=Q6NjJVywKRs\&t=8s) |
|
The corruption pertains to topics that are considered crude or taboo (without violating TOS), such as (but not limited to):
Sex, sexual organs, breasts, nudity,
Feces, urine, other biological waste,
Excessive swearing, censorship to imply swearing, and
Excessive violence (or violence enhanced by the corruption as opposed to the vanilla game).
|
| The corruption predominantly consists of one shade of colour (typically green) for the purposes of chroma-keying / green-screening. | [\[Vinesauce\] Vinny - Corruption Stockpile 30](https://www.youtube.com/watch?v=Ls5wZEMqcak\&t=85s) |
| The corruption contains unexpected, dark and/or shocking content that would not otherwise be expected. | [\[Vinesauce\] Vinny - Corruption Stockpile #37](https://m.youtube.com/watch?v=rJrZ-FVCpEI\&t=1386s) |
##
## Circumstantial Content
This chapter covers content that is inherently negative.
{% hint style="info" %}
Under the right circumstances, the content listed here can be redeemable, or even beneficial, for the corruption as a whole.
{% endhint %}
*Consider this content as riding the line between good and bad, and use it sparingly.*
The following content has been documented to make the Funny under lab conditions.\
The examples provided are instances where the content is done correctly and beneficially.
| **Content** | **Example/s** |
| -------------------------------------------------------------------------------------------------------------------------------------------------------------------------------------------------------------------------------------------------------------------------- | ------------------------------------------------------------------------------------------------------------------------------------------------------------------------------------------------------------------------------------------------------ |
| The corruption contains or features repetitive content / actions. |
|
| The corruption is just too simple, bland and/or uninteresting. |
|
## Negatives
If your corruption contains even one of these items, you need to fight an uphill battle for it to be considered good quality.
It is therefore generally advised to exclude all items listed here from any of your submissions, if you’re looking to make high quality works.
{% hint style="info" %}
Only the most kick-ass, revolutionary corruptions made with pure mastery of the craft, can contain one or more negatives and still be considered good.
{% endhint %}
*The following content has been deemed hazardous to the health of the Funny, and can even be considered a mood killer in high enough concentrations.*
| **Content** | **Example/s** |
| ------------------------------------------------------------------------------------------------------------------------------------------------------------------------------------------------------------------------------------------------------------------------------------------------------------------------------------------------------------------------------------------------------------------------------------------------------------------------------------------------------------------------------------------------------------------------------------------------------------------------------------------------------------------- | ---------------------------------------------------------------------------------------------------- |
|
The corruption was performed on a game that has been shown on stream excessively (Over-Corrupted).
As such, the pool of fresh and exciting content is drastically reduced.
|
Super Mario Bros. for the NES
Super Mario 64 for the N64
|
|
The corruption contains flashing colours.
The frequency (flashes/second), scale (pixel screen coverage), intensity (hue, brightness and saturation ranges) and duration of the flashing all determine exactly how bad this will affect the overall quality of a corruption.
Having sufficiently potent flashing in your corruption may cause epileptic seizures to those who are vulnerable, and as such it is always advised to put a \[Flashing] tag on your corruption if you believe this is a possibility.
This is also, obviously, a massive dampener to the possibility of your corruption being showcased.
This can be in the form of high-pitched frequencies, high amplitude (volume), the sound being akin to a noise profile (e.g. white noise), or just a generally chaotic and unpleasant sound (e.g. running RAM data through a sound engine).
|
|
| The corruption causes a hard crash of the game, which freezes or force-closes the emulation software, and can possibly have spillover effects. |
|
| The corruption contains copyrighted music or other material that can result in a copyright claim against any who showcase it. |
|
|
The corruption was sanitized poorly or not sanitized at all.
This gives the impression of amateurish, low-effort work that was rushed on purpose by someone who does not know what they’re doing and couldn’t be bothered to watch the tutorials.
Even if your corruption is dead simple and boring, at least make it clean and clear.
|
|
\
\
# Beginner Guides
# Tutorial Video Guide
## From 0 to 100 with a simple 17 min video.
Author: Gizmo The Dragon\
Covers: Wii/Gamecube, Corruption 101, Sanitize + Merge, Making stockpiles
{% embed url="" %}
Credit: Gizmo The Dragon - Youtube
{% endembed %}
You can also get more Tutorial videos at this page:
# Corruption Classroom
The official course on how to create your own corruption
Author: MaxMinerva\
Covers: From "Corrupting 101" to "Crafting masterpieces"
Google Slides version:
Wiki version:
{% file src="/files/sVWKGGqBwA2eHgDYrTzA" %}
{% file src="/files/8Igtb7PGOX0ZDZ7oACBN" %}
{% file src="/files/qe2NAJl2J0clwoHMbDLP" %}
{% file src="/files/846sfJnZmR7vDsM1iLP6" %}
{% file src="/files/JsuWuLG39mTv8lJxonpN" %}
{% file src="/files/xpt2VLMhvUJAqcUXGJ5c" %}
{% file src="/files/k7oItoPrLWjwDwLga0Rl" %}
{% file src="/files/KiwGZchf2l6Y6dDLER7Z" %}
{% file src="/files/lAeRucWJM9lLBYFBYMLj" %}
{% file src="/files/26gmH41zUi1tBOpuQgIK" %}
{% file src="/files/UnSAggNcxkdkx1p63k8K" %}
{% file src="/files/ieSihSC5zf98cEUDcH0Z" %}
{% file src="/files/g6TuLfeU8JJXEhei5Gvu" %}
# Cheat Sheet Guide
The fastest condensed guide to get started with RTC
Author: MaxMinerva
*This is a condensed guide that covers most of RTC in a few picture slides.*\
*It is a great cheat sheet and a complete recap of most important concepts.*
# In-Depth Guide
## Preface
This is the most extensive source of documentation for RTC, its concepts and tools. RTC as a project started in 2014 and kept changing throughout the years. A certain stability has been reached before 5.0.0 was released and most information featured in this guide should stay up to date even if the screen captures might sometimes be outdated.
## Credits
**\[RTC Team]**\
Ircluzar\
Narry\
NullShock78\
AbsenteeSurgeron\
ChrisNonyminus\
Moogie\
MaxMinerva\
Mistsofnowh3r3\
Goodblue77\
Melody\
xperia64\
Freelance Astronaut\
BLiNX PERSON\
Tenta\
\
**\[Various testers and content contributors]** \
BitRain, brand175, chinchilla\_paladin, CornObjects, Ego, VGDCMario, Freelance Astronaut, Frus, GizmoTheDragon, Impromptunite, Jojo, LuckyLuigiX4, Mr.Apple, Naransolongo Boldbayer, SuperHobbit, Unbyte, Unknown Samurai, unkyz, Killysunt, Lawn Meower, Matty G, re11ding, retrocombine, Skeletoxin, Spotty Len, vinesauce, Weinerless Steve, ZeroDucksGiven
**All programs from the RTC suite of tools are Open Source and available at:** [**https://github.com/redscientistlabs**](https://github.com/redscientistlabs)
# Introduction
The Real-Time Corruptor is a suite of tools and mods for emulators that allows a complete takeover of videogames. It is distributed through a tool called the RTC Launcher, available on [Redscientist Labs](#download-https-redscientist.com-rtc). The Launcher is a portable application that can let multiple versions of RTC Coexist and helps managing emulators and assets.
## Download: [https://redscientist.com/RTC](https://redscientist.com/rtc)
**All programs from the RTC suite of tools are Open Source and available at:** [**https://github.com/redscientistlabs**](https://github.com/redscientistlabs)
First, let’s go over the basic fundamentals of how this launcher functions.
_66tQX4AhQD.png?alt=media\&token=b3baaa7c-f3e0-415d-a989-5f72be4ecd1b)
### RTC Launcher
On the left side of the RTC Launcher, you get to choose which version of the RTC Core in use. Sometimes, RTC updates can and will break compatibility with older emulators and stockpiles so the availability of versions in the Launcher is the ultimate flexibility for compatibility.
When you click on an emulator icon, it will ask for downloading it from the server. Each emulator and component come with their own set of software licences and cannot be bundled with the Core.
When installing a new version of RTC, you may be prompted for importing emulators from older versions. This allows you to import emulator configurations from a previous RTC version. If the Launcher does not suggest you to import it, it means that the Emulator itself isn't compatible with the new version and must be re-downloaded.
#### Developer versions
In the Downloader tab, you can switch between distribution servers. Beta/Developper builds are available on the Developper server. An "Unstable" canary build is also sometimes available through the "Unstable" option.
### Quick Start
The Real-Time Corruptor was designed with ease of use in mind, if you want to get right into the action simply start an emulator from the launcher, load a ROM and click “Easy Start” then "Start with Recommended Settings" and you are away! (*Instant results not always guaranteed. Some emulators require bios or firmware files which you must acquire legally)*
Video game corruption happens when an emulated video game's program files are altered, either in the emulated game’s memory (RAM) or in the ROM itself. A real-time corruption is when the corruption itself occurs while the game is running or when the effects can be altered on the spot.
**RTC** is a collection of modified emulators and stub tools that integrate our corruption software via a solution we called Vanguard. This means that any emulator or program that is modded with Vanguard *should* be compatible. Every system's memory areas are detailed as a series of zones known as Memory Domains. The corruption will be generated for the selected domains in the main window.
### Differences from classic file corruptors
What is usually known as an iteration in static corruptors, is called a Blast in the RTC. A blast consists of a series of operations that are to be applied in the data located on the emulated game’s memory banks. (RAM, VRAM, ROM, etc.)
**The Auto-Corrupt function** attaches the blast generation to the emulated game’s clock. Smaller blasts on a fast clock will create a constant flow of randomly generated corruption. This flow can be controlled by three parameters: The **Error Delay,** which is a divider linked to the game clock, The **Intensity** which is a multiplier for the number of corruption units to be generated (which depends on the selected engine). The **Blast Radius** determines how the corruption is spread on the selected domains.
# Frequently Asked Questions
### **RTC doesn't start on my computer**
-> Have you run the Prereqs Checker in the launcher?
-> Make sure you have the latest .Net Framework installed on your computer
-> Make sure your computer is decent. It must be strong enough to run the games and RTC does add a slight increase on the system requirements.
-> Certain Emulators may have difficulties with certain hardware. Try another emulator if it doesn't work
### **Why is Bizhawk slower than other emulators ?**
-> BizHawk is one hell of an emulator. It features a ton of emulator cores and tools to create Tool-Assisted Speedruns. In order for these speedruns to be accurate to the real-life systems that they emulate, some of those do extra operations and disable optimizations that might cause faster but inaccurate emulation.
Some emulator cores are faster than others. QuickNes is generally faster than NesHawk for example.
-> You can play around with (or disable) the Rewind settings to make emulation less heavy on your system.
### **Why doesn't RTC work with LibRetro cores in BizHawk?**
All normal cores within BizHawk should work fine although a Libretro core loaded into Bizhawk won't work. The Libretro support in BizHawk is not good enough yet, we'll support it when it reaches stability comaparable to RetroArch
### **Can I add a new emulator to RTC?**
Absolutely! We provide all of our source code so that you can mod Vanguard into any program and examples for already modded emulators. If you are up for the challenge, you should probably come talk with us on the Discord and we'll give you some help if needed.
### **Why is the emulator i'm using going slow when Auto-Corrupt is on?**
Auto-Corrupt does add an extra load to the emulator as it must execute some extra code on every frame, on top of already having to execute Active Units. Certain types of Units are harder to process than others.
### How do I get to the emulator's folder?
Using the RTC Launcher, select the RTC Version and then right click on the emulator of your choice. Select the option "Open Folder" to open the Emulator's folder.
### How do I add Firmware files to BizHawk?
BizHawk expects its firmware files to be in the Firmware folder. You can check which Firmwares are properly installed from the window in the top menu, at Config -> Firmwares.
-> We CANNOT give you the files you need. They are copyrighted and you have to find them on your own.
### **How do I add Firmware files to MelonDS?**
MelonDS expects its firmware files to be installed in the Emulator folder (where the melonDS executable is). Open the folder by right clicking the emulator card in the launcher and selecting "Open Folder" then drop the files in the Windows Explorer window.
Pay extra attention to the filename of the Firmware files you give to MelonDS as it REQUIRES that they are written in all lowercase, exactly as shown in the error window when starting it.
If the error message still appears after putting the files in the folder, you did something wrong. Check all the filenames and ensure that they are IDENTICAL to the ones in the error message.
-> We CANNOT give you the files you need. They are copyrighted and you have to find them on your own.
**Visit the** [**Tips, tricks and quirks**](/rtcv/rtc/tips) **part of the guide for more details**
# Simple Mode
Getting Started Corrupting with Simple Mode
written by Melody
## Introduction with Simple Mode
Ready to start corrupting? RTC provides an incredible, overwhelming amount of tools to work with. This can be nice, but as a beginner it can be easier to learn with some of the more advanced options out of the way. This is where Simple Mode comes in handy. If you are just beginning to learn, you should start by mastering the tools provided here in Simple Mode, and **ensuring you have a firm understanding of what is occuring behind-the-scenes in your corruption.** This is vital when learning to corrupt; take the time to understand your corruptions.

## Let's Begin
Start by loading up the RTC, launching either BizHawk or Dolphin, and clicking the wizard icon to the left that says, *"Easy Start."* Next, click, *"Switch to Simple Mode."* At the top you'll see a prompt asking if you're corrupting 2D or 3D games. For this, we'll assume we're corrupting a 2D game today, so we'll select, *"Classic Platforms."* If you are corrupting a console such as the GCN or PS2, you'll want to try, *"Modern Platforms."*

Next, go ahead and load up your ROM into your emulator.
{% hint style="info" %}
If you are using RTC with the Bizhawk Emulator, make sure your Rewind and Fast Forward hotkeys are bound properly. Rewind is very useful for reversing back corruption, especially when doing real-time corruption such as manual blasts and auto-corrupt.
{% endhint %}
You'll want to find a spot in your game you think could corrupt well. Perhaps there are certain sprites on screen, or models doing animations, the choice is yours, just find somewhere to save. When you've found this location, press the button, *"Create and select a Glitch Harvester savestate"*

## What is the Glitch Harvester and Why am I using it?
Corruptions can be implemented real-time and non real-time. The Glitch Harvester is a tool that lets us not only create savestates, but it also lets us save corruptions we've found. After we save these corruptions, not only can we replay them but we can fine-tune them, and we can try to find different results with them. The *"Simple Glitch Harvester"* provided in the *"Simple Mode"* part of RTC is a very simplified version of the actual *"Glitch Harvester"*
## Time to Corrupt!
We should have either the Nightmare engine or the Vector engine loaded up, and you can confirm this by looking under the box in the center of the screen that says, *"Engine Parameters."* The benefit of Simple Mode here is we don't have to provide most of the parameters ourselves, we can simply jump right into corrupting.

Beneath the previously-mentioned box is another box, labelled, *"Real-Time Corruption."* This is where you'll input your one and only parameter, which is *"Intensity."* Move the slider up a bit; how much is entirely specific on which game you're corrupting and which engine you are using.

Press the red button labelled, *"Load and Corrupt."* This is essentially your start button, it loads the savestate and applys the corruption.

There are two easy ways to figure out what *Intensity* you should be using. Either we begin with a very high *Intensity* and work our way backwards, or we begin with a very small *Intensity* and work our way forwards. I recommend the prior, as doing the latter usually results in a lot of wiggling back and forth at the end. The main goal here is to find an *Intensity* that manages to hit a lot of *stable addresses*. Hopefully those *addresses* we hit cause the types of effects we are looking for, and not the types of effects we don't want. Try to find a balance between silliness and unstability.
{% hint style="info" %}
Keep in mind that these corruptions are randomly generated and that the results you are getting are all luck-based.
{% endhint %}
For *real-time* corruptions, we can use the button, *"Manual Blast."* This fires a single blast of corruptions at a time, in real-time. That is, we can continue to corrupt further after hitting, *"Load and Corrupt"* from the *"Glitch Harvester."* Another handy tool is the, *"Auto-Corrupt"* button. Here you can continuously blast the game with corruptions.
{% hint style="info" %}
With either of these tools *(Manual Blast and Auto-Corrupt)* you're likely going to want to lower your intensity, especially if you plan on doing a large number of blasts.
{% endhint %}
## Where do I go from here?
*"Shuffle Algorithm"* lets you try out different engines. Check the *Basic Guide* for a more thorough run-down on what each of these engines do. Try shuffling the engine a few times.

An unique feature to the Real-Time Corruptor next to its ability to corrupt in real-time is its ability to also uncorrupt in real-time, sorta. Whenever a corruption is created using the "*Glitch Harvester*", it is possible to attempt to disable it while the game is still running. You can play around with this feature using the button "*BlastLayer : ON/OFF*"

When you're ready to start learning the rest of the program, simply click, *"Switch to Normal Mode."* Here you can start making changes to the rest of the parameters each engine uses. Each engine has it's own way of working, so check each section of the *Basic Guide* respectively. You can freely switch back and forth between normal mode and simple mode if you so desire, so as to access the rest of the parameters.

## The Next Parameter
Now that you've mastered the use of the *Intensity* parameter and you've seen *"Auto-Corrupt"*, it only makes sense the next parameter we use is *"Error Delay"*. This provides spacing in-between blasts when we're using the *"Auto-Corrupt"* function. Try mixing and matching different configurations between the two parameters and seeing how they interact in the overall use of the program. Crashes are very likely so don't be surprised, but it's a learning experience after all. For more information on *"Error Delay"*, again check the *Basic Guide*.

## The Engines
Here's a quick run-down of some of the easier things you can do with each engine. I recommend you shuffle the engine, then switch to normal view to change the parameters of these engines, then switch back. At first you should only be messing with a few parameters at a time.

### Nightmare Engine
Changes Bytes in Memory once, either replacing or incrementing/decrementing them. Try switching the *Blast Type* to either replace, replace or modify, or solely modify.
### Hellgenie Engine
This engine freezes a Unit's value, **which is randomly generated.** *Max Infinite Units* is what you'll want to play with here. This parameter limits how many changes can be made, which can limit the corruption in the same way a low intensity would. If you aren't getting any effects even with a high intensity, chances are your *Max Infinite Units* is too low.
### Freeze Engine
Similar to the Hellgenie engine, here we are freezing values, but this time we're **freezing them in place.** For this engine to be effective we need to target values that are supposed to be changing. In both the Freeze and the Hellgenie engine it is likely you'll want to have *"Clear Units on Rewind"* enabled. This is so that when you load a savestate using the *Glitch Harvester*, old corruptions don't linger. You may want to disable it if you are using BizHawk's rewind function however.
### Distortion Engine
Using the Distortion engine we can backup a copy of some data, and then restore that data back to where it came from at some point in the future. This is accomplised through, *"Distortion Delay"* which is a measurement of *\*Steps* into the future. It's roughly similar to frames, but not the same thing.
### Pipe Engine
**Pipes** are bindings of one address to another. This results in data being, *"bled"* from one location to another, and can result even in data going between memory domains. *"Max Infinite Units"* again is our control parameter. This engine can be hard to utilize successfully at first, and is best used with *Virtual Memory Domains* and an otherwise thorough understanding of how your game handles it's memory.
### Vector Engine
This engine is great for messing with modern 3D games. Simply provide it a *Limiter List* and a *Value List*. When the corruptor selects data to corrupt, it gets checked against the *Limiter List*. You could think of it similar to checking the value's data type. Is it positive, negative, whole, one or zero? If the value we're checking to corrupt doesn't match up with the *Limiter List*, it's not going to be part of the corruption. The *Value List* is what we're replacing the data with.
### Custom Engine
You can also modify these engines and blend them together using the *Custom Engine*, but it's outside the scope of this article. Still worth reading however, see, *Basic Guide*.
### Blast Generator
This engine is able generate algorithmic blasts that are not real-time. It works similarly to older corruptors like the Vinesauce Rom Corruptor but allows for a deeper and more granular control of the generation algorithm.
## Finally
I hope this guide has helped you get started in making your first corruptions. It's a continuous learning experience, remember to always try new things and don't be scared to ask questions in the help channel of the RTC Discord.
# Concepts and Vocabulary
Before tackling how the corruptor is used, it is recommended to take some time to read the following details about the internals of RTC. These terms are going to be used throughout the entire guide.
### Vanguard
Throughout this entire guide, Emulators and other programs that interface with RTC can be referenced as "Vanguard Implementations". This comes from the fact that RTC, as of version 5, uses a technology called Vanguard in order to bridge any program with RTC, therefore giving it control over its memory. In order for an emulator to interface in Real-Time with RTC, it must be modded with Vanguard and adhere to its API.
### BlastUnit
*This represents one Unit of corruption instructions.*
The BlastUnit's behavior is defined by the engine that generated it and may contain one or many Addresses, Values and extra parameters. Said behavior can be customized through the Custom Engine.
### BlastLayer
*Type of item that contains* [*BlastUnits*](#blastunit) *generated from a* [*corruption engine*](/rtcv/rtc/corruption-engines)*.*
A BlastLayer is usually encapsulated within a [StashKey](/rtcv/rtc/concepts-and-vocabulary#stashkey) and can be manipulated using the [Blast Editor](/rtcv/rtc/blast-editor) or by merging multiple BlastLayers in the Glitch Harvester's Stockpile Manager. It can also be appended to another Savestate by using the Inject function of the [Glitch Harvester](/rtcv/rtc/glitch-harvester#glitch-harvester).
BlastLayers that are run from the [Stockpile Player](/rtcv/rtc/glitch-harvester#stockpile-player) or the [Glitch Harvester](/rtcv/rtc/glitch-harvester#glitch-harvester) can be deactivated and reactivated on the fly (if applicable).
### Blast
*A Blast is the action of generating and/or applying a* [*BlastLayer*](/rtcv/rtc/concepts-and-vocabulary#blastlayer) *item (The action of corrupting).*
When being generated, a Blast will contain a certain amount of [BlastUnits](/rtcv/rtc/concepts-and-vocabulary#blastunit). The amount of generated corruption Units is defined by the Intensity setting. The behavior of generated units can be tweaked by changing the selected Engine or building a custom behavior in the Custom Engine.
RTC is built in a way that corruption is always generated and saved in memory before being applied. This allows replayability, manipulation, and real-time interaction. When applied, byte-changing instructions usually backup values before modifying them. This allows corruption to be theoretically [disabled/reapplied on the fly](/rtcv/rtc/glitch-harvester#blastlayer-on-off), although this doesn't always work. Certain types of units do not store backups. Instead, they simply get removed from their execution pools. This means that while their effect may be stopped in real-time, it also may not be completely reverted.
### StashKey
*Type of item that contains information about a game, its game state, and an attached* [*BlastLayer* ](/rtcv/rtc/concepts-and-vocabulary#blastlayer)*(Corruption instructions).*
Corrupting using the [Glitch Harvester](/rtcv/rtc/glitch-harvester) generates StashKeys and sends them in the [Stash History](/rtcv/rtc/glitch-harvester#stash-history). They can later be manipulated and/or added to a [Stockpile](/rtcv/rtc/concepts-and-vocabulary#stockpile).
### Stockpile
*Type of item that contains* [*StashKeys*](/rtcv/rtc/concepts-and-vocabulary#stashkey)*.*
Stockpiles are saved files that contain Stockpile items, Game Binaries, Savestates, corruption instructions, and information related to the targeted program, plugins, and config. It is worth noting that Stockpiles will contain Game Binaries by default. This means it is important to deselect "Include referenced files" in the Stockpile Manager of the [Glitch Harvester](/rtcv/rtc/glitch-harvester#glitch-harvester) when sharing Stockpiles online is the goal.
Stockpiles can be managed using the [Glitch Harvester](/rtcv/rtc/glitch-harvester).
Stockpiles can be replayed using the [Stockpile Player](/rtcv/rtc/glitch-harvester#stockpile-player).
### Memory Domain
*Item that represents a chip or memory pool on an emulated system.*
Memory Domains wrap the native memory areas into our own format. Every [Vanguard Implementation](/rtcv/rtc/concepts-and-vocabulary#vanguard) has to wrap memory areas into Memory Domains, which allows for complete control by RTC. The high-level Memory Domain interface also allows for them to coexist with Virtual Memory Domains, which are a higher level of abstraction on top of normal Memory Domains.
### Virtual Memory Domain
*Item that represents continuous or non-contiguous part(s) of one or many Memory Domains*
Virtual Memory Domains are abstract lists of pointers that act as a Memory Domain. Most of the tools won't know the difference between a normal Memory Domain and a VMD. VMDs are marked with \[V] to show that they are not real. They can be saved and generated from files and formulas. [BlastLayers](/rtcv/rtc/concepts-and-vocabulary#blastlayer) can also be converted into VMDs.
*More information about Virtual Memory Domains is available in the* [*VMD Guide*](/rtcv/rtc/vmd-generator-advanced)*.*
### Emulation Step
[Vanguard implementations](/rtcv/rtc/concepts-and-vocabulary#vanguard) are hooked to their emulator's clock using some sort of CPU loop. This means that RTC's clock is tied the game on a frame basis. Pausing the emulator causes this loop to also get paused, therefore halting any automatic generation of corruption.
### Active and Infinite Units
As of version 5, RTC's [BlastUnit ](/rtcv/rtc/concepts-and-vocabulary#blastunit)format is completely programmable and is able to faithfully replace every BlastUnit type from the previous versions. Among the available behaviors, Units can be Active, meaning that they will have an effect for a certain amount of time, or Infinite, meaning that the effect will last forever.
# General Parameters
### Auto-Corrupt
When this is enabled, RTC will attempt to Generate and Execute a [BlastLayer](/rtcv/rtc/concepts-and-vocabulary#blastlayer) on every [Emulation Step](/rtcv/rtc/concepts-and-vocabulary#emulation-step). The amount of corruption can be set by changing the [Intensity](#intensity) and [Error Delay](#error-delay) settings.
### Manual Blast
*Alternatively to* [*Auto-Corrupt*](#auto-corrupt)*, Blasting a game with corruption can be triggered manually.*
Blasts with a bigger [Intensity ](#intensity)can be as effective as a controlled stream of corruption. It does give the user more control on when the game is altered.
### Error Delay
*Only Applicable to* [*Auto-Corrupt*](/rtcv/rtc/concepts-and-vocabulary#auto-corrupt)*.*
The Error Delay is a divider to the amount of generated corruption. This defines Auto-Corrupt will Blast the game every X [steps](/rtcv/rtc/concepts-and-vocabulary#emulation-step).
*Example of how generation works with Error Delay:*\
*1 second @ 60fps with Intensity 500 and Error Delay 1 will generate 30k units*\
*1 second @ 60fps with Intensity 30k and Error Delay 60 will generate 30k units.*\
*The difference is that the first one will generate a constant stream of units while the second one will generate a big block of units every second.*
*It should be worth noting that tweaking the Error Delay is NOT necessary to get corruption results. It only serves as a way to space out blasts during auto-corrupt.*
### Intensity
The Intensity is a multiplier to the amount of generated [Units ](/rtcv/rtc/concepts-and-vocabulary#blastunit)in a [Blast](/rtcv/rtc/concepts-and-vocabulary#blast)
*Generally, the higher the Intensity is, the more corruption will happen*
Some [engines ](/rtcv/rtc/corruption-engines)generate [Active Units](/rtcv/rtc/concepts-and-vocabulary#active-and-infinite-units), which execute code on every frame that they are active. There is a maximum amount of 50 active units by default. This setting can be changed in the engine settings (when applicable) or in Settings and tools -> Corruption Settings
*This means that a Blast with 100 Intensity while Max Active Units is set to 50 will have the same result as a blast with 50 intensity, given that the currently selected engine generates Active Units.*
### Blast Radius
When a Blast is generated, RTC can target multiple [Memory Domains](/rtcv/rtc/concepts-and-vocabulary#memory-domain) at once. Changing the Blast Radius affects how corruption scatters across the selected Memory Domains.
Spread: Randomly spread across the Memory Domains.
Chunk: Sent to a single zone that is randomly selected among the selected Memory Domains.
Burst: 10 Chunks of 1/10 of the total Intensity.
Even: Apply the blasts evenly spread through all selected domains.
Proportional: Apply the blasts proportionally through all selected domains based on the sizes.
Normalized: Iterate through all selected domains and apply blasts of intensity / (size of largest domain / size of current domain)
###
# Corruption Engines
*These are the various Engine Templates that you can use for corrupting games. These can be customized in the Custom Engine, in which you can load a template to work from.*
### Nightmare Engine

This engine corrupts on the raw byte level.
*Effect: It changes Bytes in Memory once.*
**Blast Type**
This parameter defines the effect applied on Byte(s)
RANDOM: Will replace the Byte(s) at the selected address with random Byte(s)
RANDOMTILT: Will replace the Byte(s) with random Byte(s) or Increments it or Decrements it.
TILT: Will Increment or Decrement random Byte(s).
### Hellgenie Engine

This engine generate Active Units, which execute on every frame. The Hellgenie Engine replicates the effect of Cheats (see Game Genie, Active Replay, GameShark) and replaces a value with a randomly selected one then applies it on every frame.
Effect: It randomly selects a value and forces a selected address to then keep that value.
**Max Infinite Units**
Infinite Units are resource expensive as they re-write memory on every frame and must be recycled. This allows you to define how many Infinite Units are allowed. New units retire old ones.
**Clear units on rewind**
When enabled, rewinding will clear all [Infinite Units](/rtcv/rtc/concepts-and-vocabulary#active-and-infinite-units) that have an infinite life time (when applicable).
### Freeze Engine

This engine generate Active Units, which execute on every frame. The Freeze Engine replicates the effect of Cheats (see Game Genis, Active Replay, GameShark) and replaces a value on every frame. The difference between this engine and the Hellgenie Engine is that this doesn't generate a value but instead keeps the value at the target address and reapplies it on every frame, therefore freezing its value in place.
*Effect: It forces Bytes at a selected address to keep their value.*
**Max Infinite Units**
Infinite Units are resource expensive as they re-write memory on every frame and must be recycled. This allows you to define how many Infinite Units are allowed. New units retire old ones.
**Clear units on rewind**
When enabled, rewinding will clear all [Infinite Units](/rtcv/rtc/concepts-and-vocabulary#active-and-infinite-units) that have an infinite life time (when applicable).
### Distortion Engine

This engine backups Bytes and restores those backups once, later in time.
*Effect: This corrupts data by restoring parts of it to a previous state.*
**Distortion Delay**
This is the amounts of steps that each corruption unit has to wait before restoring a backup.
**Resync Distortion**
This erases all current [active units](/rtcv/rtc/concepts-and-vocabulary#active-and-infinite-units) pending to be restored.
### Pipe Engine

This engine generates units that bind addresses together and can make data bleed from a Memory Domain to another. It uses Infinite Units that route memory changes on every Emulator Step or frame.
**Lock Step units**
Prevents any change to be done to the current Active Units
**Clear units on rewind**
When enabled, rewinding will clear all [Infinite Units](/rtcv/rtc/concepts-and-vocabulary#active-and-infinite-units) that have an infinite life time (when applicable).
### Vector Engine

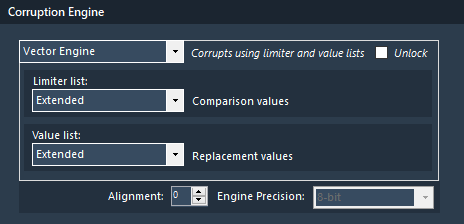
This engine corrupts using a Limiter and Value list.
*Effect: Allows for more controlled corruptions via the use of Limiter and Value lists.*
**Limiter List**
On the generation of every Unit with this engine, the value at the randomly selected address is going to be compared to a list of legal values called a Limiter List. If the value at the random address isn't legal according to the list, the Unit then will not be part of the BlastLayer.
**Value List**
After generation of the Unit with this engine, a replacement value is assigned to the legal address. This value is randomly selected from a selected Value List.
**Unlock**
Allows the Engine [Precision](#engine-precision-and-alignment) to be changed.
#### **Lists**
{% content-ref url="/pages/-M4bPkPH-oEwEo0fjLnX" %}
[Classic Vector Lists](/rtcv/rtc/classic-vector-lists)
{% endcontent-ref %}
### Cluster Engine
This engine swaps values with neighboring values.
*Effect: Swaps or rotates values around*
**Limiter List**
On the generation of every Unit with this engine, the value at the randomly selected address is going to be compared to a list of legal values called a Limiter List. If the value at the random address isn't legal according to the list, the Unit then will not be part of the BlastLayer.
**Method**
Changes how the cluster will be picked, based on the main address (can be forwards of backwards)
**Cluster Chunk Size**
Amount of units used in a cluster (total byte size = units X precision)
**Rotate Amount**
How many units of the cluster will be rotated in each execution
**Cluster Direction**
Direction in which the cluster is taken based on the first address
**Split Blast Units**
Will generate single units in the blast editor rather than one big unit for each operation
**Filter All**
Makes the filter check of each units in the cluster rather than just the base address
### Custom Engine

This engine allows you to mix and match parameters to create your own engine.
Every other engine is in fact just running templates for the Custom Engine. before RTC 5.X, each engine was really its own engine, now they're all living as templates. The parameters you input in here will reflect what you get in the [Blast Editor](/rtcv/rtc/blast-editor).
### Engine Precision and Alignment

Allows you to choose what size [BlastUnit ](/rtcv/rtc/concepts-and-vocabulary#blastunit)will be generated. 8-bit (one byte), 16-bit (2 bytes), 32-bit (4 bytes) or 64-bit (8 bytes).
The alignment settings should always be left at 0 unless corruption is done on an experimental target or file, or if the game that is being corrupted mispositions its data.
# Emulation-centric features
Some components run in the RTC process and some of them run in the Emulator process. Some features of RTC are designed to either enhance emulation experience, stability or bind corruption features to the emulator.
### Auto-KillSwitch

In order to give the user the smoothest experience, RTC will constantly monitor the state of the connected [Vanguard-Modded](/rtcv/rtc/concepts-and-vocabulary#vanguard) emulator and attempt to kill it if it falls into a non-responsive state.
*If the heartbeat between RTC and the emulator stops for a long period, the progress bar will indicate the remaining time before the KillSwitch fires automatically.*
While many emulators can have their games crash gracefully, they can sometimes freeze or enter an infinite loop if the game crash couldn't be handled properly. This can be detected and RTC will then proceed to kill and restart said emulator.
*When the Auto-KillSwitch is triggered, the user will hear a sound of broken plates, confirming that the emulator has been terminated. Said sound can be changed, replaced or muted in the Settings and tools.*
### Game Protection

The Game Protection optional feature has two benefits for the user:
* Keeps regular backups of the game's state in case of a crash
* Allows for a pseudo-rewind feature that works across all Real-Time Implementations
If the emulator crashes while Game Protection is enabled and there's at least one saved item, the game will reload the most recent state when it comes back up.
The Back/Now buttons allow for the user to browse the constantly updating list of savestates in order to rewind back, similarly to BizHawk's rewind feature but in bigger chunks of time.
*It should be worth noting that Game Protection increase the power requirements for a smooth experience. An SSD is required to prevent "hitching", although this is not always the case with every emulator/core. Mileage may vary.*
### Rewindable Domains
In BizHawk, all emulator cores come with Rewind capabilities. At the time of writing this guide, no other emulator than BizHawk supports native Rewind (among the ones modded with [Vanguard](/rtcv/rtc/concepts-and-vocabulary#vanguard)).
By default, RTC will select [Memory Domains](/rtcv/rtc/concepts-and-vocabulary#memory-domain) that are **Rewind-safe**, meaning that the data edited in these domains can be rewinded out of. Reverting back the corruption that occurs in domains that aren't rewind-safe requires the selection of "Reboot Core" in the emulation menu of BizHawk or reloading a [Glitch Harvester Savestate](/rtcv/rtc/glitch-harvester#savestate-manager) or [StashKey](/rtcv/rtc/concepts-and-vocabulary#stashkey).
It should be worth noting that RTC's Game Protection feature can act as a pseudo-rewind as it allows the user to jump back in the past using savestates. This feature should be available to any emulator with a Real-Time [vanguard implementation](/rtcv/rtc/concepts-and-vocabulary#vanguard).
# Classic Vector Lists
### **Common Floating point numbers**
*These are the lists that come with the Vector Engine by default.*
* **Extended** : -65536.00 to +65536.00 in low res, including tiny decimals
* **Extended+** : 0 to +65536 in low res, including tiny decimals
* **Extended-** : 0 to -65536 in low res, including tiny decimals
* **One**: The numbers +1.00 and -1.00
* **One-**: The number -1.00
* **One+**: The number 1.00
* **SuperExtended\_Wholes**: -65536.00 to +65536.00 in high res, integral numbers and large numbers
* **Tiny**: tiny decimals between -1.00 and +1.00
* **Two+**: The number +2.00
* **Whole**: -65536.00 to +65536.00 in low res, integral numbers
* **Whole+**: 0 to +65536.00 in low res, integral numbers
*You can add your own lists using the List Generator Tool or by downloading them with the Package Manager*
# Glitch Harvester
## Main Interface
The Glitch Harvester is one of the biggest features of RTC. It is simple to use, yet difficult to master.
*RTC extends emulator savestates into its own format, the* [*StashKey*](/rtcv/rtc/concepts-and-vocabulary#stashkey)*. This allows for corruptions to be attached onto savestates without overwriting the original data.*
Basic usage is fairly simple, you create a savestate, select the domains you would like to corrupt, chose an Intensity and click the “Corrupt" button, the emulator then corrupts the selected [memory domains](/rtcv/rtc/concepts-and-vocabulary#memory-domain) and instantly loads the savestate. (The Glitch Harvester “Corrupt” function can be bound to any key/button)
### Blast Tools
#### Corrupt button
"Corrupt" is the corruption button of the Glitch Harvester. It can corrupt, inject, replay and merge saved items. If *Stash Results* is selected in the Blast Tools options, it will create a new item in the [Stash History](/rtcv/rtc/glitch-harvester#stash-history) box.
#### Raw to Stash
This will create a item in the [Stash History](/rtcv/rtc/glitch-harvester#stash-history) box. The generated [BlastLayer ](/rtcv/rtc/concepts-and-vocabulary#blastlayer)is applied (Corruption occurs) then a new Savestate is created for this item. Active units will be stored in the attached BlastLayer, but destructive corruption (Byte changes) will be compiled in the Savestate.
#### Reroll Selected
Rerolls the corruption values of the selected item in the [Stash History](/rtcv/rtc/glitch-harvester#stash-history) or [Stockpile Manager](/rtcv/rtc/glitch-harvester#stockpile-manager). This allows to attempt to get better results from a corruption. The result will be sent in the Stash History.
#### BlastLayer ON/OFF
Attempts to uncorrupt/recorrupt the game on the fly. Results not guaranteed.
### Blast Tools options
The Corrupt, Inject and Original options will change the function of the "Corrupt" button.
**Corrupt** is the default setting. Corrupt will have its default behavior and loaded [StashKeys ](/rtcv/rtc/concepts-and-vocabulary#stashkey)will include corruption when replayed.
**Inject** will make the Corrupt button load the corruption layer from the selected item in the [Stash History](/rtcv/rtc/glitch-harvester#stash-history) or [Stockpile Manager](/rtcv/rtc/glitch-harvester#savestate-manager) into the currently selected Glitch Harvester Savestate. The same action will happen when clicking on an item in the Stash History or Stockpile Manager.
**Original** will load the selected item from the [Stash History](/rtcv/rtc/glitch-harvester#stash-history) or [Stockpile Manager](/rtcv/rtc/glitch-harvester#stockpile-manager) without the corruption layer.
### Behaviors
**Auto-Load State** makes it so a Savestate is loaded during Corruption or Replaying and item. When the *Corrupt* modifier is selected, loading an item from the Stash History or Stockpile Manager will use the embedded Savestate in the [StashKey](/rtcv/rtc/concepts-and-vocabulary#stashkey). Otherwise, it comes from the selected item in the Savestate Manager.
**Load on select** causes the [StashKey ](/rtcv/rtc/concepts-and-vocabulary#stashkey)to be loaded when an item is selected from the Stash History or Stockpile Manager. When this option is unchecked, loading a selected item requires to press the Blast/Send button.
**Stash Results** makes it so generated corruption will be added to the Stash History upon generation of a BlastLayer. If a generated BlastLayer has 0 units, the [StashKey ](/rtcv/rtc/concepts-and-vocabulary#stashkey)will not be added to the [Stash History](/rtcv/rtc/glitch-harvester#stash-history).
### Render Output
***This option is currently only available when RTC is connected to BizHawk***
This allows you quickly/automatically start audio/video rendering when corrupting using the Glitch Harvester. Rendered files will be saved in the “RENDEROUTPUT” folder which is in *RTCV/RENDEROUTPUT*
**Render type** allows you to select a file format for rendering. If you're getting an error with AVI rendering, it might mean that no codec is selected in BizHawk. In order to do so, you must start an AVI rendering from BizHawk at least once.
**Render at load** will start the render when an item from the [Stash History](/rtcv/rtc/glitch-harvester#stash-history) or [Stockpile Manager](/rtcv/rtc/glitch-harvester#stockpile-manager) is loaded.
### Savestate Manager
**Change -> SAVE/LOAD**
The change button flips the one on its right between SAVE and LOAD. This button toggling system is made this way to prevent accidental overwriting of Glitch Harvester Savestates.
**Numeric Buttons**
Numeric buttons are used to select a Glitch Harvester save-state slot.
An associated Textbox can be used for very short descriptions.
**Back and Forward**
This switches between pages of 7 Glitch Harvester Savestates.
**Load state on click**
If checked, the Glitch Harvester will load a save state upon clicking on it.
**Load/Save Savestate List**
These buttons allow you to Save and Load the filled Glitch Harvester Savestates slots to/from a file in a similar format to a Stockpile.
### Intensity
This control is linked to the [intensity ](/rtcv/rtc/general-parameters#intensity)controls in the Main Window. It multiplies the amount of generated Units on every Blast.
### Stash History
This is where new corruptions are stashed. **I**tems that appear here can be sent to a Stockpile using the "To Stockpile" button. Selecting an item in the list will replay the generated corruption.
### Stockpile Manager
This part of the Glitch Harvester is where you will perform operations on Stockpiles.
The **Load** button allows you to either load a Stockpile or load a Settings file from an *SKS* file.
Using **Save as** and **Save** buttons will generate/overwrite an *SKS* file that contains corruption data, binaries and savestates. The *SKS* file can also contains the config file from the last person who saved it. By default, the Glitch Harvester will include Game Binaries. This behavior can be changed in the Glitch Harvester settings.
**Using someone's config file**
When replaying a stockpile, corruptions can appear different if there are differences in emulator configurations. While RTC is able to detect core mismatches during loading, specific configuration differences are not.
Loading someone's config file pretty much guarantees that your Emulator is in the same state as the person who saved the Stockpile. While your controller config could be lost during the time this config is loaded, it can be reverted afterwards by selecting the **Restore Emulator config Backup** option from the Load menu.
**Import**\
This button allows you to merge stockpiles together by importing them into the one currently edited.
**Merging StashKeys together**\
By holding CTRL and clicking on multiple Stockpile items, you can load and merge items together. The resulting item will be added to the Stash History.
Merging items together requires them to be for the same console and same game. The Savestate that is used in the merged result is from the first item that got selected.
## Stockpile Player
This is a minimalist version of the Glitch Harvester's [Stockpile Manager](/rtcv/rtc/glitch-harvester#stockpile-manager). It allows you to load [Stockpiles](/rtcv/rtc/concepts-and-vocabulary#stockpile) and replay corruptions.
The Previous and Next buttons are for jumping from a corruption to another. They do the same thing as clicking on the corruptions directly.
The Red refresh button replays the current corruption.
BlastLayer Button: Toggles ON/OFF the BlastLayer of the last executed StashKey, essentially attempting to uncorrupt/recorrupt in real-time.
If the button in the Note column has a ⚠ Symbol, it means that a note is attached to the corruption. Click on it to open the note.
Various options from RTC's [Engine Config](/rtcv/rtc/corruption-engines) menu are present in a contextual menu if you right-click on corruptions.
# Blast Editor
## **Note: This part of the guide is somewhat out of date (written for the 3.2X branch). Most topics still apply.**
The Blast Editor is a tool for manipulating a StashKey in the Glitch Harvester. This allows the user to edit, add, or remove effects from the BlastLayer.

### Index
* [**Index**](/rtcv/rtc/blast-editor#index)
* [**Purpose**](/rtcv/rtc/blast-editor#purpose)
* [Sanitize](/rtcv/rtc/blast-editor#Sanitize)
* [Method](/rtcv/rtc/blast-editor#method)
* [Editing](/rtcv/rtc/blast-editor#editing)
* [**Functions**](/rtcv/rtc/blast-editor#functions)
* [BlastLayer Info](/rtcv/rtc/blast-editor#blastlayer-info)
* [Shift Selected Rows](/rtcv/rtc/blast-editor#shift-selected-rows)
* [Disabling](/rtcv/rtc/blast-editor#disabling-functions)
* [Searching](/rtcv/rtc/blast-editor#searching)
* [Load](/rtcv/rtc/blast-editor#load)
* [Apply Corruption](/rtcv/rtc/blast-editor#apply-corruption)
* [Send to Stash](/rtcv/rtc/blast-editor#send-to-stash)
* [**Unit**](/rtcv/rtc/blast-editor#category)
* [Lock](/rtcv/rtc/blast-editor#lock)
* [Selection](/rtcv/rtc/blast-editor#selection)
* [Precision](/rtcv/rtc/blast-editor#precision)
* [BlastUnit Type](/rtcv/rtc/blast-editor#blastunit-type)
* [Source Domain](/rtcv/rtc/blast-editor#source-domain)
* [Source Address](/rtcv/rtc/blast-editor#source-address---hex)
* [Parameter Domain](/rtcv/rtc/blast-editor#parameter-domain---hex)
* [Parameter Value](/rtcv/rtc/blast-editor#parameter-value---hex)
* [Notes](/rtcv/rtc/blast-editor#notes)
## Purpose
The purpose of the Blast Editor is to provide the user with the ability to edit the corruptions they create. At a lower level, users may sanitize their corruptions to remove unnecessary memory writes. Experienced users may utilize their knowledge of memory to inject specific BlastUnits to obtain their ideal corruption.
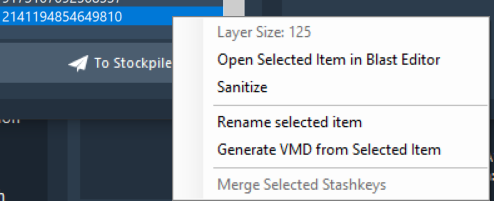
#### Sanitize
Sanitizing corruptions is an important habit that should be regularly practiced. Not only will it remove unnecessary graphical glitches, deafening audio, and clown vomit, but also it will improve the overall stability of the game. It's no fun if you have a great corruption that can only be played for half a second before the game crashes!
#### Method
The BlastLayer size can vary from just a few Units to several thousand depending on the intensity of the corruption.

With a small number of units, the user may individually disable unnecessary memory writes by unchecking them.
With larger BlastLayer sizes, unchecking individual Units will take too long. Instead, use the Randomly Disable 50% button to disable half of the BlastLayer. Repeatedly disable 50% and remove half as long as the corruption persists after loading.
Use this method:
\[Random Disable 50%] then \[Load + Corrupt].\
Is the corruption (effect) still present?\
If Yes -> \[Remove Disabled]\
If No -> \[Invert Disabled] then \[Remove Disabled]
**Video example**
{% embed url="" %}
#### Editing
After a corruption has been reduced to a few Units, their settings can be changed on the fly through the Blast Editor. Changing options such as the BlastUnit Mode (SET, ADD, SUBTRACT, ETC.), tilting the Source Address, and changing Parameter Values can result in different variations on the corruption. To change a value, double-click on it to change the value and reload the corruption to see the new effect.
## Functions

#### BlastLayer Info
The BlastLayer Info provides details about the currently loaded BlastLayer. The size of the BlastLayer (total Units) is displayed here.
#### Shift Selected Rows
The Shift Selected Rows menu adjusts the selected option (Source Address, Parameter Domain, Parameter Value) through the drop down menu. The value will be decremented/incremented by the supplied step size.
#### Disabling
**Randomly Disable 50%**
Disables 50% of the BlastLayer. Typically used for sanitizing large BlastLayers.
**Invert Disabled**
Turns all selected Units off and all unselected Units on.
**Disable Everything**
Disable all Units.
**Enable Everything**
Enable all Units.
**Remove Selected Rows**
Deletes the highlighted Units.
#### Searching

The Search For Row button opens a pop-up box where the user may search for a Source Address, Parameter Value, Source Address Domain, Parameter Domain, Blast Unit Type, or Blast Unit Mode. The located value will be highlighted and all other Units will be deselected.
#### Load
The Load + Corrupt button runs the emulation with enabled Units applied.
#### Apply Corruption
The Apply Corruption button will inject the currently running emulation with the enabled Units in real time.
#### Send to Stash
The Send to Stash button sends the Units in their current state to the stash as a save state with a BlastLayer applied to it. Unselected Units will remain disabled, but they will not be removed.
## Unit

A Unit contains several bits of information. These are the functions and descriptions of a Unit's column parameters within the Blast Editor from left to right.
#### Lock
Locking a Unit will prevent its parameters from being modified by any automatic system such as "Randomly disable 50%" or "Reroll."
#### Selection
The check mark sets the Unit's enabled/disabled state. This will determine whether the Unit is loaded/applied to the emulation.
#### Precision
Precision sets whether the BlastUnit is of type 8-bit, 16-bit, or 32-bit precision.
#### BlastUnit Type
The type description for the BlastUnit. Options include BlastByte, BlastCheat, and BlastPipe.
#### BlastUnit Mode
The mode that the BlastUnit is set in. Options include SET, ADD, SUBTRACT, RANDOM, RANDOM\_RANGE, SHIFT\_LEFT, SHIFT\_RIGHT, REPLACE\_X\_WITH\_Y, and a number of bitwise operations. Typically the type is manipulated by the selected corruption engine.
#### Source Domain
The location that the Unit is corrupting in memory. Types are included but not limited to, ROM, OAM, RAM, etc.
#### Source Address
The address within the specified source domain that the corruption is applied at.
#### Parameter Domain
If the BlastUnit Type/BlastUnit Mode requires another memory location, the memory address for this parameter will be supplied in the parameter domain.
#### Parameter Value
The parameter used for the corruption generation. Depending on the corruption type, this value will mean different things. For example, in a SET BlastUnit Mode the parameter value will overwrite the value at the supplied source address.
#### Notes
Allows the user to enter notes about a specific Unit.
Write up by TechSupportSparky 
# Blast Generator
The Blast Generator is a tool which acts similar to classic style ROM corruptors. You can use the Blast Generator to create blastunits.

#### Domain
Domain targeted by the line of action
#### Precision
Word size on which generated BlastUnits will operate
#### Type
Type of operation that will be appended to the units
#### Mode
The mode for generation
#### Interval
How many addresses to skip in between generated blastunits.
#### Start Address
The address to start corruption generation at
#### End Address
The address to end corruption generation at.
#### Param1
A parameter for the corruption generation. See below for details on how it's used.
#### Param2
A parameter for the corruption generation. See below for details on how it's used.
Endianess is always handled as little endian, or right -> left. This is completely agnostic of core endianess
That means that:
10 on 16-bit precision will be treated as 00 10
1000 on 16-bit precision will be treated as 10 00
Ranges are exclusive, meaning that the last address is excluded from the range.
This means that:
Start Address of 10, End address of 16, step size of 1 would generate blasts for addresses 10,11,12,13,14,15
#### Lifetime
For how many frames will the BlastUnit execute
#### Execute Frame
At which frame will the BlastUnit start executing
#### Seed
The seed will ensure that the generator gives consistent random results if reproduced later.
## Type : Value
### Modes
#### SET
Sets an address to a specific value.
Param1: The value to set to\
Param2: Unused
#### ADD
Adds a value to the value at the address selected.
Param1: The value to add\
Param2: Unused
#### SUBTRACT
Subtracts a value from the value at the address selected.
Param1: The value to subtract\
Param2: Unused
#### RANDOM
Sets the value at the address to a random value.
Param1: Unused\
Param2: Unused
#### RANDOM\_RANGE
Sets the value at the address to a random value within the range provided.
Param1: The lowest possible value\
Param2: The maximum possible value
#### SHIFT\_LEFT
Copies a value from the selected address a set number of bytes to the right
Param1: How many bytes over you want to shift\
Param2: Unused
#### SHIFT\_RIGHT
Copies a value from the selected address a set number of bytes to the right
Param1: How many bytes over you want to shift\
Param2: Unused
#### REPLACE\_X\_WITH\_Y
Replaces a value with another if the value matches the parameter.
Param1: The value to search for\
Param2: The value to replace with.
#### BITWISE\_AND
Performs a Bitwise AND on the value and a parameter
Param1: The value to perform the bitwise operation with.\
Param2: Unused
#### BITWISE\_OR
Performs a Bitwise OR on the value and a parameter
Param1: The value to perform the bitwise operation with.\
Param2: Unused
#### BITWISE\_XOR
Performs a Bitwise XOR on the value and a parameter
Param1: The value to perform the bitwise operation with.\
Param2: Unused
#### BITWISE\_COMPLEMENT
Performs a Bitwise complement on the value and a parameter
Param1: The value to perform the bitwise operation with.\
Param2: Unused
#### BITWISE\_SHIFT\_LEFT
Performs a Bitwise Left Shift on the value
Param1: How far to shift left\
Param2: Unused
#### BITWISE\_SHIFT\_RIGHT
Performs a Bitwise Right Shift on the value
Param1: How far to shift right\
Param2: Unused
#### BITWISE\_ROTATE\_LEFT
Performs a Bitwise Left Rotation (cyclical shift) on the value
Param1: How far to rotate left\
Param2: Unused
#### BITWISE\_ROTATE\_RIGHT
Performs a Bitwise Right Rotation (cyclical shift) on the value
Param1: How far to rotate left\
Param2: Unused
*Additional details on Bitwise Operations can be found here:*\
[*https://en.wikipedia.org/wiki/Bitwise\_operation*](https://legacy.gitbook.com/book/x8bitrain/corrupt-wiki/edit#)
## Type : Store
### Modes
#### CHAINED
Generates units that act as pipes
Param1: Unused\
Param2: Unused
#### SOURCE\_SET
Sets the source address as something set with the destination address being the stepped address
Param1: Address to set the source to\
Param2: Unused
#### SOURCE\_RANDOM
Sets the source address as something random with the destination address being the stepped address
Param1: Unused\
Param2: Unused
#### DEST\_RANDOM
Sets the source address as the stepped address with the destination being something random
Param1: Unused\
Param2: Unused
#### FREEZE
Freezes a value at the stepped address to its current value.
Param1: Unused\
Param2: Unused
# Virtual Memory Domains
## What do VMDs look like?
[Virtual Memory Domains](/rtcv/rtc/concepts-and-vocabulary#virtual-memory-domain), also called VMDs, are virtual representations of areas from one or multiple real Memory Domains. The VMD Generator uses address instructions to make VMD Prototypes which can be used to generate/regenerate VMDs. These prototypes are very lightweight, save/load from a file and can also be created from a Corruption in the Glitch Harvester.
## VMD Pool
The Virtual Memory Domain Pool is your main interaction window for loading and working with already loaded VMDs.
**Load VMD From File**
Allows you to load VMDs that were previously saved to a file.
**Save Selected VMD to File**
Allows you to save a generated VMD to a file which can be loaded later.
**Rename Selected VMD**
Allows you to rename a VMD.
**Unload Selected VMD**
Unloads the selected VMD from the RTC so it no longer appears in the Domain list and the VMD Pool.
**VMD Size**
Displays the size of the currently selected VMD in bytes.
**Real Domain**
Displays the memory domain that the VMD is built to target.
## VMD Generator
An in-depth [VMD Generator Guide](/rtcv/rtc/vmd-generator-advanced) is also available
**Load Domains**
Loads the Memory Domains of the currently active emulation core into the VMD Generator.
**Memory Domain**
This Selector Box allows you to chose a target Domain.
**Domain Size**
The size of the selected Memory Domain in bytes
**Word Size**
The size of a [word](https://en.wikipedia.org/wiki/Word_\(computer_architecture\)) for the currently selected memory domain
**Endian Type**
The [endian type](https://en.wikipedia.org/wiki/Endianness) for the currently selected memory domain
**Set pointer every X addresses**
Generates a VMD pointer every X addresses of the range input into the generator.
**VMD Name**
The name of the VMD being generated.
**Generate VMD**
Generates the VMD.
**Remove/Add Addresses**
The addresses that will be used in generation of your VMD. This box can take input in various forms. A single line is treated as a single command. You can use multiple commands in generation of the same VMD.
You are able to:
* Add an address range
* Example: 50-100
* Add a single address
* Example: 55
* Remove an address range
* Example: -60-110
* Remove a single address
* Example: -66
If the user doesn't add a value or range, the default range will be the entire selected memory domain. You are able to remove a value from this default range using one of the various remove methods. For example, if you only input "-55" into the box, you'd get a VMD which has every address in the real memory domain excluding -55.
**Additional notes:**
* By default, all addresses are treated as decimal
* If you add "0x" before an address, it will be treated as hexadecimal rather than decimal.
* Single added addresses will bypass the removal range.
* Single added addresses aren't affected by the pointer spacer parameter.
* Ranges are exclusive, which means that the last address will be excluded from the range.
# VMD Generator (Advanced)
by Moogie
### VMD Generator Interface
**This intermediate guide will assume some working knowledge of the Real-Time Corruptor, as well as a basic understanding of Hex notation (0x).**
*Alternatively, if you don't feel confident enough with the full VMD Generator interface, a simpler interface named "Simple VMD Generatior" is also available for experimenting. Keep in mind that it does not have all of the functions from the regular VMD Generator.*
*The examples shown below use BizHawk as an example Emulator but can be applicable to any program that implements Vanguard*
### What are VMDs?
**VMD** stands for "Virtual Memory Domain." It is a user-defined area of memory in which you can force RTC to limit its activities. VMDs take corrupting to the next level, allowing you to hone-in on known memory locations, such as where the game’s graphics are kept, or where a character’s stats are listed, and forces all blasts to target that specific area for consistent results.
RTC comes with a pre-defined set of these called simply Domains. That’s this stuff:
Every system supported by Bizhawk will have its own custom list, so you won’t always see the same names here. CHR and CHR VROM, for example, are specific to the NES system. You won’t find them working on a Playstation game.
One thing you will find on every system, however, is that one at the bottom: the **System Bus**.
### Understanding Domains
It’s important to have at least a general idea of what this is, because it will help you understand how everything else fits together.
When you load a game to corrupt, Bizhawk emulates the entire system it runs on, whether it be a SNES or a Playstation or an N64. That means it creates a virtual representation of the system’s memory spaces and everything they contain. We call these "busses." A system can have multiple busses if multiple pieces of its hardware have their own memory spaces. On the NES, for example, the System Bus is the CPU RAM, but you also have an entirely different bus which is the PPU RAM. Even game cartridges can have their own RAM space.
Although they interact with each other, it’s important to keep in mind that an address located at x100 on the System Bus, and that same address on the PPU Bus, are two entirely different addresses, like writing on the first line of two separate pieces of paper.
Let me show you some examples. The NES System Bus (i.e. the CPU RAM) is a grand total of FFFF (65535) bytes.
The Domain labelled **RAM** is located at the top from x0000 to x07FF, and is mirrored three times: at x0800, x1000, and x1800.
Cartridge ROM and RAM data, such as **PRG ROM**, are loaded into the x4020-xFFFF area.
**WRAM** is located at x6000-x7FFF.
← Visually, that would make the System Bus look something like this.
So when you select a Domain to corrupt in RTC, what you’re actually doing is selecting the specific areas of memory in which bytes are corrupted.
With just the WRAM Domain selected, for example, all of your blasts are going to occur in the x6000-x7FFF range. It won’t touch anywhere else.
If you’ve understood this concept, you’re now ready to learn how to make and use your very own VMDs.
### Creating a VMD
You do this from the main RTC window. In "Advanced Memory Tools," select “VMD Generator.”
Now click "Load Domains" and the current system’s memory busses will be loaded in.
You’ll notice that RAM is the first in the list. This is no coincidence; remember I showed you how it appears at the very top of the System Bus memory space?
See the "Domain summary" below that? It tells you the size of the RAM Domain, x800 bytes, or as previously shown, x0000 to x07FF.
Word size and Endian type aren’t important for this guide, so let’s skip those for now.
Let’s also skip over "Set pointer" and “Add X bytes of padding” until later. For now, let’s just do something really simple: Adding addresses that will act as your memory space filter.
In the "Remove/Add addresses" box, you can list either single addresses (one per line) or ranges of addresses to specify which areas of the currently selected Domain you wish to edit.
One thing may be confusing at first, but it’s **SUPER** important to understand this: Remember when I said the same address on two different busses is like writing on two different pieces of paper? The same concept also applies to individual Domains. Using this tool, you can think of all these domains as having their own separate pieces of paper. So if you were to add the address xFF in this example, you’d be telling RTC to including address xFF of the RAM domain **ONLY**.
What if you put that same address, xFF, and had WRAM selected instead? Which address on the System Bus do you think you’d be telling RTC to use?
It wouldn’t be x00FF. It would be *x60FF*. Because remember, the WRAM domain begins at x6000 on the System Bus.
You might think this isn’t important to know, but if you’re using VMDs, then you’re probably also following some sort of RAM Map or specific offsets you’ve found online via Googling. And if they’re giving you addresses specific to a particular Domain such as WRAM, then that’s fine. That’s easy. Just plonk the address in, and you’re good to go.
**BUT!** Sometimes those addresses they’re telling you are specifying from the System Bus as a whole, not just an individual Domain therein. So when they tell you "Offset x6F20 is the character’s move speed," it’s up to you to figure out how to handle that information, because you can’t just put x6F20 in with the WRAM Domain selected. It won’t work!
Sure, that address falls within the range that WRAM sits on the System Bus (x6000-x7FFF). But remember, like all Domains, WRAM *has its own memory space*-- its own piece of paper. It’s not big enough to have an address x6F20 of its own, because it’s only x2000 bytes in size!
So how do you handle that? There’s two ways:
1. From the Domains dropdown menu, select **System Bus** and input the address: **x6F20**. That’s the easiest way.
2. However, you could also select **WRAM** as the Domain, and do a bit of maths to figure out what x6F20 minus x6000 is. The answer is **xF20**, so you’d put that in.
That’s all well and good, but really, what VMDs are best for are *ranges* of addresses, not just single addresses themselves. If you just wanted single addresses you can do that easily enough in the Blast Editor. So let’s find out how to create a VMD that acts, for all intents and purposes, exactly like a Domain, with one important advantage: the ability to target *exactly* the areas you wish to affect.
### Specifying Ranges
I’ve selected System Bus and given the Generator two ranges. These ranges span different Domains on the bus. The first is within PRG ROM, and the other is in OAM.
(Important note: ranges **exclude** the final byte, so in this example I’m actually specifying xA950-xAA3F and xF510-xF73F. You must always account for that!)
When you input a name and click "Generate VMD," it appears both in the list of selectable Domains (prefixed with \[V] to denote a custom Domain) and in the VMD Pool menu like so:
Now I can select my custom Domain and use it to blast just those areas of memory which I specified in the list. You can see the results of these blasts in the Blast Editor window. (The Blast Editor is accessed via the Glitch Harvester screen, by right-clicking the BlastLayer in the stash history or stockpile lists and selecting it from the context menu).

But, hang on. Does something about the numbers in the "Source address" column seem wrong to you? I specified a range starting from xA950, so why is it blasting addresses of x27B and x2BA?
It’s because our VMD is behaving just like any other Domain. Offset x0 of our VMD corresponds to xA950 in reality, so when it says "Source address: 2" it really means xF698.
There’s a handy way to make this simpler for ourselves. From the Tools menu in this window, select "Rasterize VMDs."
See? That’s better. "Source Domain" has been rasterized to the System Bus, and the addresses are exactly what I had specified. This is just a visual thing, it doesn’t change what’s happening.
### Saving Your VMD
Now that you’ve created a VMD, don’t forget to save it! Any unsaved VMDs will be lost once you end the session. VMDs save as XML files, which can be shared with other people.
### Advanced Filtering
You’ve basically learned all there is to creating and using VMDs, but I just want to quickly show you how you can be even more selective with your ranges.
Let’s say you have a range and the data therein follows a strict pattern. Maybe it’s a list with a fixed-length header and then one byte specifying the value.
In this example, the header is 12 00, and then we have the value, starting with 01 and incrementing. Maybe this is an organised list of NPCs and instead of their usual order, you want to shuffle them around, so that instead of loading up NPC 01 the game instead loads up NPC 09.
You’d do this with a VMD, but there’s a problem in that blasting this range of data is going to inevitably corrupt those headers. You *only* want to change the values, not the headers. So how do we do this?
Again, there are two ways. One of those ways will be much more suitable for this specific example, but depending on context, they are both very useful methods, so use whichever one makes your job easier.
**Method 1: Set Pointers.** In the VMD Generation menu, tick the "Set pointer every X addresses" box. What a pointer does, essentially, is filter to these addresses (on a value of 2):
So when you blast, address x0 is really x1, and address x1 is really x3, and address xC is really x17.
On a value of 3, it would filter to these addresses instead:
So when you blast, address 0x is really x2, and address x1 is really x5, and address xC is really x23.
In this example, that’s exactly what we want: all the value bytes, none of the header bytes.
**Method 2: Exclude specific addresses or ranges.** When generating your VMD, you could instead construct your list like this:
Remember the note about ranges excluding the final byte? So here, what I’m telling it is:
-Add all the bytes from the range x0-x2F, but then...
-Exclude the bytes x0, x1, x3, x4, x6, x7, x9, xA, etc.
In this example, I’ve specified them as small two-byte ranges, but if you really wanted to you could exclude them individually instead. Sometimes you might need to do it that way. Click the blue "?" icon for some more in-depth instructions about this.
# Cluster Engine (Advanced)
Guide for RTC's Cluster Engine
The Cluster Engine is an integrated corruption engine written by NullShock78. It is based on the List filtering principle from the Vector Engine but works very differently.
This guide is written in Google Docs. You can access the[ document directly here](https://docs.google.com/spreadsheets/d/1u6WiVTRJfO4Z4jlRby9hzDoM6rLpavA_k_BWYrj_jXg/edit?usp=sharing)
{% embed url="" %}
Embedded Google Document
{% endembed %}
[Backup Link for the Google Document](https://docs.google.com/spreadsheets/d/1ENLRdcPzweTsJ9v6kPBvSKoi_uwNVCbKzvDo5zqd6y4/edit?usp=sharing)
# Hotkeys
There are a variety of hotkeys that you can bind to either your keyboard or controller buttons in RTC. These are configurable in the Settings -> Hotkey Config.
If your controller isn't automatically detected, you can refresh controllers in the General section.
## Hotkey Config interface

**Manual Blast**
Does a normal Blast that doesn't get sent to the Glitch Harvester
**Auto-Corrupt**
Toggles ON/OFF on the Auto-Corrupt feature.
**Error Delay--**
Decreases the currently set Error Delay by 1
**Error Delay++**
Increases the currently set Error Delay by 1
**Intensity--**
Decreases the currently set Intensity by 1
**Intensity++**
Increases the currently set Intensity by 1
**Induce KS Crash**
Kills the KillSwitch heartbeat, causing (if enabled) RTC to detect a crash.
**BlastLayer Toggle**
Toggles ON/OFF the BlastLayer of the last executed StashKey
**BlastLayer Re-Blast**
Re-executes BlastLayer of the last executed StashKey.
**Game Protect Back**
Triggers the Back button on Game Protection (If available)
**Game Protect Now**
Triggers the Now button on Game Protection (If available)
**Load and Corrupt**
Loads the selected GH SaveState, creates a StashKey in the Stash History and then runs it.
**Just Corrupt**
Creates a StashKey in the Stash History and then runs it without loading a save.
**Reroll**
Triggers the Glitch Harvester's Reroll Selected button
**Load**
Loads the currently selected Glitch Harvester Savestate Box.
**Save**
Saves the game state in the currently Glitch Harvester Savestate Box.
**Stash->Stockpile**
Sends the currently selected item in the Stash History and sends it to the Stockpile.
**Blast+RawStash**
Does a Manual Blast to the game then creates a Raw Stashkey in the Stash History.
**Send Raw to Stash**
Creates a Raw StashKey in the StashHistory
# Tips, tricks and quirks
* [**Index**](/rtcv/rtc/tips)
* [**Tips**](/rtcv/rtc/tips#tips)
* [**Not all memory domains can be rewinded**](/rtcv/rtc/tips#not-all-memory-domains-can-be-rewinded)
* [**Time travel to an alternate universe**](/rtcv/rtc/tips#time-travel-to-a-parallel-universe)
* [**Playing with the settings**](/rtcv/rtc/tips#playing-with-the-settings)
* [**Control your game from any window**](/rtcv/rtc/tips#control-your-game-from-any-window)
* [**Tricks**](/rtcv/rtc/tips#tricks)
* [**Rerolling**](/rtcv/rtc/tips#rerolling)
* [**Sanitizing and merging**](/rtcv/rtc/tips#sanitizing-and-merging)
* [**Working off existing knowledge**](/rtcv/rtc/tips#working-off-existing-knowledge)
* [**Quirks**](/rtcv/rtc/tips#quirks)
* [**N64 is running slow**](/rtcv/rtc/tips#n64-is-running-slow)
* [**N64 can be quirky and unstable**](/rtcv/rtc/tips#n64-can-be-quirky-and-unstable)
* [**Game Capture Software doesn't work properly with my RTC**](/rtcv/rtc/tips#game-capture-software-doesnt-work-properly-with-my-rtc)
* [**Game running slow on some engines**](/rtcv/rtc/tips#game-running-slow-on-some-engines)
## Tips
### Not all memory domains can be rewinded
The default selected memory domains in RTC are supposed to be rewindable. If you select all or add more, you might end up in situations where rewind cannot erase corruption. Game Protection in Detached mode can allow for a more compatible but chunkier rewind.
### Time travel to an alternate universe
When you rewind using bizhawk, corruption also get rewinded. After you've let go of the rewind button, different corruption will be applied if Auto-Corrupt is enabled. For example, if the music dies, you can quickly rewind before it died and it should stay alive in this parallel universe.
### Playing with the settings
All the games corrupt differently. Some games may give better results with certain engines or settings.
N64 works best with Vector engine but if you are able to target specific zones using VMDs, you can get excellent corruptions with the nightmare engine.
The external ROM plugins are additional options that can allow you to get crazy results.
### Control your game from any window
Annoyed that you have to constantly click back and forth between the RTC window and the Bizhawk window in detached mode? Toggle "Accept Background Input" (Config > Customize)
## Tricks
### Rerolling
If you think you've got a masterpiece in your stockpile, try rerolling it a few times. Maybe you'll end up with something better or even completely different. Rerolling reuses the same target addresses but generates new corruption for it. You might find a case where different values in the same addresses allow you to get cooler stuff
### Sanitizing and merging
Most of the times, corruptions tend to corrupt a lot of useless addresses which can result in game crashing. Sanitizing corruptions using the Blast Editor can allow you to reduce a corruption to its minimal state. Sometimes, an interesting effect is caused by a single corruption unit. When corruptions are sanitized, they are more stable and therefore can be merged more easily. Using this method, you can craft custom corruptions with very specific effects.
### Working off existing knowledge
Some games are very well documented online. You can find documentations on ROM layouts and exploit this knowledge in order to generate VMDs and target specific areas of a ROM. The same can apply for other memory domains, if such documentation exists.
## Quirks
### N64 is running slow
By default, BizHawk doesn't enable rewind on large systems like N64 but RTC does. You can disable Large Savestates in the Rewind options.
Large Savestates require a powerful cpu and an SSD to run well. If you don't then you may very well need to disable Large Savestates for rewind.
### N64 can be quirky and unstable
When corrupting N64 games, if you're using autocorrupt or manual blast and rewind or if you "send raw to stash" and try playing back the stashed corruption, you may find that Bizhawk crashes This is a result of how the emulator works. You can prevent these crashes by changing the N64 CPU mode to "Pure Interpreter" but do note, you'll experience more crashes overall and it uses significantly more CPU.
Sometimes Bizhawk will just break and throw an error about the core accepting the rom but throwing an exception. This isn't an RTC bug, it's a Bizhawk bug. Just restart BizHawk and you should be fine.
### Game Capture Software doesn't work properly with my RTC
Having trouble capturing Bizhawk with OBS or XSplit? Try changing the display option from OpenGL to Direct3D, or vice-versa (Config > Display > Display Method).
### Game running slow on some engines
Game running slow after using the Pipe, Freeze, or Hellgenie engines? Try turning down the intensity. These engines are significantly more CPU intensive than other engines.
# More RTC Guides
# RTCV Dev Startup Guide
This guide covers the standard setup for RTCV Development and the basic things the know for navigating this program. This guide will recommend tools such as Visual Studio and Github Desktop but if you are familiar with alternatives, feel free to use them. Just keep in mind that you could encounter issues that we haven't.
Here's the programs that we will use:
* Microsoft Visual Studio 2022 (Community Edition)
* Github Desktop
## Visual Studio installation
If you haven't installed Visual Studio yet, you can grab the community edition from free on microsoft's visualstudio.com website. The 2022 version is the once we currently work with, but 2019 will most likely work too. VS Code is also an alternative if you're into that.
For the Visual Studio installation, you will need the ".NET desktop environment" in the Installer components. I usually also throw in "ASP.NET" and "Universal Windows Platform" with it but that's not required for RTCV development.

## Getting the source code
This part of the guide will use Github Desktop as the git client. If you've never played with git before (or if you're tired of complicated git interfaces), you will want to give Github Desktop a try.
You will now need to clone the following repositories for a base development platform:
RTCV :
Bizhawk50X-Vanguard:
***"Where do i put those repositories?"***
So, you could technically put these anywhere you want. Visual Studio likes to create repositories in C:\Users\\\[username]\sources. Some people like to have project folders a the roof of their C drive.
I personally prefer creating a PROJECTS folder in my documents and put all the repositories in there. What's important is that whenever you clone a repository for use with RTCV, you have to keep them side by side. For example, the RTCV folder and the Bizhawk50X-Vanguard folder would have to sit in the same folder. If you were to add plugins, they would also have to sit in that same folder level.
Using the Clone repository function, get those two folders side by side in the project folder.

Then, go back to the RTCV repo in GitHub Desktop and switch to the branch 52X ~~51X~~ ~~506v2~~. This is the current branch we use for the final 5.2.x dev.
Usually, the main branch for emulators and plugins will be master, with ocasionally the "Vanguard" branch in certain emulators. This guide will not cover the setup for any other emulator than Bizhawk50X. This version of Bizhawk is currently our modded emulator of choice for testing plugins and new features. The reason being that it is in a detached repository that is not tailored to any external development (such as most of our emulator forks).
## Preparing the MegaSolution
RTCV is designed to be modular and expanded via many things such as lists, plugins and custom layouts. The program, in its entirety is so massive that any new feature that isn't deemed "essential" to the base user has to be isolated in a plugin to prevent the program from over-inflating.
During general QA testing of the application, it is recommended to load as many Plugins as possible in order to trap various edge cases related to plugin interaction. This however is very expansive in terms of cpu and memory usage and can't be recommended for casual development.
*SLN file: ..\Bizhawk50X-Vanguard\Real-Time Corruptor\BizHawk\_RTC\RTCV\_MegaSolution.sln*
The MegaSolution will most likely not fully load when you open it. Not just because of the amount of plugins and projects that your Visual Studio is not going to be able to load, but due to the nuget packages having to be refreshed.

Once you're done setting all of this, you can delete the links to the missing projects if you want to get rid of errors on startup (Not now, do it once it all works). Everything that isn't included in RTCV and Bizhawk50X is non-essential.

It seems like in Visual Studio 2022, the MegaSolution can sometimes fail to refresh the nuget packages correctly, we'll have to fix that if you have the error shown above.
Open the Package Manager Console with Tools -> Nuget Package Manager -> Open Package Manager Console

*In the console, type the following command: Update-Package -reinstall*
This will force-reinstall all nuget packages from their original repos. This can take a few minutes. Once this is all done, the console will go back to PM>
Try building the solution like that

The first time it compiles, it might take some time and even throw errors. The compilation progress bar looks like this:

If it fails, do not do a Rebuild. Keep going for Build solution again and see if it succeeds.

If after a few builds it still doesn't fully compile, check the Error List and Output tabs to get a clue of what's going on. Probably a nuget package not working or something. These are a mess sometimes.
## Preparing for a dual process Debug
In the Solution Explorer (usually on the right), right click on the top icon of the solution tree (usually the purple one) and go in the properties of the solution.
Here, you will want to switch your startup project to Multiple startup projects.
*Find Bizhawk.Client.EmuHawk and set it to Star*t
*Find StandaloneRTC and set it to Start*
Press OK to save and click the Start icon to boot RTCV in debug mode

You should now have RTCV and Bizhawk starting up and connecting to eachother.
## Particularities of Debug mode
Running any program in Debug mode inherently makes it slower. This is because everything is unoptimized in order for the debugger to break and give correct debug information to the developer. The RTCV interface is a bit slower but the first thing you'll notice is that emulation is also much slower in debug mode. I have found the QuickNes is works fairly well in debug mode so if you're just testing RTCV stuff and need performance, keep it to Nes emulation.
By default, the Auto-Killswitch will not fire in Debug mode if a debugger is attached. If you need to test a situation where the Killswitch might trigger, either run without the debugger attached or hook to StandaloneRTC after the emulator crash/restart (or just replace Debugger.IsAttached with true in the Killswitch module).
In any case, it should be worth also mentioning that if your emulator crashes and gets restarted with the Killswitch, Visual Studio will not reattach to it automatically. You will need to go to the menu Debug -> Attach to process... in order to reattach to the emulator.
Also keep in mind that non-managed emulators (c++ based ones) are much harder to debug than BizHawk, it being mostly developed in C#.
## Navigating NetCore Routing
This could be a topic on its own but if you're debugging RTCV, you need to understand about how data and function calls is running between processes. Our communication method is an UDP+TCP RPC system we call NetCore2 which allows synchronous and asynchronous calls between processes.
This means that a sync call between the process will lock the caller's thread automatically until the message returns. This could be dangerous process as it would could be a cause for deadlocks if the RPC ran on the main thread, but in the case of NetCore2, it is not. Both processes run NetCore on a separate thread and it is possible to invoke the Form thread in a way that does not deadlock the system even with two sync calls fired both ways at the same time.
Take the following call for example:
```
LocalNetCoreRouter.QueryRoute(NetCore.Endpoints.CorruptCore, NetCore.Commands.Remote.SaveState, sk);
```
This call is a Query, meaning that it is automatically Synced (although the function does support it not being synced but the return value will need to be caught some other way.
The first parameter \[NetCore.Endpoints.CorruptCore] of the QueryRoute or Route function contains a string-enum that specifies which endpoint is expected to receive the call.
Every endpoint except for Vanguard will be routed within the StandaloneRTC process, Vanguard will be routed to the Emulator process and will fallback to CorruptCore within the Emu process if Vanguard didn't have a definition for the command.
\[RTCV.NetCore.Commands.Remote.SetApplyCorruptBL] is a string-enum that specifies which command is being sent. Each endpoint the registers to the local router is expected to handle those commands or reject/ignore them. Check out the Connector source files for more info on that.
"sk" is the object payload send through the call router. It can be anything, but must be serializable if it goes through processes. in this case, sk is a StashKey object, which represents a complete corruption item (metadata, savestate id and blastlayer).
***"How do I follow a NetCore call through the program while debugging?"***

First of all, you don't want to go step-by-step through NetCore. This is wayyy too many abstraction layers to go through. Instead, you'll want to find the destination using the string-enum. Right-click on the command and do "Find all references".

Chances are that you'll only find a few hits, somewhere in the solution. The one you want is the one that ends in a big switch statement. You can expect your call to land at that point. Put a new break point in the switch case and let the program run. It will break at the other end.

Now that you're on the other side, you can follow the code whether it's in the Emulator process or in the RTCV Process. Keep in mind that if you're hooked to another emulator that is not running in debug mode, your breakpoint will not fire. Also if you are debugging with another emulator in a separate solution, you need to have the RTCV projects in that other solution otherwise it will also not trigger the breakpoints.
## Inter-process Variable Synchronization
RTCV is designed from the ground up to be running in an unstable environment in which the Emulator process is literally expected to crash.
**Emulators crashing due to corruption is inevitable**
RTCV stores its mutating variables in a system called UniSpec. This is a system inside NetCore that functions as a replicating dictionary of variables. Each one or multiple variables are modified within an RTCV Spec, the changes are pushed to both processes through a Partial Spec update. This keeps those critical variables synced up across processes.
If the emulator crashes and restarts, once it connects to RTCV, it will grab a copy of the latest Specs to get back up to date with the other process. Whenever there's a crash happening, the Cloud Debug info contains dumps of the specs from both processes (when possible). This is really useful for telling exactly what was in the process memory at the moment of a crash.
## Ensuring your code runs on the Main thread from anywhere
At any time in the code, if you're attempting to modify something in the UI from another thread, you will get an error about editing stuff from the wrong thread. Normally, the good practice would be to figure which form holds the handle to the thread and invoking it. We're really lazy so we've wrapped this into an action caller.
```
SyncObjectSingleton.FormExecute(() =>
{
// This code will run on the Main thread
// Which is usually the main form thread
});
```
Simply by wrapping your code with this snippet will ensure that your code isn't running on the wrong thread. If it gets called twice (a call within the other), it will not deadlock because of how the wrapping is designed. This is always safe to use for quick operations but take note of the following quirk:
When executing code in the Form Thread in the emulator process, this prevents the killswitch from pinging back. This is a normal behavior as this is how we can detect that the emulator has frozen. If you need to process stuff in the emulator process, try to do it with another thread than the main thread if possible.
## Singleton Form System
The RTCV Grid system is too complex for this guide but here's what you need to know:
In the StandaloneRTC process, you can get ahold of a singleton form by calling it with the S object and passing the type
```
S.GET();
```
This gets the form singleton and will initialize it if it hasn't been initialized yet.
Forms that inherit from the ComponentForm class can be anchored in the RTCV UI or be summoned for a Custom Layout.
# Running RTCV on Linux
Startup guide on how to run RTC on Linux using Wine
\
**Guide written by:** LuckyLuigiX4\
**Linux distro used in the making of this guide:** Linux Manjaro
**If you are a Windows user, you do not need to follow this as RTC is already made for Windows**
### WARNING: **This is a community-made guide for running RTC on Linux. The RTC devs are not officially supporting Linux as a platform for RTC at this time. Some users have managed to get it to work and this guide aims at providing more people with the knowledge on how to get it to work. Wine is a workaround and RTC isn't a native Linux app nor is it officially supported for it. Thank you for understanding.**
## **What is Wine?**
In Layman’s terms, it’s a Linux Program that allows Windows only programs to run on Linux. It’s gotten very good the past few years and can now run RTCV.
### **How to Run RTCV under Wine:**
This will be a step by step guide on how to run RTCV under Wine. Pictures will be shown.
This Guide will assume you already have RTCV Downloaded to your system and Wine Installed, it’s a quick good search if you somehow don’t have it.
**1. Install Lutris**
Lutris is a great Linux application that allows for easy Management of games and programs that you need to run under wine.
The Lutris Website shows how to install on many Distributions
(If you know what you are doing then you may not need to use Lutris, but it’s highly reccomended)
**2. Open Lutris and Add a Game**

Once you’ve opened Lutris, You’re going to want to add a new game.
**3. Enter Name and Select a Runner**
In the “Game Info” Tab, Enter a Name for the Program (Ex: RTCV) and select “Wine” from the Runner’s List


**3.5 Extract RTCV to a folder**
You most likely want to create a folder for Wine Programs for Lutris if you plan on using it in the future. Make a folder called wine and make folders inside that for individual Programs.
**4. Enter the Executable Path**
In the “Game Options” Tab, click the Browse Button for the Executable Space. Go to the Path you extracted RTCV to and click on the executable named “RTC\_Launcher.exe”

**4.5 Add a Custom Wine Prefix (Optional, but Highly Reccomeneded)**
This is if you plan on using Lutris a lot. Makes it so other wine programs don’t have a chance of conflicting with one another. It’s as simple as creating another folder.

**5. Check the Wine Version**
In the “Runner Options” Tab, check if the Wine version if the newest availible. At the time of writing, it is Wine Staging 6.8

Every other option should be setup correctly by default, you can now click on Save and close the Add Game Window.
**6. Install Dependencies via winetricks**
At the current moment the built-in Prereqs Checker does not function properly under Wine, the work around is simple.
On the main window, at the bottom there’s an Icon that looks like a Wine Glass. Click that or the arrow next to it to bring up a drop down menu.

You then want to click on Winetricks in the menu
Then, click on “Select the Default wineprefix”

Next, click on “Install Windows DLL or Component”

Once you are there, look for the components – dotnet40, dotnet48, and vcrun2019

Wait for them to install, you’ll know they’re done when the “Install Windows DLL or Component” Windows appears again. Close winetricks.
After that all you need to do is click on RTCV in Lutris and the Launcher will open, the Launcher works almost exactly like windows.
**Note:** *This guide was written on May 27th 2021. Any problems may not exist at a later date.*
***Currently, Bizhawk Vanguard, Dolphin Vanguard, and FileStub are known to work mostly as intended. Process stub only works on other applications currently running under wine. PCSX2 at the current moment does not work, as it fails to configure plugins.***
### **Known Issues:**
**Package Downloader** has bug when you click on a category, such as PLUGIN, you can not click the BACK Button in the top left corner. You can get back by clicking Change Catalog and going back to the one you're on.
**Bizhawk Vanguard** will not detect your controller if you plug it in after launching Bizhawk. This Might not be just a wine issue.
**MelonDS** has to be launched seperately from the RTC Launcher, as for some reason it will not launch with the Launcher. First click on MelonDS in the Launcher, then wait for the RTCV Client to load, then open the MelonDS application via wine.
MelonDS can also have strange graphical errors after loading savestates via glitch harvester a few times (such as Objects turning dark in SM64DS. Currently known solution is to restart the emulator and make a new savestate. (This does not seem to happen in all DS games)
**Dolphin Vanguard** does not always save configurations properly. In testing, Multiple controller configs had to be saved before it would remember a controller was plugged in. Volume slider in dolphin resets each time its launched. Same thing with graphics config.
***The above issue was found using Dolphin Vanguard, but could be a thing on on new/future Vanguard Implementations.***
Infinite warnings can appear if you close dolphin before RTC closes, and then you try to close RTC while the kill-switch script is running, RTC will close, dolphin will launch again, but infinite Error messages will occur, taking away control from other windows and can quickly use up RAM. If this happens the only known solution at the moment is to Kill all Wine Process. There is a python script you can find to create a hotkey for this.
# How to make Passthrough Lists
By TomatoServal
## Prerequisites
* A basic understanding of computer architecture, including registers, opcodes, bits, etc.
* Previous experiences with making lists for RTC
## Introduction
The Vector Engine in RTC allows users to replace data structures (such as data types, instructions, etc) with other data structures inside a game. More advanced lists use a component called the **BitlogicListFilter** and it can do more than just a simple replacement. It can alter specific components of an instruction as well. One can use this for special lists called Passthrough Lists. In this short tutorial, I will explain how to make them for yourself in RTC.
\*NOTE: You must look up the instruction set for the desired system. If you are unsure, use the following prompt in a Google search: “**SYSTEM** cpu.” Then, search for the architecture. In addition, you need a basic understanding of computer architecture. Now, let’s get started :)
## Overview
### How Do Passthrough Lists Work?
As mentioned, passthrough lists allow RTC to alter specific instruction components in a program. What does that mean?
Most CPUs need two types of information in an instruction:
1. OPCODE - The specific operation the CPU needs to perform
2. OPERANDS - The data the CPU manipulates during execution
Let’s say you wanted to add two numbers together: 5 and 6. On paper, you’d write it as 5+6. A CPU would interpret the addition sign as the OPCODE and the numbers as the OPERAND.
Passthrough lists preserve specific components of these instructions. You can denote these bits/bytes using the (**#**) character in the list file. As such, you can swap key components of opcodes called by the processor. For example, you can alter the registers in a load instruction, replacing important data with garbage. Such lists allow for more unique results compared to the typical \[Limiter: Load -> Value: NOP].
Don’t mistake the (**#**) symbol for the (?) symbol. A (**?**) assigns a random value to the bit, allowing for a potential change. The (**#**) prevents this scenario from happening. To prevent any further confusion, I will refer to the (**#**) character as the static symbol and the (**?**) character as the variable symbol.
### Naming your Lists
Whenever you make a list, its name should be easy to understand. The corrupter should be able to answer the following three questions, which I will refer to as identifiers:
1. Which system should I use?
2. Which instructions will this list target?
3. How will this list affect the targeted instructions?
The first two identifiers follow similar guidelines as listed in the simple tutorial. The last one relates to passthrough lists specifically.
When naming your list, provide all these identifiers as concisely as possible. You can give it any name if it explains the list’s function. If you feel the name needs more explanation, you can utilize comments in the list file (I'll explain later).
## Simple Tutorial/Instruction-specific List:
In the following tutorial, I will make a **\[MIPS]\_BC\_REGISTER** list. This list aims to replace the registers that conditional branch instructions execute, e.g., branch if equal, branch if greater than, etc. We will disregard any “jump” instructions, as they execute regardless of any condition or state. This list applies to all systems that utilize a MIPS instruction set, which contains the N64, PS1, and PS2.
### Step 1: Finding the Opcodes
First, we must search for the instruction set online. The website **must** include opcodes, which is a string of binary numbers in the following format: 100100100101. Do NOT use any assembly code in the following format: beq **rs**,**rt**,**OFFSET**.
The rs, rt, and offset fields in the following example represent variables that can change (registers, addresses, etc.). These are the exact fields we will target later on in this demonstration. Once you find a valid website, you can create your lists.
### Step 2: Creating the List File
To start, we must create the file where we store lists. You **must** access the “VERSIONS” folder of RTC on your computer. Go to the following location: RTCV\_**XXX**\RTCV\RTC\LISTS. Next, create a new text file, name it appropriately, and open it. Then, paste **@BitlogicListFilter** at the top of the file.
NOTE: You can use comments in these lists by starting a line with //. They help explain the function of your list and highlight what you still need to do.
PRO TIP: You can go to your RTCV Versions folder by right-clicking the version in your Launcher and then selecting “Open Folder.”
### Step 2.5: Determining Endianness
RTC formats list entries in *Little Endian* format by default. You can add an underscore at the beginning of your text file if you want all instructions to use a *Big Endian* format. It makes copying easier since most websites show them in this format. However, plans are in place to change this system. Personally, I format my lists in *Little Endian* to future-proof them. As such, I will use this format in the example list in Step 3.
To convert between the formats, you must put all bytes in reverse order. Below is a table representing data values in both endian formats:
In this example, we have a 16-bit word, both in hexadecimal(0x) and binary(0b). The most-significant byte is highlighted in green, while the least-significant byte is highlighted in red. The two bytes change locations, depending on their endianness.
### Step 3: Adding Opcodes to the List
Now that we have our website and lists, we may add our opcodes to the passthrough list. We must locate all conditional branch instructions on the site and copy them into the list. Note that for each entry, we must include *0b* if our items are in binary and *0x* if they’re in binary.
Below is the instruction in question:
In this example, the register fields (**rs** and **rt**) are 5 bits long, while the **offset** field is 16 bits long. Since we want to change the registers, we will replace every register bit with a *variable symbol* in the list. For the offset, we will replace every offset bit with the *static symbol*. This will prevent these bits from changing when using the list. After inserting the new characters, our current list file will look like this:
However, if you notice, our entry is in Big Endian format. If we want to convert the following into Little Endian, we must reverse the order of bytes. As a result, we get the following:
Using this method, we can convert the remaining conditional branch opcodes to get the following file:
We have now created the lists. To use it, place **\[MIPS]\_BC\_REGISTER** as both the limiter and value list.
That concludes the simple tutorial. You can use this method for any system. However, you can do more with passthrough lists than just this.
## Advanced Tutorial/General Lists:
You don’t NEED to use passthrough lists with themselves. You can use it with ANY list as the limiter. Therefore, you can utilize standard RTC lists in tandem with passthrough lists, resulting in fewer lists.
In this section, you will need two lists:
1. A regular list with all conditional branches
2. A passthrough list swapping the registers.
We can utilize the list in the simple tutorial for both with some changes. For our first list, we will copy **\[MIPS]\_BC\_REGISTER** in the current directory and rename it to **\[MIPS]\_BC**. Then, we will open the text document and replace all *static symbols* with *variable symbols*. When you finish, it should look like the following:
Creating our second list will require different changes. We will, again, copy **\[MIPS]\_BC\_REGISTER** in the current directory but rename it to **\[MIPS]\_ReplaceRegister**. Next, we will open the file. However, we will delete all opcodes except for **beq**. Finally, we will replace all numbers with the *static symbol*. When you finish, the second list should look like this:
You are now ready to use these lists. Just place **\[MIPS]\_BC** as the limiter list and **\[MIPS]\_ReplaceRegister** as the value list.
This method is more complicated and abstract compared to the simple tutorial. Yet, it is also more practical. CPUs follow a universal arrangement for each instruction. Regarding MIPS, there are three instruction types: R-Type, I-Type, and J-Type. Conditional branches fall under the I-Type, which includes a 6-bit opcode, two 5-bit registers, and a 16-bit immediate/offset value.
Our register replacement list will work for all I-Type instructions. To make our list more universal, I can rename it **\[MIPS]\_ReplaceRegister\_Itype** to highlight this fact.
Creating lists by type rather than opcode will require fewer lists. There is a common instruction arrangement for each CPU. You will need to research your desired system thoroughly to find it, but you will surely reap the benefits.
## Conclusion
To conclude, passthrough lists are very versatile. Using the static symbol (**#**), they can target and change specific instruction components. You can either use them with themselves or in tandem with regular lists.
There are many ways to make passthrough lists than the ones mentioned in this tutorial. Try to experiment with them on your own. Happy testing :)
\
One final PROTIP: If you need to flip the endianness of an entire list, you can add \_ at the beginning of the filename to make RTC auto-flip the endianness when loading it.
# Sequence Loader Plugin
by Gemini
## How to use the Sequence Loader Plugin with RTC
The Sequence Loader Plugin is a tool that allows you to load and corrupt NSF and SPC files in BizHawk.
#### How to install the Sequence Loader Plugin
1. Download the Sequence Loader Plugin from the Package Downloader.
2. Install the plugin.
3. Restart RTC.

#### How to use the Sequence Loader Plugin
1. Open the Sequence Loader Plugin tool in the Advanced tools section (Bottom right).
2. There are two ways to load a file:
* Click the "Load Sequenced song from File" button and select the file you want to load.
* Drag and drop the file into the plugin window in the rectangle area on the top-right
3. The plugin will create a save state so you can replay the song over and over again and corrupt it.
4. NSF files can contain an entire soundtrack, so you can use the "next song" button to load a new song into a GH save state.
5. SPC files are dumps of the contents of the SPC700 chips. They can be used to corrupt the music over and over again.
#### Things to keep in mind
* NSF files are not perfect replicas of the music that was playing in the game. Some games, such as Mario 3, do not replay perfectly.
* SPC files relies on an open source program called SPC loader that gets wrapped into a ROM before it can be used with the Sequence Loader Plugin. This supports most games but doesn’t have perfect compatibility (ex: very very long songs)
* It can take time to get good results with the Sequence Loader Plugin. Don't expect to get immediate results.
I hope this wiki article is helpful!
Please let me know if you have any other questions.
# Classic Corruptors
# Vinesauce ROM Corruptor
{% hint style="info" %}
While you can still use this corruptor, we suggest using the [Real Time Corruptor](/rtcv/rtc) whenever you can. The RTC is under active development and has far more features than other corruptors.
{% endhint %}
{% content-ref url="/pages/-LcqJjnbkw6x3fMGMa5F" %}
[In-Depth Guide](/rtcv/rtc)
{% endcontent-ref %}
### Vinesauce ROM Corruptor Guide
**Author:** Ryan "Rikerz" Sammon\
**Source:** \
**Download:**
> *The Vinesauce ROM Corruptor is a corruptor that allows you to change the bytes of any file by tweaking some simple settings. Its development thus far has been biased toward corrupting NES ROM files for the best corruption effects, but since it works on any file, it can be used to corrupt any kind of ROM or game data file.*

#### Index
* [**Index**](/other-corruptors/classic-corruptors/vinesauce-rom-corruptor#index)
* [**Functions**](/other-corruptors/classic-corruptors/vinesauce-rom-corruptor#functions)
* [File Selection - ROM Directory](/other-corruptors/classic-corruptors/vinesauce-rom-corruptor#file-selection---rom-directory)
* [Save Corrupted ROM To](/other-corruptors/classic-corruptors/vinesauce-rom-corruptor#save-corrupted-rom-to)
* [Run Emulator after Corrupting](/other-corruptors/classic-corruptors/vinesauce-rom-corruptor#run-emulator-after-corrupting)
* [Save](/other-corruptors/classic-corruptors/vinesauce-rom-corruptor#save)
* [Load](/other-corruptors/classic-corruptors/vinesauce-rom-corruptor#load)
* [**Byte Corruption**](/other-corruptors/classic-corruptors/vinesauce-rom-corruptor#byte-corruption)
* [Start Byte](/other-corruptors/classic-corruptors/vinesauce-rom-corruptor#start-byte---hex)
* [End Byte](/other-corruptors/classic-corruptors/vinesauce-rom-corruptor#end-byte---hex)
* [Increment](/other-corruptors/classic-corruptors/vinesauce-rom-corruptor#increment---decimal)
* [Auto End](/other-corruptors/classic-corruptors/vinesauce-rom-corruptor#auto-end)
* [Corrupt every nth Byte](/other-corruptors/classic-corruptors/vinesauce-rom-corruptor#corrupt-every-nth-byte---decimal)
* [Add x to every byte](/other-corruptors/classic-corruptors/vinesauce-rom-corruptor#add-x-to-every-byte---decimal)
* [Shift right](/other-corruptors/classic-corruptors/vinesauce-rom-corruptor#shift-right-by-x-bytes---decimal)
* [Replace x with y ](/other-corruptors/classic-corruptors/vinesauce-rom-corruptor#replace-x-with-y---hex)
* [Enable NES CPU Jam Protection](/other-corruptors/classic-corruptors/vinesauce-rom-corruptor#enable-nes-cpu-jam-protection)
* [Text Replacement](/other-corruptors/classic-corruptors/vinesauce-rom-corruptor#text-replacement---ascii)
* [Color Replacement](/other-corruptors/classic-corruptors/vinesauce-rom-corruptor#color-replacement---hex)
* [**Quick Corruption Setup**](/other-corruptors/classic-corruptors/vinesauce-rom-corruptor#quick-corruption-setup)
* [**Example Corruption Saves**](/other-corruptors/classic-corruptors/vinesauce-rom-corruptor#example-corruption-saves)
* [**Video Tutorials**](/other-corruptors/classic-corruptors/vinesauce-rom-corruptor#video-tutorials)
#### Functions

**File Selection - ROM Directory**
Choose a folder containing your files or ROMs, a selection of the files from the selected folder will display, clicking on one of the files once will select it as the target file to corrupt.
**Save Corrupted ROM To**
This sets the a destination path for the corrupted file/ROM, ticking "Overwrite File" will always replace the file/ROM in the set destination.
**Run Emulator after Corrupting**
This launches an emulator and runs the corrupted ROM after clicking 'Run'. Some emulators may require you launch the corrupted ROM manually. See a list of recommended emulators.
**Save**
You can save your corruption to a .txt file or a TinyURL link when enabled and share it with others, be sure to update the path of the ROM when loading a save. Please note that TinyURL links sometimes expire and won't keep your corruption save forever.
**Load**
You can load saved corruptions in .txt format or load a TinyURL link to corrupt your own ROMs.
#### Byte Corruption

This section is where you configure the corruptions settings.
**Start Byte - Hex**
This sets the starting value for the corruption, setting this value too low will likely result in corrupting the header which can prevent the emulator from reading the file properly. A recommended starting value is 500.
**End Byte - Hex**
This sets the end value for the corruption, it can be set anywhere after the start byte. Setting this value too close to the start byte makes the byte range for corrupting too narrow for any significant corruption to happen, however, this can be useful for pinpointing files or values to corrupt.
**Increment - Decimal**
This sets the byte increment for when you are using the + and - buttons to change the start end end bytes. Setting the increment value to 1000 will increase or decrease the value of the start or end byte by 1000 when using + and -.
**Auto End**
When selected it will set the end byte to the last value of the ROM/file.
**Corrupt every nth Byte - Decimal**
This value sets how often to corrupt bytes, setting this to 1 will corrupt every byte, setting it to 2 will corrupt every second byte, and so on. The higher the number the less likely corrupting will happen, the lower the value the more likely a crash will occur. 10 is a recommended value to start out with.
**Add x to every byte - Decimal**
When using this option it will add the specified decimal value to each byte corrupted, any bytes corrupted with this option will be increased by the specified value. You can set negative values with this option too.
**Shift right by x bytes - Decimal**
Using this option each corrupted byte will be shifted to the right from it's original position, using a negative value will shift the bytes to the left.
**Replace x \_with y \_- HEX**
When using this option, each corrupted byte will be compared to the first value (*x), \_if it matches it will be replaced with* (y), \_the second value. So only matching bytes will be corrupted, other bytes remain untouched.
**Enable NES CPU Jam Protection**
This option will increase stability and decrease crashes when corrupting NES ROMs by avoiding known important NES operations and by avoiding changing certain values known to cause jams in the NES CPU. This option does not effect anything other than NES ROMs.
**Text Replacement - ASCII**
Anchor Text **-** Enter at least one word that you know exists in the file into this field. These words are used to understand what encoding the text in the file has. Usually one word is enough.
Text To Replace **-** Enter the text to replace into this field. Multiple sections of text can be replaced by putting pipe characters (|) between them. Any characters that are not letters (ie. numbers, spaces, hyphens, etc.) will match any character in the file. Small sections of text will result in greater collateral corruption of the file, as they will match non-text data more often.
Replace With **-** Enter what to replace the matching sections of text with into this field. If multiple sections of text were added into the box above, the same number of sections must also be entered into this box. Again, the pipe character (|) is used to separate sections.
A more detailed guide can be found here: [http://corruptedbytes.com/vinesauce-rom-corruptor-text-replacement-guide/](https://web.archive.org/web/20231001124022/http://corruptedbytes.com/vinesauce-rom-corruptor-text-replacement-guide/)
**Color Replacement - Hex**
This allows you to arbitrarily replace colors in games. Enter the hexadecimal value of the color to replace into the first text box. Multiple colors can be replaced at the same time by putting pipe characters (|) between them. Enter the hexadecimal value to replace the matching color with into this text box. If multiple colors were added into the box above, the same number of colors must also be entered into this box.
A more detailed guide can be found here: [http://corruptedbytes.com/vinesauce-rom-corruptor-color-replacement-guide/](https://web.archive.org/web/20231203005818/http://corruptedbytes.com/vinesauce-rom-corruptor-color-replacement-guide/)
#### Quick Corruption Setup
You can load a saved corruption from a .txt file a TinyURL link, or:
1. Locate the folder with your ROM or file and select it in the file selection field.
2. Set the destination of the ROM/file, set it to overwrite if needed.
3. Choose an emulator to run after corrupting (optional).
4. Enable the byte corruption field.
1. Set the Start Byte to a number greater than 0 to avoid corrupting the file header (100-500 is recommended).
2. Set the end byte, either by toggling Auto End or choosing a large value for a wide byte range or a small value for a narrow byte range.
3. Set the increment, changing start and end byte values with a small increment can result in different but similar corruptions, larger increments will corrupt very different sets of bytes depending on the type of file.
4. Set the corrupt every value, 5-10 is recommended for large byte ranges and 1-5 is best for small byte ranges (the lower the value the more bytes corrupted).
5. Choose a corruption method.
1. Adding \_x \_bytes, any value will produce a result, smaller values seem to be most effective on NES.
2. Shift Right \_x \_Bytes, 1-10 recommended for interesting results.
3. Replace *x \_with \_y*, recommended 1-10 in each field however, any number will work.
6. If corrupting NES ROMs, enable CPU Jam Protection (optional).
7. Use Text Replacement with at least one Anchor word (optional).
8. Use Color Replacement with the color palette as a reference if needed (optional).
9. Save the corruption to a text file on disk or as a TinyURL link (optional).
10. Click Run to corrupt the file.
Some emulators aren't compatible with the option to run the corrupted ROM right after corrupting it, you may have to run the emulator choose the ROM manually.
#### Example Corruption Saves
TODO
### Video Tutorials
**Corruption connoisseur, Zer0DucksGiven has an in-depth guide for the corruptor.**
**YouTube user FZERO has a simple guide showing the basics of the corruptor.**
# VineCorrupt
### VineCorrupt
**Author:** "Maiddog"\
**Source:** \
**Download:**
> *VineCorrupt is a multi-system corrupter designed to work with game systems ranging from NES to Wii with further inclusive development for other systems. VineCorrupt features opcode and file protection for its supported systems to minimize crashes. Each system has a different protection protocol according to their instruction set or file type to prevent crash inducing modifications. VineCorrupt also features the ability to corrupt specific files within a disc through a directory structure.*

#### Index
* [**Index**](/other-corruptors/classic-corruptors/vinecorrupt#index)
* [**Functions**](/other-corruptors/classic-corruptors/vinecorrupt#functions)
* [ROM File](/other-corruptors/classic-corruptors/vinecorrupt#rom-File)
* [Extract To](/other-corruptors/classic-corruptors/vinecorrupt#extract-to)
* [Emulator](/other-corruptors/classic-corruptors/vinecorrupt#emulator)
* [Save](/other-corruptors/classic-corruptors/vinecorrupt#save)
* [Save Last](/other-corruptors/classic-corruptors/vinecorrupt#save-last)
* [Load](/other-corruptors/classic-corruptors/vinecorrupt#load)
* [Corrupt](/other-corruptors/classic-corruptors/vinecorrupt#corrupt)
* [Run Emulator](/other-corruptors/classic-corruptors/vinecorrupt#run-emulator)
* [Miscellaneous Files](/other-corruptors/classic-corruptors/vinecorrupt#misc-files)
* [**Byte Corruption**](/other-corruptors/classic-corruptors/vinecorrupt#byte-corruption)
* [Step Size](/other-corruptors/classic-corruptors/vinecorrupt#step-size---hex)
* [Start Byte](/other-corruptors/classic-corruptors/vinecorrupt#start-byte---hex)
* [End Byte](/other-corruptors/classic-corruptors/vinecorrupt#end-byte---hex)
* [Total Bytes](/other-corruptors/classic-corruptors/vinecorrupt#total-byte---hex)
* [Bytes Corrupted](/other-corruptors/classic-corruptors/vinecorrupt#bytes-corrupted)
* [Corruption Selection](/other-corruptors/classic-corruptors/vinecorrupt#operation-select)
* [Corruption Value](/other-corruptors/classic-corruptors/vinecorrupt#corruption-value)
* [**Byte Operations**](/other-corruptors/classic-corruptors/vinecorrupt#byte-operations)
* [Shift](/other-corruptors/classic-corruptors/vinecorrupt#shift)
* [Swap](/other-corruptors/classic-corruptors/vinecorrupt#swap)
* [Add](/other-corruptors/classic-corruptors/vinecorrupt#add)
* [Set To](/other-corruptors/classic-corruptors/vinecorrupt#set-to)
* [Random](/other-corruptors/classic-corruptors/vinecorrupt#random)
* [Rotate (L/R)](/other-corruptors/classic-corruptors/vinecorrupt#rotate-lr)
* [Logical AND](/other-corruptors/classic-corruptors/vinecorrupt#logical-AND)
* [Logical OR](/other-corruptors/classic-corruptors/vinecorrupt#logical-OR)
* [Logical XOR](/other-corruptors/classic-corruptors/vinecorrupt#logical-XOR)
* [Logical Complement](/other-corruptors/classic-corruptors/vinecorrupt#logical-complement)
#### Functions

This section goes over the functions of VineCorrupt.
**ROM File**
Choose a ROM file by selecting "Browse." The ROM's directory path will be displayed once the ROM has been selected.
**Extract To**
Choose a directory by selecting "Browse" to extract the contents of the selected ROM. This directory's files will be the target for corruption.
**Emulator**
Choose an emulator by selecting "Browse" to point to the emulator that runs the ROM files from the current tab. The selected emulator will remain selected for the specified system until the user chooses another one or VineCorrupt is updated.
**Save**
Shows a display box with a code that can be loaded to restore the current settings. These values correspond to the current corruption options.
**Save Last**
Once a ROM is corrupted, you can save it to a custom directory with this option. It will be deleted from the corrupter directory afterwards.
**Load**
Shows a display box that allows the user to enter a code generated by a "save" operation. Submitting a code will restore previous corruption settings. This code corresponds to the current corruption options.
**Corrupt**
Starts the corruption process with the current settings. If an "Extract To" directory is listed, the files within this directory will be corrupted.
**Run Emulator**
If an emulator is selected, it will attempt t o run the emulator with the given ROM as an argument. If an emulator has already been run this way, it will be closed. The option does not work with all emulators and the run/auto-close feature may not operate properly.
**Miscellaneous Files**

VineCorrupt supports non-specific file corruption for unsupported systems. It is not recommended to use this function if the supplied file is already supported by a VineCorrupt system due to the built-in file protection. Miscellaneous file corruption is performed in the same manner as supported system file corruption.
#### Byte Corruption

This section goes over the "Corruption Options" section of VineCorrupt.
**Step Size**
The amount of space to skip between each corruption.
**Start Byte**
The offset into the ROM where the program will start corruption.
**End Byte**
The offset into the ROM where the program will stop corruption. Setting this value to 0 will corrupt from the Start Byte to the end of the file (similar to "Auto-end").
**Total Bytes**
This displays the total bytes of the ROM in hexadecimal once the file has been selected.
**Bytes Corrupted**
This displays the total bytes corrupted with the current settings after the ROM has been corrupted.
**Corruption Selection**
The drop down box lists all the current corruption types. The currently selected one will be applied after hitting Corrupt.
**Corruption Value**

The Corruption Value is currently unlabeled and is located under the corruption selection drop down box. This value modifies byte operations.
#### Byte Operations

This section goes over the byte operations of VineCorrupt. For examples of these operations see Maiddog's [Help Section](http://www.maiddog.com/projects/corrupter/help.php#tab-help-2)
**Shift**
Shift grabs a byte a \[Corruption Value] distance away and puts it in the current position.
**Swap**
Swap grabs the current byte and a byte of \[Corruption Value] distance away and swaps their values.
**Add**
Adds the \[Corruption Value] to the current byte.
**Set To**
Sets the value of the current byte to the value of \[Corruption Value].
**Random**
Random generates a random value and places it at the current byte. Random does not use the corruption value.
**Rotate (L/R)**
Rotate performs a bitwise rotation of the current value by a distance of \[Corruption Value].
**Logical AND**
Performs a logical AND operation at the current byte with the \[Corruption Value].
**Logical OR**
Performs a logical OR operation at the current byte with the \[Corruption Value].
**Logical XOR**
Performs a logical XOR operation at the current byte with the \[Corruption Value].
**Logical Complement**
Changes the current byte to its logical complement. Complement does not use the corruption value.
* * \*
Write up by TechSupportSparky\

# Windows Glitch Harvester
## Windows Glitch Harvester
### Legacy corruptor backported to .NET Framework 2.0
 Legacy corruptor for running on old Windows OS versions
 Can run on windows as old as Win98 (As long as .Net Framework 2.0 is installed)
 Has built-in nightmare engine and vector engine (no extensibility)
 Has a very basic Stockpile management support
WARNING:
Windows Glitch Harvester is an old corruptor. If you are looking to just corrupt Windows files and programs, check out RTCV + FileStub/ProcessStub instead. This has been tested on Win9x and WinXP. You may need to disable the Multithreading option on win9x
### Download
[WGH Legacy (.ISO CD Image)](https://optionalfun.redscientist.com/software/wgh/wgh.iso)
### How to install
Download the ISO file, mount it or burn it to a CD. The ISO contains the .Net Framework 2.0 redistributable if you need it.
\
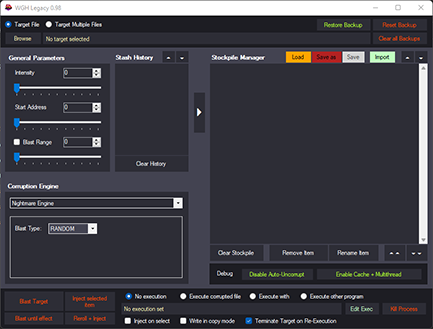
\
### How to use
WGH Legacy works similarly to RTC's Glitch Harvester but everything is crammed into a single window.
You have access to a Stash History and Stockpile Manager just like in RTC but be weary that the stockpile format is flaky in this one.
Keep in mind that this is not real-time, just like with FileStub. If you are getting errors, make sure your corrupted file is not already in use.
DO NOT corrupt things that you don't have backups of. The Backup system in WGH is much inferior to the one in FileStub.
\
### Application support
We can only offer support if you use this application on a legacy system such as Win9x, Win2000 or WinXP. If you use Windows 7 and newer, use FileStub instead.
# Android Vinesauce ROM Corruptor
An old android application for corrupting on the go
Vinesauce ROM Corruptor is a tools app developed by Viveret. It was based on the original Windows Application by Rikerz
The APK has been available *since March 2015*. It has been removed from the Google Play store since. The last update of the app was on *April 14, 2016* and was designed to run on Android version *4.0.*
The icon and name on Android
*We do not recommend using this app as it will most likely not give out results that provide much entertainment. After it was removed from the Google Play store, various cloned versions were published on Google Play over the years, including fake clones that injected Ads.*
Here's an APK version that we have confirmed to be safe:
Link to download [Vinesauce Rom Corruptor Android](https://cdn.discordapp.com/attachments/1137901970087227462/1220484153204674671/Vinesauce_Rom_Corruptor_Android.zip?ex=660f1b71\&is=65fca671\&hm=ac782a1f20a553aa12daca27ae86fe67f2bed58481557e7c8d4141a338a82ebb&)
Viveret eventually renamed the application to Android File Scrambler. It doesn't appear to be available on Google Play anymore.
*We don't have a tested APK for this one. There is a copy available at appbrain.com but use that information at your own risk.*
# Lesser known corruptors
* [**Index**](/other-corruptors/classic-corruptors/lesser-known-corruptors)
* [Chain Chomp](#chain-chomp)
* [Erosion-v4](#erosion-v4)
* [ROM Poison](#rom-poison)
* [The Haggleforth Rom Corruptor](#the-haggleforth-rom-corruptor)
* [rcorrupt](#rcorrupt)
* [oxidizer](#oxidizer)
* [Alice Corruptor](#alice-corruptor)
### Chain Chomp
**Author:** "Lafolie"\
**Source:** \*\*\*\*\
**Download:**
> *Chain Chomp is a plugin-based corruptor that is open source. This main concept of this corruptor is that operations on on a chain basis, where operations are driven from plugins, individually configurable.*

### Erosion-v4
**Author**: juanmv94\
**Download**:
> *A small file corrupter project from 2016 emerged from the need for an actual fast and advanced ROM and file corrupter. Only the binary was released, being this the first time the source code is available.*

###
### ROM Poison
**Author**: Coolcord\
**Download**:
> *ROM Poison is designed to be a simple, but powerful, ROM corruptor. Due to the nature of ROM corruptors, this can be used on any file, but it is intended to be used with video game ROMs (such as NES, SNES, and N64 games). It is written in C++11 using the Qt5 libraries, making it multiplatform.*

### The Haggleforth Rom Corruptor
**Author**: RyanTheNerd\
**Download**:
> *A basic rom corruptor written in python. runs exclusively in command line and takes configuration of the corruption through a json file*
### rcorrupt
**Author**: xpcybic\
**Download**:
> *A basic rom corruptor written in c. runs exclusively in command line with arguments*
### oxidizer
Author: ix\
Download:
> *A basic rom corruptor written in rust. runs exclusively in command line with arguments*
### Alice Corruptor
Author: AliceTS\
Download: [Archive](https://cdn.discordapp.com/attachments/1137901970087227462/1137902013380837456/alicecorruptor.zip)
> *A basic process corruptor written in Cheat Engine. Brought PC games corruptions to life before the development of ProcessStub was finished.*
# Old Corruptors
> *Some of the oldest ROM corruption software date back to the year 2000, before the creation and the popularization of the Vinesauce ROM Corruptor. Some of these are meant mostly for editing NES ROMs without the use of a full Hex editor, the ability to break games being a secondary use.*
* [**Index**](/other-corruptors/classic-corruptors/old-corruptors)
* [ROM Corruptor](/other-corruptors/classic-corruptors/old-corruptors#rom-corruptor)
* [Corrupster](/other-corruptors/classic-corruptors/old-corruptors#corrupster)
* [Erosion](/other-corruptors/classic-corruptors/old-corruptors#erosion)
* [NoChaos](/other-corruptors/classic-corruptors/old-corruptors#nochaos)
* [Sapros](/other-corruptors/classic-corruptors/old-corruptors#sapros)
* [Permanent Game Genie](/other-corruptors/classic-corruptors/old-corruptors#permanent-game-genie)
### ROM Corruptor
**Author:** Alan Weiss\
**Release date:** May 26, 2001\
**Also known as:** CORRUPT\
**Download:**
> *Originally made to hack NES ROMs by modifying individual bytes or byte ranges, it's secondary use of breaking games is a popular alternative. ROM Corruptor was* [*originally used by Vinesauce*](https://youtu.be/b3SubgihMfE?t=6s) *in their early days of streaming corruptions.*

### Corrupster
**Author:** "Disch"\
**Release date:** 26 July, 2009\
**Download:**
> *Corrupster was originally made as a utility for hacking Final Fantasy 1 NES Roms but can be used for corrupting any NES ROM, as well as any file as long as you switch the file type off of .nes. Because it does not ask for an emulator, it saw some limited use early on as a corruptor for files instead of ROMs.*

### Erosion
**Author:** "Syizm"\
**Release date:** June 10, 2000\
**Download:**
> *The Corruptor is based off of an unknown software called File Corrupt 4.0 according to it's* [*Zophar page*](https://www.zophar.net/utilities/corruptutil/erosion.html)*. Erosion was a more advanced corruptor for it's time with features like using powers, values, random values, overwrite specific values and byte ranges among other options. It has option backup and option logging features so you can know what offsets were written and what value was placed within. The source code is included with the first version.*

### NoChaos
**Author:** "jathys"\
**Release date:** July 24, 2002\
**Download:**
> *NoChaos is more of a recursive Hex editor than it is meant to be a corruptor. However it's description on his website states that it is used for "Controlled corruption".*

### Sapros
**Author:** "Dan"\
**Release date:** January 31, 2005\
**Download:**
> *Sapros is a simple NES ROM corruptor that utilises the CDL files produced by FCEUXD, a NES debugger, to provide added precision to the corruption process.*

## Permanent Game Genie
**Author:** Robert A. Durbin\
**Release date:** March 2, 2002\
**Download:**
> *Not a corruptor in the traditional sense but this program takes Game Genie code and permanently inserts them into NES ROMs, normally with Game Genie codes they are executed within an emulator instead of being written directly to the ROM. Using this tool you can overlap some interesting codes and create unique corruptions.*

## Contribution
If you know of any old corruption software please make a submission here: [github.com/x8BitRain/corruption-wiki-media](https://github.com/x8BitRain/corruption-wiki-media)
# Scares Scrambler
## **Scares Scrambler (v1.21)**

**Author:** Zach “Scares” Strong\
**Source:** \
**Download:**

#### Index
* [**Index**](/other-corruptors/scares-scrambler#index)
* [**Functions**](/other-corruptors/scares-scrambler#functions)
* [**Algorithms**](/other-corruptors/scares-scrambler#algorithms)
* [Basic Functions](/other-corruptors/scares-scrambler#algorithms-basic-functions)
* [Special Functions](/other-corruptors/scares-scrambler#algorithms-special-functions)
* [**Corrupt and Repeat**](/other-corruptors/scares-scrambler#corrupt-and-repeat)
* [**Miscellaneous**](/other-corruptors/scares-scrambler#miscellaneous)
* [**Example Preset**](/other-corruptors/scares-scrambler#example-preset)
* [**Video Tutorial**](/other-corruptors/scares-scrambler#video-tutorial)
* [**Feedback**](/other-corruptors/scares-scrambler#feedback)
### **Functions**
File - Choose File (Alt+F)

This window is used to choose the desired file to corrupt, as well as the name and location for the resulting corrupted file. “Select File” will open a standard dialogue box for selecting the file to corrupt. “Select Folder” will open a custom window for selecting a folder or specific file for the resulting corrupted file (see below). Alternatively, clicking the textbox labelled “Enter new file name…” will let the user enter the file path for the new file manually. “Apply” will set the file to corrupt and the resulting corrupted file to the given values.
If no filename or filepath is given, the corrupted file will default to the name “CorruptedFile”, with the file extension given by the file that’s being corrupted. The file will be placed in the same folder as the Scares Scrambler.
If a filepath is given, but no filename, the corrupted file will be given no name, with the file extension given by the file that’s being corrupted. This is considered a bug and will be fixed in future releases. The file will be placed in the given filepath.
File – Choose File - Select Folder

This window is used to select a specific filepath for the resulting corrupted file, without the need for typing it manually. This window will be replaced with a more standard dialogue box in future releases. The window contains the current filepath (in this example, it’s “C:/Example\”), the contents of the current folder, and three buttons.
Clicking on the name of any file/folder in the list will select it. Clicking “Ok” will use the current filepath displayed in the window as the filepath for the resulting corrupted file. “Select Folder” will change the filepath to inside the selected folder. “Go Up” will change the filepath to the parent folder of the current filepath. Currently, “Go Up” is slightly bugged and will be fixed in future releases.
File - Save Presets (Alt+S)

This window is used to save the current settings for the current algorithm to a simple text file. Entering a filename into the textbox and clicking “Ok” will save a preset file to the same folder as the Scares Scrambler.
File - Load Presets (Alt+L)
Opens a standard dialogue box to select a preset file. Once selected, the settings from the preset file will be applied to the Scares Scrambler.
Options – Hexadecimal Mode
Turning this on will allow the user to use hexadecimal values for all number inputs within the Scares Scrambler. Toggling this option will automatically convert any numbers already inputted into the corrupter into their respective hexadecimal representations, or back into decimal.
Options – Auto Insert Auto End
Turning this option on will allow the corrupter to automatically insert the chosen file’s size (in bytes) into the corrupter’s “End Value” parameter when choosing new files to corrupt.
Options – Hide File Labels
Turning this on will hide any filepaths/filenames on the main Scares Scrambler window.
Themes
The Scares Scrambler contains three different themes to use: “Light” (Default), “Dark”, and “Dubby”. Each theme changes the corrupter’s logo and colours. To change between them, simply click the desired theme in the Themes menu.
About – Info (Alt+I)
Displays some basic info about the Scares Scrambler.
About – Contributors
Displays a list of project contributors, as well as what they contributed to the project.
### **Algorithms**
Algorithms are the different methods which the Scares Scrambler uses to corrupt files. Certain algorithms are better suited for different filetypes. To switch between different algorithms, click the “…” button below the Scares Scrambler banner and select the desired algorithm.
#### **Algorithms – Basic Functions**

To change any of the values listed below, simply click the textboxes beside each label and enter the desired value.
Start Value
The Start Value tells the corrupter at which byte of the selected file to start corrupting. This allows the corrupter to leave data near the start of the file uncorrupted.
End Value
The End Value tells the corrupter at which byte of the selected file to stop corrupting. This allows the corrupter to leave data near the end of the file uncorrupted.
Inc Value
The Inc Value tells the corrupter how much to add/subtract to a certain value whenever a “+/-” button is clicked. For example, setting the Inc Value to 20, then clicking the “+/-” button beside the Start Value will add 20 to the Start Value. Right-clicking the “+/-” button will subtract 20.
“+/-” Button
Whenever a “+/-” Button is clicked, the Inc Value is added to the chosen value (the one beside the “+/-” Button). Whenever a “+/-” Button is right-clicked, the Inc Value is subtracted from the chosen value.
Auto End
The Auto End button will insert the selected file’s size (in bytes) into the End Value.
Block Size
The Block Size tells the corrupter the size of the corrupted blocks. In other words, it tells the corrupter how many bytes to corrupt in a row, without leaving a space. Each algorithm uses this value differently. Check each algorithm’s description for specific details.
Block Space (Exponent/Upper Bound)
The Block Space tells the corrupter how much uncorrupted space to leave between corrupted blocks (groups of corrupted bytes). Below this value are three radiobuttons labelled “Linear”, “Exponential”, and “Random”. These buttons give the corrupter different ways to leave uncorrupted space.
Linear
Linear is the default option selected. Selecting Linear tells the corrupter to leave a specific amount of space between each corrupted block. That specific amount is determined by the value of Block Space.
Exponential
Selecting Exponential tells the corrupter to leave an increasing amount of space between each corrupted block. The maximum spacing between corrupted blocks is capped at one million (1000000). Exponential is the only value in the Scares Scrambler where a fractional value can be used (1.2, 12.456, etc.). This setting changes “Block Space” into “Exponent”. The exact formula used to determine the space between corrupted blocks is x^(Exponent), where Exponent is the value of Exponent, and x is an integer which gets incremented by 1 for each corrupted block. The initial value of x is 1.
Random
Selecting Random tells the corrupter to leave a random amount of space between each corrupted block. This setting changes “Block Space” into “Upper Bound”. The value of Upper Bound tells the corrupter the highest possible space between corrupted bytes; it limits how high the spacing can be.
Random Buttons
Clicking the Random Buttons situated beside certain values will give a random number between 0 and 255, inclusive, to that value.
#### **Algorithms – Special Functions**
Incrementer Algorithm
The Incrementer Algorithm adds a specific amount to each byte it corrupts. If the value of the byte exceeds 255, its value will be divided by 255, and the remainder of that division will be used instead.
Incrementer Algorithm – Add/Subtract
The Add/Subtract value is the specific amount that the Incrementer Algorithm adds to each byte. This value can be negative.
Randomizer Algorithm
The Randomizer Algorithm sets every byte it corrupts to a random value between 0 and 255, inclusive.
Scrambler Algorithm
The Scrambler Algorithm takes two blocks (groups of bytes) and swaps them. In other words, the first block will be placed where the second block is, and vice versa. The exact size of these blocks is determined by the value of Block Size.
Scrambler Algorithm – Block Gap
The Block Gap determines the space between the blocks which get swapped. This value is different from Block Space, which determines how much uncorrupted space to leave between pairs of corrupted blocks.

Copier Algorithm
The Copier Algorithm takes a block (group of bytes) and copies it to a second block. The exact size of these blocks is determined by the value of Block Size.
Copier Algorithm – Block Gap
The Block Gap determines the space between the original block and the copied block. If this value is positive, the first block will be copied to the second block. If this value is negative, the second block will be copied to the first block. Essentially, whether the Block Gap is positive or negative will determine the direction in which the data is copied. This value is different from Block Space, which determines how much uncorrupted space to leave between pairs of corrupted blocks.
Tilter Algorithm
The Tilter Algorithm will replace each corrupted byte with a specific value.
Tilter Algorithm – Replace
The Replace value tells the corrupter which byte values to replace. In other words, the Tilter Algorithm will only replace bytes that have the same value as Replace. This value only takes effect when “Exclusive” is checked.
Tilter Algorithm – Replace With
The Replace With value tells the Tilter Algorithm which value to replace corrupted bytes with.
Tilter Algorithm – Exclusive
If the Exclusive checkbox is checked, the Tilter Algorithm will only replace bytes within the blocks (groups of bytes) that match the value of Replace. If the Exclusive checkbox is unchecked, the Tilter Algorithm will replace every byte within the corrupted blocks.
Smoother Algorithm
The Smoother Algorithm replaces bytes with the average of all the bytes in the corrupted block (groups of corrupted bytes) pair.
Smoother Algorithm – Block Gap
The Block Gap tells the Smoother Algorithm how much space to leave between the original block and the smoothed block. If this value is positive, the second block will be corrupted. If this value is negative, the first block will be corrupted. Essentially, whether this value is positive or negative will determine which block in each pair will be corrupted. This value is different from Block Space, which tells the Smoother Algorithm how much space to leave between pairs of corrupted blocks.
Smoother Algorithm – Termwise
If Termwise is checked, each byte in the corrupted block will be replaced with the average between itself and the byte in the same relative position in the other block. If Termwise is unchecked, each byte in the corrupted block will be replaced with the average of all the bytes within the corrupted block and the other block.
Blender Algorithm
The Blender Algorithm takes two files and blends them together, forming one corrupted file. Essentially, blocks (groups of bytes) will be copied from one file to another, according to the values of Block Size and Block Space.
Blender Algorithm - File Offset
The File Offset determines where in the secondary file to start copying bytes from. It’s essentially another Start Value for the secondary file.
Blender Algorithm – Select File
The Select File button opens a standard dialogue box to select a secondary file to corrupt with. It chooses the file to blend with the chosen file.
### **Corrupt and Repeat**

The Corrupt and Repeat feature allows the user to create multiple corrupted files at once. To open Corrupt and Repeat, click the “Corrupt and Repeat” button below the “Corrupt” button on the main window.
Corrupt and Repeat – Basic Usage
Depending on which algorithm you select, the Corrupt and Repeat window will have different parameters to change. Each parameter will be tied to a parameter of the chosen algorithm. For example, the above screenshot shows a Corrupt and Repeat window for the Incrementer Algorithm.
To use the Corrupt and Repeat window, simply enter the number of files you’d like to create in the “Number of Files” textbox, then adjust the “Inc” values. The first corrupted file will use the values given in the main Scares Scrambler window for corrupting. Every subsequent file created will add the “Inc” values in the Corrupt and Repeat window to the values given in the main window and use those for corrupting.
For example, setting “Start Value Inc” to 1 will increase the Start Value by 1 for each new file created.
Corrupt and Repeat – Store files in new folder
If this option is checked, all the corrupted files will be placed in a new folder located in the filepath specified in the “Choose File” window. If this option is unchecked, all the corrupted files will be placed directly into the filepath specified. Note: this option may not behave properly if no filename/filepath is given.
### **Miscellaneous**
Auto-Load Presets
The Scares Scrambler automatically searches for preset files on startup. If a preset file is found in the same folder as the Scares Scrambler, then it will auto-load its settings.
Different Preset Versions
Currently, there are two preset formats: “preset” and “preset16”. “preset” was used with Scares Scrambler (v1.1), while “preset16” is used in the current version (v1.21). Both presets will work but be warned that in future versions the corrupter may drop support for older preset types.
A Note on Files
The Scares Scrambler comes with a few Python files and images. The corrupter needs these files in order to function, so uh, don’t remove them thanks!!!
### **Example Preset**
{% file src="/files/-M5Jd-IXhCJiZe-lUH2y" %}
Example Preset for a PSX Bios Corruption
{% endfile %}
It takes in the Playstation BIOS file “scph1001.BIN” and spits out “Corruptedscph1001.BIN”. The corruption is of one of the corruptions I got in the Playstation BIOS Corruptions #3 video. Tested on ePSXe200 v2.0.0.
### **Video Tutorial**
(made for v1.1, but still applicable)
### **Feedback**
Any feedback on the corrupter can be sent via a comment to this YouTube channel:
# Super Simple Rom Corruptor
## Super Simple ROM Corruptor
#### Let yourself be guided by the tool
### SSRC
 An extremely simplified ROM corruptor for classic ROM corruption
 It will hold your hand from start to finish
 Great source of pure randomness
Feature Set:
This program can corrupt game ROM in a classic yet very simplified way. You can control how much you corrupt, everything else is randomness magic. This novelty corruptor is form over function yet very functional.
###

### Download
[Executable file (portable, no install)](https://optionalfun.redscientist.com/software/ssrc/SSRC.exe)
### How to use
Start the program and follow the Wizard.
The Next button is your best friend.
Please don't corrupt things that you don't have backups of.
### Application support
This is a novelty corruptor developed with aesthetics first in mind for design choices. You can report bugs but do not expect any feature request to be considered.
# Cheat Engine
{% hint style="info" %}
While this method for corrupting Windows Games/Programs still work, we suggest using the [Real Time Corruptor](/rtcv/rtc) with ProcessStub for a more automated experience.
{% endhint %}
{% content-ref url="/pages/-LcqJjnbkw6x3fMGMa5F" %}
[In-Depth Guide](/rtcv/rtc)
{% endcontent-ref %}
### Cheat Engine Guide for 3D PC Games
**Author:** Eric "Dark Byte" Heijnen\
**Source:** \
**Download:**
> *Cheat Engine is an Memory Hacking Software for the* [*Windows*](https://github.com/cheat-engine/cheat-engine/releases)*,* [*OSX*](http://www.cheatengine.org) *and* [*Android*](http://forum.cheatengine.org/viewtopic.php?t=579943)*, it scans what a program has loaded on a computer's memory (RAM) when it's running and allows you to edit all the values a program has on memory. Normally Cheat Engine is used to cheat in video games like give you infinite health, thus the name.*

Due to Cheat Engine having many features for game hacking and memory editing, this wiki article will focus on the corruption aspect of Cheat Engine and the basics of the software to corrupt with it. Please visit the Cheat Engine Wiki for more information on the memory hacking and scripting side of Cheat Engine here:
## Index
* [**Index**](/other-corruptors/cheat-engine#index)
* [**Functions**](/other-corruptors/cheat-engine#functions)
* [**Process Hooking**](/other-corruptors/cheat-engine#process-hooking)
* [**Memory Scanning**](/other-corruptors/cheat-engine#memory-scanning)
* [Scan Option](/other-corruptors/cheat-engine#scan-option)
* [Scan Range](/other-corruptors/cheat-engine#scan-range)
* [**Found Values**](/other-corruptors/cheat-engine#found-values)
* [**Active Table**](/other-corruptors/cheat-engine#active-table)
* [**Common Hex Values**](/other-corruptors/cheat-engine#common-hex-values)
* [**Quick Corruption Setup**](/other-corruptors/cheat-engine#quick-corruption-setup)
* [**Corrupting Emulated Games**](https://corrupt.wiki/other-corruptors/pages/-LcqJjoFKsNXdkJk80gb#corrupting-emulated%20games)
* [Little Endian Values](/other-corruptors/cheat-engine#little-endian-values)
* [**Tips**](/other-corruptors/cheat-engine#tips)
* [**Warnings**](/other-corruptors/cheat-engine#warnings)
* [**References**](/other-corruptors/cheat-engine#references)
* [**Videos**](/other-corruptors/cheat-engine#videos)
## Functions
### 
## Process Hooking
Hooking processes in Cheat Engine allows you to choose your target application or game for corruption. You can also hook emulators and even system processes.
### 
## Memory Scanning
Memory scanning scans the memory of the chosen application from the process list, there are many types of values you can scan however in the context of corruptions 4 byte values are mostly used. You can experiment with other types of values including strings if you want to replace text on screen.
#### Scan Option
If you are trying to pinpoint specific elements of a game to corrupt but can't find what they are, Cheat Engine gives you lots of flexibility with various scanning options and the ability to scan specific ranges (similar to how you can corrupt specific ranges in the VSRC).
First Scan options are:
* Exact Value
* Bigger than...
* Smaller than...
* Value between...
* Unknown initial value
After the first scan you can set the options for the 'Next Scan' which are:
* Exact Value
* Bigger than...
* Smaller than...
* Value between...
* Increased Value
* Increased Value by...
* Decreased Value
* Decreased Value by...
* Changed Value
* Unchanged Value
* Same as First Scan
All these options speak for themselves. Cheat Engine remembers the values found in the previous scan, allowing it to compare new values with the old ones and revert to a previous scan. It also remembers the values of the First Scan.
#### Scan Range
Cheat Engine only scans between the given range markers. Default are these From: 00400000 To: 7FFFFFFF If you know for certain that a certain address must be between two addresses, then you can change these markers and Cheat Engine will only search between those values.

## Found Values
After searching for a value it will show the results in the left panel. You can select groups of values by clicking on one value, holding shift and clicking another value, or select multiple individual values by clicking on values while holding Ctrl.
Move your selected values to the active table for editing by clicking the red arrow on the bottom right of the results table.
### 
## Active Table
The active table is where you can edit the properties of your selected/found addresses. You can edit the following properties:
* Description
* Address
* Type
* Value
In the context of corruption the Value is the most modified property for the most prevalent results.
## Common Hex Values
These values are best for getting good corruption results, after scanning for these values, move the found values to the active table and increase or decrease them by 1000 to see if they have any effect on the game.
`3c000000 - 3e800000`
`3e800000 - 3f800000`
`3f800000 - 40000000`
`40000000 - 40800000`
`40800000 - 42000000`
`42000000 - 47000000`
`bc000000 - be800000`
`be800000 - bf800000`
`bf800000 - c0000000`
`c0000000 - c0800000`
`c0800000 - c2000000`
`c2000000 - c7000000`
## Quick Corruption Setup
1. Select a process (game or emulator) from the process button in the top left corner.
2. Tick the Hex checkbox next to the value input.
3. Input a value of your choice (ex. 3F800000).
4. Click on "First Scan".
5. After the first scan has completed, select several hundred values from the list by holding shift to select values in bulk.
6. Click on the red arrow in the bottom right of the found values table to move the values to the active table.
7. Select all the values in the active table with Ctrl+A and hit enter to change the values.
8. Add 1000 to the value and click OK.
1. If nothing happened try change the value from "3F800000" to "3F900000" or to "3D800000".
2. If a crash occurred you should try repeat the process from 1-8 with the same values but modify the value in smaller amounts, i.e: 3F800000 to 3F801000.
9. If you are unsuccessful with the chosen values, try another set of values and modify those instead.
You can experiment extensively with Cheat Engine because of it's high flexibility with memory editing so if you'd like to try the and corrupt a game with all of it's features please check the official Cheat Engine Wiki to learn more.

## Corrupting Emulated Games
If you want to try corrupting emulated games in something like Dolphin, first check the architecture of the emulated console to see if uses Little or Large Endian values.
The Wii and the Wii U use little endian values so when corrupting with Cemu or Dolphin, use the values below.
#### Little Endian Values
`0000803F - 00002040`
`0000003F - 00000040`
`0000803E - 00004040`
`0000C03F - 00004040`
`00000040 - 00008040`
`0000A040 - 00000041`
`00002041 - 00000042`
`00000042 - 00000043`
`00000044 - 00000045`
`0000807F - 0000803F`
`000080BF- 000040C0`
`000000BF - 000000C0`
`000000C0 - 000000C1`
### Tips
* Depending on the game, un-checking the "Writable" and "Exectuble" options before doing the first scan can give you better values to corrupt with.

* If your game crashes and you don't want to lose the values you found, you can relaunch the game, choose it from the processes list again and click "Yes" when it asks if you want to keep the current address list/code list. However, this will only work if the addresses are static (colored green as opposed to black).

## Warnings
***NEVER CORRUPT AN ONLINE GAME!***
This will most likely result in you getting banned from the game's multiplayer network if there is any kind of anti-cheat mechanism involved. Corrupting Counter-Strike games will get you kicked or banned because of the Valve Anti Cheat system recognizing memory editing happening on the client side or that an external program has hooked the game process during a match.
***CHEAT ENGINE CORRUPTION CAN CAUSE BSODs!***
It's rare but you can cause the "blue screen of death" when corrupting with Cheat Engine, BSODs happening while corrupting almost never cause any long term damage to your OS, the only inconvenience being unexpected shutdowns.
***LOWER YOUR VOLUME!***
Sometimes when you're changing values one of those values will control the volume so you might accidentally tab back into the game to find the volume at 1000%.
## References
This wiki article is adapted from a guide written by BitRain [you can find here.](https://github.com/x8bitrain/corrupt-wiki/tree/430148d289135ba52a58a9e30a4c9ac95d616b76/assets/cheat-engine/corruption-guide.pdf)
BitRain's guide was inspired and adapted from CosmoCourtney's tutorial [video here.](https://www.youtube.com/watch?v=iLdrMNrwgRo)
## Videos
{% embed url="" %}
CosmoCourtney has a guide on how to use Cheat Engine to corrupt games, in this example Goat Simulator is corrupted.
{% embed url="" %}
A good example of what Cheat Engine is possible of when used on modern titles.
# Web-Based Corruptors
> *These are corruptors that run in your browser.*
* [**Index**](/other-corruptors/web-based-corruptors)
* [Emoji/SVG Corrupt](/other-corruptors/web-based-corruptors#emoji-svg-corrupt)
* [jsRTC](/other-corruptors/web-based-corruptors#jsrtc)
## Emoji/SVG Corrupt
**Author**: x8BitRain\
**Page URL**: \
**Source** :
> *As its name implies, this is a web-based corruptor that works with SVG Vectorial Files. A quick selection of SVG Emojis is available to get started fast.*

## jsRTC
**Author**: ircluzar\
**Page URL:**
> *jsRTC is a minimalist Real-Time Corruptor written in JavaScript. jsRTC works by creating a bookmark in your browser that contains the corruptor's code. It will pop a frame at the top-left corner of your browser, giving you control over the corruptor.*

**jsRTC for js-dosbox (dosgamesarchives.com edition)**
This version of jsRTC is made for a very particular website: dosgamesarchives.com\
that websites has a built-in dosbox emulator written in JavaScript to which jsRTC hooks to.\
**Page URL:**
# NES
# Corrupting the NES
## Introduction
The Nintendo Entertainment System (NES) is an 8-bit third-generation home video game console produced, released, and marketed by Nintendo.
{% hint style="info" %}
Recommended setup: Nightmare engine, Hellgenie, Freeze, Pipe
{% endhint %}
## Recommended Settings
The NES is a system with very little memory. It runs its programs directly from the ROM. The default settings in RTC are adequate for corrupting the system. If you add the System Bus or PRG ROM to the selected domains, it will unlock many more effects but makes rewind unusable for uncorrupting. You can get more results using 6502 Instruction Lists.
## Expected results
Due to its age, the NES will very often spit a lot of visual corruption. Games will freeze/crash when corrupted with a lot of intensity. However, the Bizhawk Nes cores are very stable and the NES very rarely cause Bizhawk itself to crash.
# NES Architechture
Nes Processor Architechture:
6502 Instruction set:
TIP: NOP is 0xEA
# NES Memory Domains
## QuickNes
* **RAM** (Rewindable) : Contains the console's main RAM
* **WRAM** (Rewindable) : Work RAM
* **CHR** (Rewindable) : Sprite memory
* **CIRAM (nametables)** (Rewindable) : Area of the PPU where the backgrounds are stored
* **PRG ROM** : Main Program ROM (From .nes file)
* **CHR VROM**: Main Character data (From .nes file)
* **PALRAM**: Palette RAM. Changes colors
* **OAM** (Rewindable) : Object attribute memory (sprite flags and locations)
* **System Bus**: Main memory bus where everything is mapped on
## NesHawk
* **RAM** (Rewindable) : Contains the console's main RAM
* **System Bus** : Main memory bus where everything is mapped on
* **PPU Bus** (Rewindable) : Sprite memory
* **CIRAM (nametables)** : Area of the PPU where the backgrounds are stored
* **OAM** (Rewindable) : Object attribute memory (sprite flags and locations)
* **Battery RAM** : Memory space for saving on cartridge
* **PRG ROM** : Main Program ROM (From .nes file)
* **CHR VROM** : Main Character data (From .nes file)
* **WRAM** : Work RAM
# SNES
# Corrupting the SNES
## Introduction
The Super Nintendo Entertainment System (SNES), also known as the Super NES or Super Nintendo. It has a dedicated SONY Audio Chip for music and SFX and has native image transformation capabilities such as Mode7 and later on got SuperFX through the use of expansion chips.
{% hint style="info" %}
Recommended setup: Nightmare engine, Hellegine, Freeze, Pipe
{% endhint %}
## Recommended Settings
The SNES is a somewhat similar to the NES but has more memory and visual features to mess with. It also runs its programs directly from the ROM. The default settings in RTC are adequate for corrupting the system. If you add the System Bus or CARTROM to the selected domains, it will unlock many more effects but makes rewind unusable for uncorrupting. You can get more results using 65C816 Instruction Lists.
## Expected results
The SNES tends to generate a lot of clown vomit like the NES. Similar effects to it are to be expected. However, the SNES is a bit more crashy than the NES and the BSNES core in Bizhawk can end up causing Bizhawk to crash.
# SNES Architechture
SNES Processor architechture:
65C816 Instruction set:
TIP: NOP is 0xEA42 (Second byte is optional)
SPC 700 documentation
# SNES Memory Domains
*Bizhawk-Vanguard exposes the following domains in RTC:*
## BSNES core
* **WRAM** (Rewindable) : The console's main memory
* **CARTROM** : Contains the ROM
* **VRAM** (Rewindable) : Video RAM, contains Tile Data and the Tile Map
* **OAM** (Rewindable) : Object Attribute Memory. "OAM contains all the properties of your sprites, such as the X coordinate, Y coordinate, tile #, vertical flip, etc (All will be listed shortly). OAM can only hold properties for up to 128 sprites at a time. Also, OAM addresses are a word in size." [*ref*](https://wiki.superfamicom.org/snes-sprites)
* **CGRAM** : Color Graphics Ram. This is where the color palette data is kept
* **APURAM** : Audio Processing Unit Ram. This is where audio data is kept
* **System Bus** : Domain used by the CPU for mapping the multiple areas that can be read from and written to
## Snes9x core
* **WRAM** (Rewindable) : The console's main memory
* **VRAM** (Rewindable) : Video RAM, contains Tile Data and the Tile Map
* **CARTROM** : Contains the ROM
## Documentation references
\
# SNES Audio Tinkering
The BSNES Core in Bizhawk can let you mess with the internals of the emulated SPC700 chip. Technically, all engine templates can give you interesting results when blasting to the **APURAM** domain alone.
There are a few particular effects that you can obtain via certain workflows. These effects, when obtained, can be sanitized and merged with other effects. Here's some examples:
**Vector engine with SPC700 lists** : Targeting the APURAM with \[SPC700]\_NOP as the Limiter and \[SPC700]\_GIGA as the Value is an easy way to get audio corruptions. These list can be found in the Package Downloader as SPC700\_Basic\_by\_BLiNX\_Person.
**Distortion Engine with Auto-Corrupt on APURAM** : The Distortion engine will always corrupt addresses using values that did previously exist in the past. This will cause things that previously happened to come back later. This will most likely desync the song tracks. Instrument changes may revert back to previous instruments.
**Pipe Engine on APURAM** : Pipe Engine on APURAM (only) with 100 Intensity and 100 Max Infinite Units is a good setup to mess up the audio rendering. Using the Glitch Harvester, you can easily Corrupt over and over to obtain particular music corruptions. The secret to this technique is that you can end up piping legal values from an address to another that cause the audio to mess up while staying stable.
# Sega Genesis
# Corrupting the Sega Genesis
by Brad Corrupts
## Introduction
The Sega Genesis/Megadrive (GEN, MD) is a 16-bit fourth-generation home video game console produced, released, and marketed by Sega.
{% hint style="info" %}
Recommended setup: Nightmare engine, Hellgenie, Freeze, Pipe
{% endhint %}
## Recommended Settings
The Genesis is a system with little memory. It runs its programs directly from the ROM. The default settings in RTC are adequate for corrupting the system. If you add the System Bus or Cart ROM to the selected domains, it will unlock many more effects but make rewind unusable for uncorrupting. If you plan on using Cart ROM, you can get more results using 68000 (68K) instruction Lists.
## Expected results
Due to its age, the Genesis will very often spit out a lot of visual corruption, with some corruptions experiencing what would be colloquially called "VDP vomit," consisting of completely random pixels filling the entire screen. Games will freeze/crash when corrupted with a lot of intensity. A custom exception handler will mitigate this a bit (see below). With that said, the Bizhawk Genesis core is very stable and the Genesis very rarely causes Bizhawk itself to crash, though it is theoretically possible.
## Exception Handler
The Sega Genesis uses a 68000 CPU, which unlike earlier CPUs of the era, actually catches common CPU errors and for most games will be programmed to go into an infinite loop, thus crashing the game. To circumvent this, Brad from the YouTube channel [Brad Corrupts](https://corrupt.wiki/systems/sega-genesis/www.youtube.com/@BradCorrupts) programmed a custom exception handler to attempt to recover when the CPU encounters an error. While it can help with game crashes, it is not foolproof. There are many other ways to crash or soft-lock the game without involving CPU exceptions. With that said, the exception handler IPS patch is provided below. Use your patching solution of choice to patch the ROM you want to corrupt.
{% file src="/files/4smHgYVHn2lMbUsKGIAY" %}
Exception handler IPS patch
{% endfile %}
# Genesis Architecture
by Brad Corrupts
[Genesis Architecture, a Practical Analysis](https://www.copetti.org/writings/consoles/mega-drive-genesis/)
[Genesis memory map](https://segaretro.org/Sega_Mega_Drive/Memory_map)
[Genesis ROM Header, including vector tables](http://www.hacking-cult.org/?r/18/21)
## CPU
The Sega Genesis uses a [Motorola 68000](https://en.wikipedia.org/wiki/Motorola_68000) as its main processor.
[M68000 Microprocessor User's Manual](https://www.nxp.com/docs/en/data-sheet/M68000UM.pdf)
[Motorola 68000 CPU Opcode Table](http://goldencrystal.free.fr/M68kOpcodes-v2.3.pdf) (Good reference for creating instruction lists)
[68000 ASM-to-Hex Code Reference](https://info.sonicretro.org/SCHG:68000_ASM-to-Hex_Code_Reference) (Good reference for hacking machine code by hand)
## APU
The Sega Genesis uses a [Zilog Z80](https://en.wikipedia.org/wiki/Motorola_68000) as a coprocessor, mainly for driving the [Yamaha YM2612](https://en.wikipedia.org/wiki/Yamaha_YM2612) and [Texas Instruments SN76489](https://en.wikipedia.org/wiki/Texas_Instruments_SN76489).
[Genesis Z80 memory map (among other technical information)](https://md.railgun.works/index.php?title=Zilog_Z80#Memory_Map)
[Z80 Microprocessor User's Manual](https://www.zilog.com/docs/z80/UM0080.pdf)
[Z80 Opcode Tables](https://clrhome.org/table/) (Good reference for creating instruction lists)
[Yamaha YM2612 technical documentation](https://www.smspower.org/maxim/Documents/YM2612)
[Texas Instruments SN76489 technical documentation](https://retrocdn.net/images/e/e0/SN76489_Application_Manual.pdf)
## GPU
The Sega Genesis uses a proprietary Yamaha YM7101 Visual Display Processor (VDP).
[Sega Genesis Software Manual](https://segaretro.org/images/a/a2/Genesis_Software_Manual.pdf) (See section II)
# Genesis Memory Domains
by Brad Corrupts
*Bizhawk-Vanguard exposes the following domains in RTC:*
## Genplus-gx
* **68K RAM (Rewindable):** Genesis main RAM region run by the 68K. 64KB large on a 16-bit bus. Main memory containing variables, data structures, etc. Rarely, if ever, contains actual code.
* **Z80 RAM (Rewindable):** SPU work ram run by the Z80. 8KB large on an 8-bit bus. Sound engine and data are stored here. Note that some games use the 68K for their sound engine (Sonic 1 being a notable example).
* **MD CART:** The ROM file.
* **BOOT ROM:** The BIOS for the Sega/Mega CD. Don't touch this, unless you're doing BIOS corruptions.
* **CRAM (Rewindable):** Palette ram. 128 bytes. (Not recommended. Some games refresh CRAM every frame. Also looks to be broken in this build.)
* **VSRAM (Rewindable):** Vertical Scroll RAM. 128 bytes. (Not recommended. Only affects vertical scroll position in the game.)
* **VRAM (Rewindable):** Video ram. 96KB. Holds the actual data drawn to the screen.
* **System Bus:** Theoretically allows access to everything that's mapped as it facilitates the communication between pieces of hardware. In execution, not everything mapped will be visible through this domain. It's a matter of whether it was properly exposed or not. Corrupt something here and it'll be reflected in the domains derived from it.
* `0x000000 - 0x3FFFFF`- 4MB Cartridge ROM (MD Cart)
* `0x400000 - 0x7FFFFF`- Reserved (used by the Sega CD and 32x)
* `0x800000 - 0x9FFFFF`- Reserved (used by the 32x?)
* `0xA00000 - 0xA0FFFF`- Z80 addressing space (8K RAM mapped to x0000-0x1FFF)
* `0xA10000 - 0xA10001`- Version register (read-only word-long)
* `0xA10002 - 0xA1001F`- I/O Registers
* `0xA11000`- Memory mode register
* `0xA11100 - 0xA11101`- Z80 bus request
* `0xA11200 - 0xA11201`- Z80 reset
* `0xA14000 - 0xA14003`- TMSS register
* `0xC00000 - 0xC00009`- VDP registers
* `0xFF0000 - 0xFFFFFF`- 64KB 68K RAM **Sega CD Changes**
* `0x000000 0x01FFFF`- BIOS ROM
* `0x020000 0x03FFFF`- "Program RAM" Bank Access
* `0x200000 0x23FFFF`- "WORD RAM"
* `0xA12000 0xA120XX`- "Gate Array"
* `0xFFFD00 0xFFFDFF`- Interrupt/Exception vectors
* [Source](https://en.wikibooks.org/wiki/Genesis_Programming/68K_Memory_map/)
# Cracking the Checksum Routine
by Brad Corrupts
## Introduction
The vast majority of games on the Sega Genesis/Megadrive utilize a routine that the game initializes that performs a simple checksum on its ROM contents to ensure basic ROM integrity for proper operation. This was a simple method to ensure that the cartridge was making a solid connection with the console (unlike systems such as the NES where you could get a scrambled game). If the checksum fails, the game refuses to boot, usually displaying a red screen. This was why back in the day, Genesis Game Genie codes usually required you to put in a master code to circumvent this.
While this shouldn't be necessary when using most of RTC's functions, this is essential if you're using filestub or an alternative ROM corrupting solution, not to mention running your corruptions on real hardware. The following guide should walk you through how to properly crack the routine.
{% hint style="success" %}
**Quick heads up!** Some games never check the checksum, so if you corrupt the ROM several times and you don't get a blank (red, blue, etc) screen, then you don't need to worry about it.
{% endhint %}
## Cracking the Routine
### Method 1: Using an Existing Game Genie Code (Easy)
{% hint style="success" %}
**Good news everyone!** If you have a Master code, this is dead simple, just follow the guide below, and you're golden.
{% endhint %}
Back in 1992, Galoob came out with the Game Genie for the Sega Genesis. Due to how the Game Genie worked, intercepting reads from ROM and returning a different value meant that it would break any checksum routine that was run. To circumvent this, affected games needed a "master code" for any other code to work. All this master code did was to circumvent the checksum, meaning the Game Genie developers did all the hard work for us. However, we still need to decode the Game Genie code and patch it in the ROM. To do this, we are going to use the ROM hacking tool Patchinator. For this example, we are going to use the game Wardner.
Download link to : [Patchinator V10](https://cdn.discordapp.com/attachments/1137901970087227462/1220465815464185946/PatchinatorV10.zip?ex=660f0a5d\&is=65fc955d\&hm=3777698839a12903a4d8a1f3a9565838cbbaa3f19ff2cdf89bfd22e232b972de&)
The master code for Wardner is AJBT-AA4Y. So, the first step is to open Patchinator and open the ROM in step 1 at the top. Then, all you have to do is paste the code in step 2, and then click on "patch codes into your ROM." If you want the program to make a new ROM, thereby preserving the original copy, then make sure to check "create new ROM when patching." It should look something like this:

Congratulations, your ROM is ready for file corrupting!
### Method 2: Using a Debugger to Crack the Routine Yourself (Intermediate)
{% hint style="warning" %}
**Heads up!** The following guides require beginner to intermediate ASM skills. Keep that in mind and proceed with caution.
{% endhint %}
{% hint style="info" %}
**Tip:** Using Bizhawk for debugging is not recommended. Use an emulator with a functional debugger, such as Exodus or Regen.
{% endhint %}
For this tutorial, we are going to pick a Genesis game at random, which will be Rambo III.
The best way to find the checksum routine is to see when it reads from offset 0x018E, which is the internal checksum for the ROM.
For this example, we're going to be using [Exodus](https://www.exodusemulator.com/) as the emulator. Once you have the ROM loaded, you're going to want to go to debug, then Mega Drive, then 68000, then watchpoints. From there, you're going to set a watchpoint for the address 0x18E. (See below)

Now, reset the game (and make sure to run it if it's paused!) and wait for the breakpoint to trigger. If it doesn't, it's likely due to one of two reasons.
* The game doesn't give a shit about the checksum, so you should be able to corrupt the game to your heart's content.
* The game is quite frankly evil and it figured it's better to use its *own* checksum handling routine (See Method 3).
If successful, you're going to see a screen like this. What we are looking for is a compare instruction (CMP) followed by a branch instruction (BEQ/BNE).

Now, these two instructions are often seen hand in hand. The **CMP** instruction compares 2 values together. This is followed by a **branch** instruction that tells the CPU to jump to a new location, depending on the result of the comparison. This is essentially the foundation of conditional logic, which is what is needed for CPUs to essentially make simple decisions, based on various inputs. Otherwise, they'd be just glorified linear calculators. (other operations can affect the behavior of branch instructions, but that's a topic for another time)
In this example, we can see that it's using a **BEQ** instruction, which means **B**ranch on **Eq**ual. Essentially, this means that if the checksums match, jump to this location, otherwise continue. We want to software to always think that the checksums match, so the best way to do that in this case would be to make the instruction **Br**anch **A**lways, or change **BEQ** to **BRA**. Luckily for us, this is a very simple edit, by looking at the Sonic Retro's [ASM-to-Hex\_Code\_Reference](https://info.sonicretro.org/SCHG:68000_ASM-to-Hex_Code_Reference), we can see that the BEQ instruction starts with the byte 0x67. If we change it to 0x60 (BRA) in your hex editor of choice, it'll always branch ahead, regardless of the comparison!
But what if it uses a **B**ranch if **N**ot **E**qual instruction? Well, that would mean that it would branch if the checksum **fails**. Since there isn't a "branch never" instruction, because that would be rather useless, we need to take a slightly different approach. This will vary based on how long the instruction is.
**16-bit branch:** This is a branch where the instruction bytecode will look something like this: `66 00 12 34`. For this example, you would replace `12 34` with `00 02`. This will negate the branch, telling it to essentially jump to the following instruction regardless of the condition. You can find an example of this in the video shown below:
{% embed url="" %}
Brad walks you through step by step on how to crack the checksum routine in a Genesis game. Source: [Brad Corrupts](https://www.youtube.com/@BradCorrupts)
{% endembed %}
**8-bit branch:** This is a branch where the instruction bytecode will look something like this: `66 12`. Due to how the 68000 encodes instructions, we can't negate the branch like how we did it above. This time, we're going to replace it with **N**o **OP**eration, which is an operation that does literally nothing. This is equivalent to commenting out a line of code. Using the [aforementioned guide above](https://info.sonicretro.org/SCHG:68000_ASM-to-Hex_Code_Reference), we can see that the NOP opcode is `4E 71`, so that is what you would write **over** the branch. Once the branch has been overwritten with NOP, then you're good to go, have fun.
### Method 3: Using a Debugger to Crack an Evil, Custom-Made, Checksum Routine Yourself (Advanced)
Sometimes, you'll encounter a game that decides to be a rebel and says "Fuck the system, I'll use my own damn checksum routine!" This is often done by a well-known and *very well respected* developer, Electronic Arts.
{% hint style="info" %}
**Fun Fact:** This type of routine was discovered as the editor was writing this guide. Supposedly, he managed to luck out for your benefit. Cheers!
{% endhint %}
{% hint style="info" %}
**Fun Fact #2:** Since its inception, EA has always been the pioneer of trying creative ideas in the gaming industry in the worst ways possible. This trend continues to this day.
{% endhint %}
{% hint style="warning" %}
**Caution:** There will be a lot less hand-holding in this guide than the others. Intermediate debugging skills are essential.
{% endhint %}
For this example, we will be using NHL Hockey. For this one, open up Exodus (which we'll be using for this example, feel free to use whatever competent debugging tools suit you best), and open up the debugger and watchpoint windows. From there, pause emulation and create a read watchpoint for somewhere in the middle of the ROM, a place that is most likely not going to be accessed by any other initialization routine (for this game, somewhere around 0x40000 is fine). Now, reset the game, then run it. Almost immediately, it should break and you should see the following down below, which is stored at the very end of ROM, oddly enough.
```
MOVEQ #0, D0 ;Initialization
SUBA.l A0, A0
MOVE.l #$0001FFA3, D1 ;Length of ROM * 4.
loc_0007FE96:
CMPA.w #$018C, A0 ;Check to see if it's about to read the actual official checksum, because lol.
BNE.b loc_0007FEA0 ;If it does, skip check/adding it, otherwise continue (probably to make its own checksum calculation simpler).
ADDQ.w #4, A0
BRA.b loc_0007FEA2
```
What we care about is this section of code down below. Here, you can see it adds the ROM contents 32 bits at a time, then when it's done, it does a compare with its own *special* 32-bit checksum. NOPing the branch afterward will crack the routine.
```
loc_0007FEA0:
ADD.l (A0)+, D0 ;Add the next part of ROM to the data check register, it's gonna break here.
loc_0007FEA2:
SUBQ.l #1, D1 ;Decrement ROM length.
BGT.b loc_0007FE96 ;If greater than 0, keep looping.
CMPI.l #$9BB2FE9B, D0 ;What, EA? 16-bit checksums not good enough for you? I think you're overcompensating for something.
BNE.b loc_0007FEB0 ;This is what we want. this is a BNE.b (8-bit), so you want to replace this with a NOP. (This is at offset 0x07FEAC)
RTS ;If it passes, however, return.
```
However, if you let it fail, it decides to be fancy and make a nice horizontal line pattern, because fuck it, why not? (Did I mention that EA was special?)
```
loc_0007FEB0:
MOVEA.l #$00C00004, A4 ;Start rendering the kill screen (they decided to go fancy with it).
MOVE.w #$8F02, (A4)
MOVE.w #$8004, (A4)
MOVE.w #$8700, (A4)
MOVE.w #$8144, (A4)
MOVE.w #$C000, (A4)
MOVE.w #$003F, D1 ;Init loop
loc_0007FECE:
MOVE.w #$000E, $00C00000 ;Short loop to make the "lines."
DBF D1, loc_0007FECE
loc_0007FEDA:
BRA.b loc_0007FEDA ;Infinite loop, crashing the game
```
In a nutshell, that's how you would crack an EA game. Just note that there could be other developers that have their own routines, but the method for finding them should be more or less the same.
# N64
# Corrupting the N64
## Introduction
The Nintendo 64 is a home video game console developed and marketed by Nintendo. In its own generation, it was more powerful than the PS1 but lacked the Optical disc storage space for games. Unlike the PS1, the Nintendo 64 was compliant with IEEE754 floats.
{% hint style="info" %}
Recommended setup: Vector engine on RAM domain
Startup vector suggestions:\
**Limiter**: One, **Value**: Two\
**Limiter**: Extended, **Value**: Extended
{% endhint %}
## Recommended Settings
The N64 is a complete departure from what you'd see in more classic systems like NES, SNES, Gameboy, Genesis. The entire system relies on a pool of either 4mb or 8mb of Ram which is accessed by the whole machine. This is called the RDRAM in the memory domains and it is the best domain to target. The ROM can also be corrupted with the memory domains but it is most of the time compressed data unless you're using a decompressed rom. You can get more results using MIPS Instruction Lists.
## Expected results
The N64 being an early 3D console doesn't make extensive use of shaders and physics. Due to that, the corruptions will most likely affect models. Disapearing and stretching tris is to be expected.
## Improving emulator stability
Bizhawk's latest builds do not have an N64 core with a dynamic recompiler. This makes corruptions less stable than its earlier versions. The RTC Launcher has a compatiblity build called "Bizhawk Legacy" that exclusively improves stability for N64.
It's worth noting that corruptions found with that version can sometimes be moved to a newer version of Bizhawk after they've been sanitized.
##
# N64 Architecture
The Nintendo 64 is a home console that was released by Nintendo in 1996. It has a 64-bit NEC VR4300 CPU running at 93.75 MHz, a 64-bit Reality Coprocessor running at 62.5 MHz with 100 MFLOPS. The GPU is actually 2 processors in one, the Reality Display Processor and the Reality Signal Processor can render 3D graphics with texture mapping, lighting and anti-aliasing, and 4 MB of RDRAM (expandable to 8 MB with the Expansion Pak). It uses cartridges as its primary storage format, which have faster loading times but lower capacity than CDs.
N64 documentation:
\
# N64 Memory Domains
{% hint style="info" %}
The Nintendo 64's architechture supports IEEE754 Floats and is natively compatible with the Vector Engine.
{% endhint %}
*Bizhawk-Vanguard exposes the following domains in RTC:*
## Mupen64Plus core
* **RDRAM (Rewindable) :** This is the console's main RAM. It will be either 4mb or 8mb depending if the emulating N64 is using an Expansion Pack or not.
* **ROM :** This is the game's rom as perceived by the emulator.
* **MI Interface** : The registers for the CPU itself. Probably avoid this
* **PI Register :** Peripheral interface registers. Controllers and stuff
* **SI Register :** Serial Interface registers. Registers for use by anything that uses the N64's serial port
* **VI Register :** The registers for the video interface. Contains data related to drawing the current frame. Not really gonna get anything out of this besides maybe enabling some filters (such as anti-ailiasing)
* **RI Register :**
* **AI Register :** The registers for the sound chip. Doesn't actually contain the data for the music, just points to where the music is in rdram for the hardware
* **EEPROM :**
* **System Bus :**
# N64 Basic/Advanced ROM Corruption
{% hint style="warning" %}
This documentation was written with classic corruptors such as Vinesauce ROM Corruptor. That information is however still valid for corrupting the ROM domain in RTC.
{% endhint %}
## Index
* [Index](/systems/n64/basic-advanced-rom-corruption#index)
* [N64 Corruption with the Vinesauce ROM Corruptor](/systems/n64/basic-advanced-rom-corruption#n64-corruption-with-the-vinesauce-rom-corruptor)
* [Basis](/systems/n64/basic-advanced-rom-corruption#basis)
* [Setting the Values](/systems/n64/basic-advanced-rom-corruption#setting-the-values)
* [Start Byte/End Byte](/systems/n64/basic-advanced-rom-corruption#start-byteend-byte)
* [Corrupt Every](/systems/n64/basic-advanced-rom-corruption#corrupt-every)
* [Add/Shift](/systems/n64/basic-advanced-rom-corruption#addshift)
* [Replace](/systems/n64/basic-advanced-rom-corruption#replace)
* [Special Cases](/systems/n64/basic-advanced-rom-corruption#special-cases)
* [Save States](/systems/n64/basic-advanced-rom-corruption#save-states)
* [Decompressed ROM Corruptions with VSRC](/systems/n64/basic-advanced-rom-corruption#decompressed-rom-corruptions-with-vsrc)
* [Basis of Decompressed Corruptions](/systems/n64/basic-advanced-rom-corruption#basis-of-decompressed-corruptions)
* [Setting Up](/systems/n64/basic-advanced-rom-corruption#setting-up)
* [Method](/systems/n64/basic-advanced-rom-corruption#method)
* [Save States](/systems/n64/basic-advanced-rom-corruption#save-states)
* [References](/systems/n64/basic-advanced-rom-corruption#references)
* [Example Corruptions](/systems/n64/basic-advanced-rom-corruption#example-corruptions)
* [Video Examples](/systems/n64/basic-advanced-rom-corruption#video-examples)
## N64 Corruption with the Vinesauce ROM Corruptor
**Guide Author: Chris Byrne (Weinerless Steve)**
This guide is currently based on [version 1.2.2](https://web.archive.org/web/20231203015643/http://corruptedbytes.com/the-vinesauce-rom-corruptor/) of the Vinesauce ROM Corruptor, which is what is included with RTC and [version 2.3.2](http://www.pj64-emu.com/download/project64-latest) of Project64. Instructions may differ slightly for older versions of either. These instructions will also more or less work for VineCorrupt.
### Basis
In standard N64 corruption with the Vinesauce ROM Corruptor, our aim is to corrupt only the areas that are being loaded in real time. This allows us to specifically target things like polygon and model movement and music. Additionally, it prevents crashes by avoiding having the ROM access corrupted data in loading screens, and allows us to bypass the amount of finesse required to target specific areas of an N64 ROM by blasting a high volume of corruption over the areas.
### Setting the Values
An effective way to learn corruption is to look at an example and interpret why the values are what they are, so that will be our starting point. For a point of reference, a standard corruption of Elmo’s Letter Adventure is given below:

This screenshot is of VSRC, but none of these values would change with VSRC classic.
#### Start Byte/End Byte
A good way to start is to break down every value given one by one. The start byte should be above roughly 102000 no matter what N64 game you're corrupting, as anything below will cause a permanent loop error because you're corrupting crucial data in the ROM. The best way to find values that work is the set the end byte to the end of the rom and the start byte to around 102000, and if you're getting errors, bring the values of the start and end byte closer together (A good way to go about this is to use intervals of 100000 just to make things move quicker, but you might want to try increasing the start byte by just a bit at first) until you get a working corruption. If you're not seeing any sort of corruption now, move the start byte closer to the beginning or vice versa until you find the largest value that works. It is possible to corrupt a specific section of the game, like the corrupting Mario's face in the intro of Super Mario 64 by using a very small range and not needing save states. Unless you know what you’re doing, you’re likely to get nowhere attempting to be specific in what zones of the ROM you target.
#### Corrupt Every
In most cases, you'll want the "corrupt every" value between about 1 and 50. These values are so low because everything crucial to the game working is already load uncorrupted by the save state. As you probably already know, going closer to 1 will give more severe corruptions but will crash more often and vice versa. You might be tempted to try corrupting every few hundredth byte to try and get load screens to work, but you'll end up with little visible corruption and practically no results. The best place to start when you're first corrupting a ROM is around 25. There are special cases, such as Ocarina of Time, Goldeneye and Mario Party which corrupt differently than the standard ROM and will be covered later.
#### Add/Shift
Except with some special cases, the "Add to \_\_\_\_\_ byte" and "Shift Right \_\_\_\_\_ bytes" values cause pseudo-random changes in the corruptions, meaning that the parts of the ROM you’re attacking aren’t specific enough variables where you can control with any degree of accuracy what the corruption will look like based on what number you use. In a game like Ocarina of Time, this can control how far above or below the ground the character is depending on how high or low the Add/Shift number is, and in a game like Mario Party, the Add/Shift value controls what text characters replace corrupted text.
#### Replace
This option is not commonly used in N64 corruption, as replace is usually used when you want to be precise in what you’re corrupting. Because N64 corruption consists of blasting the whole ROM with little specificity, replace generally isn’t what you want.
#### Special Cases
There are a couple of special cases, and these are text corruption and what I call "object corruption". Corrupting text, which is when some text characters are replaced with other text characters or garbage text, is very similar except that you'll only see results with "corrupt every" values between 1 and about 13. Object corruption is different in that in any "corrupt every" value above 1-2, you'll get a jittery character that looks the same every time and gets repetitive quickly. Corrupting every 1-2 bytes will freeze often the character in a distorted position, creating much more interesting corruption especially when combined with the corrupted camera tilt of games like Perfect Dark and Goldeneye, and the real-time texture corruptions of games like Ocarina Of Time, which become more and more obvious the lower the "corrupt every" value is because they character is not rapidly moving and the texture corruptions are more likely to happen. You can tell whether you have a special case or not by how the game reacts when corrupted via the standard method. If the character models are stretched in weird ways but this stretching is fairly consistent, it's a normal N64 corruption. If the polygons of the character models are stretched and corrupted, it's also a normal corruption. If the character model's contortions are changing rapidly, it's object corruption, and if the text is garbled but everything else is normal (ignoring music) then you have a text corruption.
### Save States
When making the save states, you'll want to turn the corruption off and load the ROM in an unchanged state. You can make these in cutscenes or gameplay, as long as either is not pre-rendered. Avoid making them before load screens, or on menu screens. It's best to experiment to see what save states work well and what save states don't really show much corruption and go from there. To make save states, you’ll have to create them manually in your emulator of choice or use the Glitch Harvester, which is covered [elsewhere](/rtcv/rtc) in this wiki. Unless you've managed to find a value range where the game doesn't crash at or near startup, you'll have to load these states every single time. Keep in mind that you'll sometimes have to interact with an NPC or activate some sort of trigger before you see the effects of a corruption.
## Decompressed ROM Corruptions with VSRC

### Basis of Decompressed Corruptions
Corrupting a basic ROM by blasting it with corruption and hitting only the parts that are loading in real time is not the only way to corrupt N64 games. With a decompressed ROM, you can target specific areas of the ROM, making a larger variety of corruptions possible and eliminating the need for save states, although they can still be helpful. A decompressed ROM is what it sounds like: it is an N64 ROM with the compression removed, making the ROM larger and easier to corrupt even though it still essentially runs the same.
### Setting Up
There are ROM decompression tools for 3 N64 games: Super Mario 64, Majora's Mask, and Ocarina of time. The recommended tools are: [SM64 ROM extender](https://www.smwcentral.net/?p=section\&a=details\&id=4812) by VL-Tone and [ZDEC](http://www.mediafire.com/file/3v3v94llaqaccaj/ZDEC.rar), which is for Ocarina of Time and Majora’s Mask and also created by VL-Tone. There is another Super Mario 64 decompression tool with more options called [sm64extend](http://origami64.net/showthread.php?tid=97) which is not recommended because it creates larger extended ROMs then the ones used to make the example corruptions. You can circumvent this by specifying the size that you want your extended ROM to be, but unless you want to mess around with the more technical options of sm64extend this is an unnecessary extra step. If you intend to follow with the N64 corruption examples given, you need the right version of Super Mario 64, which can be found denoted as Super Mario 64 (U) \[!]. If you're not sure you have the right ROM, try a corruption and see if it works as intended. The SM64 ROM should be about 24 MB if this process was done correctly. Example corruptions for each of these games and a text file with a rough mapping of the SM64 ranges can be found below.
To run these with Project64, you need to run the decompressed ROM you want to corrupt, and go into Options>Settings>Config (ROM name) and change the memory size to 8MB. Otherwise, you'll just get a black screen because the emulator doesn't have enough memory to map in. However, if you are using RTC and Bizhawk this step is unnecessary.
### Method
Decompression of ROMs spaces out the ROM in question, making it much easier to access a specific part of a ROM that you are trying to reach as you can deal with greater ranges and don’t have to work around compression which can make targeting specific areas far less effective. The best results can be found by looking to find the parts of the ROM that control textures, models, or anything else desired, and isolate this part to get the result you want with as few crashes as possible. A good way to go about this to look for specific parts in blocks of 100,000 at a time (such as corrupting from 900K to 1M) and widening or shortening the range to get better results. If the part you’re trying to corrupt is toward the end of the ROM, it’s not a bad idea to just corrupt to the end of the ROM as this can cause some corruptions to behave differently but is unlikely to cause crashes. This part of the ROM does not create much corruption on it’s own, but can modify the effects of existing corruptions in earlier parts of the ROM. You'll want to have the "corrupt every" higher with these, with the 75-120 range being optimal in most cases. Depending on what part I'm trying to corrupt, I've gone as low as 45 or as high as 160. It all depends on what aspect of the ROM you are trying to corrupt, and the best way to figure out the value you want is trial and error like everything else with N64 corruption.
Along with the decompressed corruptions I've included a small text file with the ROMs and examples that show some of my findings for ranges in SM64 decompressed. This may help give an idea of how ROMs work and help with corrupting other decompressed ROMs as well.
### Save States
Unlike the model corruptions, which we've been doing earlier in the guide, most of these are activated by loading screens. If you're trying to load a texture scrambling corruption, for instance, you'd be best off using a save state that takes you to the screen before the place you want to see corrupted. You're not really aiming for every single load screen to work, but you want enough where you're able to see the results of your corruption without it being too unstable. Music corruptions can be an exception to this rule, but this is a rule you usually need to follow.
While save states aren’t required, it’s still helpful to make them anyway. Whether a load screen will crash the game or not can be inconsistent within a single corruption. Therefore, you want to make multiple save states before and after load screens to make sure you don’t miss any good results. For example, if I was corrupting Super Mario 64 I would put one at the menu screen in case the game crashed starting up, one outside the castle, inside any major section of the castle, and a couple in the levels themselves. I would also have a save with no stars so I could see what the intro looked like corrupted, and a save with stars so I could see as many individual levels as I wanted corrupted. If you want quick access to all the levels in a game, you can always use Gameshark codes to unlock everything and then make your save states from there.
## References
This wiki article is adapted from the [N64 Corruption Guide 1.1.5](https://web.archive.org/web/20160519231533/http://vinesauce.com:80/vinetalk/viewtopic.php?f=34\&t=98). Credit goes to Nephkin for finding the range for the SM64 corruptions of Mario’s face and [SmellyFeetYouHave](https://www.youtube.com/user/smellyfeetyouhave) for the idea of the decompressed ROM corruptions. The videos below were made with [Weinerless Steve](https://www.youtube.com/user/Sevelix)'s corruptions, and [Vinesauce](https://www.youtube.com/user/vinesauce)'s commentating and editing.
## Example Corruptions
(These corruptions were found by Weinerless Steve and many of these corruptions are the same ones found in Vinesauce’s videos as Steve submitted these corruptions to him. If you plan on using these corruptions without modification in your own videos, please credit Weinerless Steve. If you choose to find your own using these as a starting point, no credit is necessary)
[Decompressed ROM Corruptions](http://www.dropbox.com/sh/0x8n01kqwmmlel6/HyptNZP3Bc)
[Elmo's Letter Adventure](https://www.dropbox.com/sh/idnk0nzx0hdktf0/DTt5Vezfzn)
[Perfect Dark](https://www.dropbox.com/sh/8210223azlyie0b/WYb6WNMWYf)
[Super Mario 64 Face Corruptions](https://www.dropbox.com/sh/lfaxy26nvkk1sk9/Vji8jfRe5Z)
[Super Mario 64 Movement Corruptions](https://www.dropbox.com/sh/lagac9vj7xw4lhu/spiDPotgye)
[Donkey Kong 64](https://www.dropbox.com/sh/o0n337gqt5mjqs9/J6MtMENySV)
[Legend of Zelda: Ocarina Of Time](https://www.dropbox.com/sh/jl147aectlhvvoo/UCSfeVXf-_)
## Video Examples
{% embed url="" %}
One of the more popular corruption videos and a good example of object corruption.
{% embed url="" %}
The first iteration of decompressed ROM corruptions and one of the most well known corruption videos to date.
# N64 Expert ROM Corruption
{% hint style="warning" %}
This documentation was written with classic corruptors such as Vinesauce ROM Corruptor. That information is however still valid for corrupting the ROM domain in RTC.
{% endhint %}
## Index
* [Index](/systems/n64/expert-rom-corruption#index)
* [Super Mario 64](/systems/n64/expert-rom-corruption#super-mario-64)
* [Using Quad64](/systems/n64/expert-rom-corruption#using-quad64)
* [3D Objects](/systems/n64/expert-rom-corruption#3d-objects)
* [Macro 3D Objects](/systems/n64/expert-rom-corruption#macro-3d-objects)
* [Ocarina of Time/Majora's Mask](/systems/n64/expert-rom-corruption#ocarina-of-timemajoras-mask)
* [Other Games](/systems/n64/expert-rom-corruption#other-games)
* [References](/systems/n64/expert-rom-corruption#references)
* [Video Examples](/systems/n64/expert-rom-corruption#video-examples)
For the average person, the best way to corrupt a ROM beyond what you can do with traditional N64 corruption is to do decompressed ROM corruptions with aggregates, and guess and check to find the best zones. However, if you are feeling more comfortable, there are more precise methods you can try. For the three games listed below, there are tools you can use to pinpoint the exact ranges over which you want to corrupt. These methods involve finding precise addresses of values in an N64 game, are targeting those precise ranges at a high intensity.
## Super Mario 64
To find exact ranges for Super Mario 64, you can use a map editing program like [Quad64](https://www.smwcentral.net/?p=viewthread\&t=90510) by Davideesk. Quad64 is an open source version of [Toad's Tool 64](http://qubedstudios.rustedlogic.net/ToadsTool64.htm) by Qubed Studios with cleaner UI.

The idea here is that instead of making guesses at where different values lie and then using trial and error to get good corruptions, we can look up the values we want in this tool and be more precise. Unfortunately, this tool currently only holds the values for the game's objects, but we can still get some strange results like model replacement and modified object behavior.
### Using Quad64
Upon opening the program, it will ask you to supply a ROM from which it will pull the values from. Obviously, this ROM should be the same one you intend to corrupt. I recommend using a decompressed ROM as corruption results will be more consistent when you don't have to deal with compression. I personally use a 24MB ROM, but any size decompression should be fine.
Once a ROM has been selected. you'll see a window exactly like the one above with four tabs at the top and four object types to choose from. You'll want to use the Level tab to switch between levels. If a level has more than one area to it, you can switch between them with "Select Area". The four types of objects you'll see are 3D Objects, Macro 3D Objects, Special 3D Objects, and Warps. 3D Objects and Macro 3D objects are what we plan on corrupting, and will be covered in their own sections. Special Objects are usually trees (and Bowser, for some reason) and corrupting them will only change their X and Y values so we generally don't touch them. Warps just teleport Mario to different places when they are triggered, there is little point in corrupting them.
If you open up any of these categories and click on an object, you'll get several values corresponding to that object. For our purposes, none of these values are important except for the address. The address (after the 0x) is the first hexadecimal value corresponding to the addresses associated with that object. For the last address corresponding to that object, go to the next object and subtract from it's address by one. 3D Objects will almost always be 24 bytes in size, and Macro 3D objects will almost always be 10.
### 3D Objects
3D objects tend to be highly unstable, and many values associated with 3D objects will crash the game when altered. Corrupting over the range of 3D objects will invariably cause the game to crash, and corrupting over the range with low intensity will create minimal results. Because of this, it is recommended that you try corrupting one object at a time, and combine corruptions using the Queue tool in VSRC or the merge tool in RTC. The best way to corrupt only one object is to corrupt over it's entire range with an intensity of 1 so that you hit every byte. Even when corrupting one object however, the game is likely to crash. You may need to experiment with different start bytes or increase the intensity by a little bit to get them to work. You'll get the best results by using the "Add to Byte" option and keeping the addition value small so that the object doesn't disappear or change too greatly in it's x or y value.
Another good method to make 3D Object corruptions work is to corrupt over the entire range of the object using the VSRC plugin for RTC and the glitch harvester, and then sanitize the corruption using the Random Disable 50% tool or target specific values to see what they do. This way, you can target specific behaviors while avoiding crashes. An address that tends to be useful is for objects such as enemies or bosses is the first or third address corresponds to that object's model. Look for the value in the range of about 80-110. Changing that value to 1 will replace the model of that object with that of Mario, and other values will replace it with the models of other enemies and objects depending on what pool of enemies you're pulling from. The pool of enemies depends on what cluster of levels you're currently in. Most replacement values will just make the enemy become invisible but 100, 102, 103, 104, 107, and 108 are values that often work. Doing this will make the model of on object switch with that of another, causing some bizarre behavior.
### Macro 3D Objects
Macro 3D objects are much more stable than 3D objects, but they have less variables associated with them. They are commonly objects such as groups of coins and common enemies. Because they are so much more stable, you can corrupt over the entire range of Macro 3D objects for that level with an intensity of 1 and usually not have to worry about a crash. If this doesn't work, change the intensity to 2. If this still doesn't work, keep the intensity at 2 and increase the start byte by 1. You can achieve a similar effect to this by using the Random Disable 50% tool in RTC's blast editor. To find the range over which Macro 3D Objects preside, set your start byte to the address of the first listed object and the end byte to the address of the last listed object plus 9. Again, you'll get the best results by using the "Add to Byte" option and keeping the addition value small. 1 and 2 tend to be the best values to use but you should experiment.
A lot of subtle things will change around the level with this kind of corruption, so you'll want to explore the level after you corrupt. Sometimes, Macro 3D corruption will also cause objects to use the wrong model. This is because you spawned an enemy or object which is not usually found in the level instead of the proper one. Getting too close to these objects or interacting with them will sometimes crash the game, so keep that in mind.
## Ocarina of Time/Majora's Mask
For Ocarina of Time and Majora's Mask there does not exist a level editor that reveals addresses of specific objects in the ROM. However, Ocarina of Time and Majora's Mask both have decompressed ROMs. For these ROMs, extensive ROM maps exists which give the addresses of objects and other entities in the ROM in table form. There is one for [Ocarina Of Time](https://wiki.cloudmodding.com/oot/File_List/NTSC_1.0), as well as documentation for Majora's Mask, which is split up into a [Actor List](https://wiki.cloudmodding.com/mm/Actor_List) and an [Object List](https://wiki.cloudmodding.com/mm/Object_List_\(U\)). To follow along with either of these, you'll need to decompress your ROM. The tool of choice to decompress either Ocarina of Time or Majora's Mask is [ZDEC](http://www.mediafire.com/file/3v3v94llaqaccaj/ZDEC.rar) by VL-Tone.
Corrupting using these addresses will be similar to the process used for SM64 targeted corruption, so it's recommended that you read that section first. Like 3D objects, Actors have more pronounced and diverse corruption but are less stable. Objects are like Macro 3D objects in the same way: they're more stable but less pronounced. The File List for Ocarina of Time also gives the addresses for various other files such as textures and scenes, which are also worth experimenting with. Actors should be corrupted one at a time with similar intensity to that of 3D objects, Objects should be corrupted en masse with a corrupt every of one or two, and texture corruptions should be done in large groups but with a much larger corrupt every, similar to that of traditional decompressed corruptions. Care should be taken so that the objects or actors you corrupt are all in the area that you are actually corrupting so that you can see your results.
This section needs to be researched, and should be expanded upon in the future, but this should serve as a good basic guideline of expert corruption of Ocarina of Time and Majora's Mask.
## Other Games
Decompressed ROMs don't currently exist for N64 ROMs other than Super Mario 64, Ocarina of Time, and Majora's Mask. However, basic ROM maps exist for many games. To find them, try searching "(game title) ROM map" and seeing what you can find. For example, this is a basic [Banjo Kazooie ROM map](http://www.therwp.com/forums/showthread.php?t=15763) by Coolboyman. These games will still be more difficult to corrupt because you're going to probably find aggregates for where types of data exist, and the ROM is compressed. However, results are still possible and these ROM maps will allow for more precision when corrupting. When using ROM maps, you'll generally want to corrupt the range over which textures, models, and objects are housed. Try to pick the objects that are in the level you want to corrupt if you can. Many [RDRAM maps](https://github.com/Isotarge/ScriptHawk/tree/master/Watch) like these from Isotarge also exist for N64, but you'll need to [use RTC to corrupt those](broken://pages/-LcqJjoPGWPOZWI-6qDG).
## References
The excerpts of the video below was made with [Weinerless Steve](https://www.youtube.com/user/Sevelix) and [SmellyFeetYouHave](https://www.youtube.com/user/smellyfeetyouhave)'s corruptions, and [Vinesauce](https://www.youtube.com/user/vinesauce)'s commentating, and [CaptainSouthbird](https://www.youtube.com/user/sonicepochguy)'s editing.
## Video Examples
{% embed url="" %}
(8:08 to 8:29 for OoT, 8:35 to 10:34 for SM64)
# Gameboy Advance
# Corrupting the GBA
## Introduction
The Game Boy Advance (GBA) is a 32-bit handheld game console developed, manufactured and marketed by Nintendo as the successor to the Game Boy. It has similar capabilities to the Super Nintendo.
{% hint style="info" %}
Recommended setup: Nightmare engine, Hellgenie, Freeze, Pipe
{% endhint %}
## Recommended Settings
The GBA cores in Bizhawk will auto-select RAM domains that can be rewinded. The ROM can also be corrupted for more effects but corrupting this one means that using rewind for uncorrupting is not an option. You can get more results using ARMThumb Instruction Lists.
## Expected results
The GBA's got a reputation for being very crashy and especially for outputting a strident noise when crashing.
##
# GBA Architecture
The Game Boy Advance is a handheld console that was released by Nintendo in 2001. It has a 32-bit ARM7TDMI CPU running at 16.78 MHz, a custom GPU that can render 2D graphics with scaling and rotation, and 32 KB of internal RAM and 96 KB of VRAM. It can also play Game Boy and Game Boy Color games using a built-in Sharp SM83 chip running at 4.2 or 8.4 mhz.
ARM7TDMI documentation:
# GBA Memory Domains
*Bizhawk-Vanguard exposes the following domains in RTC:*
## mGBA & VBA-Next
* **IWRAM (Rewindable) :** Internal (on the same chip as the CPU) work ram. 32kb large on a 32 bit bus. Generally holds the most critical data (ARM code, time sensitive data, etc).
* **EWRAM (Rewindable) :** External (not on the same chip as the cpu) work ram. 256kb large on a 16 bit bus. Slower than the IWRAM. Holds anything that'd go in WRAM that isn't stored in the IWRAM. Can hold code, but since it's on a 16 bit bus it has to be ARM THUMB code.
* **BIOS** **:** The BIOS, don't touch this.
* **PALRAM :** Palette ram. 1KB Want to swap the colors? Have fun.
* **VRAM (Rewindable)** **:** Video ram. 96KB. Holds the actual data drawn to the screen.
* **OAM:** Object Attribute Memory. 1KB. Contains the actual "object" of things such as sprites (the mode, the size, what palette to use, etc).
* **ROM** : The ROM file.
* **SRAM (Rewindable, unavailable on mGBA) :** Saveram. Want to corrupt a save file? Corrupt this.
* **Combined WRAM (Rewindable)** **:** IWRAM and EXRAM combined into a single memory domain that contains both.
* **System Bus:** Theoretically allows access to everything that's mapped as it facillitates the communication between pieces of hardware. In execution, not everything mapped will be visible through this domain. It's a matter of if it was properly exposed or not. Corrupt something here and it'll be reflected in the domains derived from it.
* `0x00000000 - 0x00003FFF`- 16 KB System ROM (executable, but not readable)
* `0x02000000 - 0x02030000`- 256 KB EWRAM (general purpose RAM external to the CPU)
* `0x03000000 - 0x03007FFF`- 32 KB IWRAM (general purpose RAM internal to the CPU)
* `0x04000000 - 0x040003FF`- I/O Registers
* `0x05000000 - 0x050003FF`- 1 KB Colour Palette RAM
* `0x06000000 - 0x06017FFF`- 96 KB VRAM (Video RAM)
* `0x07000000 - 0x070003FF`- 1 KB OAM RAM
* `0x08000000 - 0x????????`- Game Pak ROM (0 to 32 MB)
* `0x0E000000 - 0x????????`- Game Pak RAM
* [Source](https://www.reinterpretcast.com/writing-a-game-boy-advance-game)
# Nintendo DS
# Corrupting the DS
### Introduction
Nintendo DS was the first handheld by Nintendo to achieve true 3D, and similarly Nintendo DS was the starting point for corruption of 3D games. It was from experimentation with corruption of this console that N64 corruption and everything after came to be.
At the moment, the best way to corrupt Nintendo DS is with RTC and with the latest Bizhawk-Vanguard. A build of MelonDS-Vanguard is also available for compatibility with older corruptions.
{% hint style="info" %}
Recommended setup: Vector Engine with NDS Lists. \
\
Startup vector suggestions:\
**Limiter**: NDS\_One, **Value**: NDS\_Two\
**Limiter**: NDS\_Extended, **Value**: NDS\_Extended
{% endhint %}
{% hint style="info" %}
Nightmare engine also works sometimes but it is less stable
{% endhint %}
## Recommended Settings
Bizhawk doesn't come with the DS fixed-point lists preinstalled, it is recommended to get them in the Package Downloader (named VectorClassicLists\_FixedPoint.pkg)
MainRAM and SharedWRAM are where the currently loaded game stores its memory. These domains can be rewinded in Bizhawk. It is possible to corrupt DS with the ROM domain but due to the DS using compression heavily, this will rarely work. You can get more results using ARM Instruction Lists.
## Expected results
The DS is one of the few 3D consoles that can be corrupted with both the Vector Engine and the Classic Engines. Due to it being in that transition when consoles were moving to 3d, it will exhibit a lot of textures turning to clown vomit and sharp noises and pops from data entering buffers.
# MelonDS Memory Domains
{% hint style="warning" %}
The Nintendo DS's architechture does not support IEEE754 Floats and isn't compatible with the built-in Vector Engine lists. Special lists with the NDS prefix are bundled with MelonDS-Vanguard.
{% endhint %}
MelonDS-Vanguard exposes the following domains in RTC:
* **MainRAM**: Main memory (Dedicated WRAM for ARM9). This contains the bulk of loaded data
* **SharedWRAM**: Shared memory between ARM9 and ARM7.
* **ARM7WRAM**: Dedicated WRAM for ARM7. Used for auxiliary tasks
* **VRAM**: Video Ram
* **CartROM**: Contains the ROM
# MelonDS-Specific Lists
{% hint style="danger" %}
The Nintendo DS's architechture does not support IEEE754 Floats and isn't compatible with the built-in Vector Engine lists. Special lists with the NDS prefix are bundled with MelonDS-Vanguard.
{% endhint %}
### System-specific Vector Engine Lists that come with Dolphin-Vanguard
* **NDS\_Extended**: -65536.00 to +65536.00 in low res, including tiny decimals
* **NDS\_NOP\_ARM**: Value for No Operation instruction (Standard instruction set)
* **NDS\_NOP\_THUMB2**: Value for No Operation instruction (Thumb 2 instruction set)
* **NDS\_NOP\_THUMB4**: Value for No Operation instruction (Thumb 4 instruction set)
* **NDS\_One**: The numbers +1.00 and -1.00
* **NDS\_Two**: The number +2.00
* **NDS\_Whole**: -65536.00 to +65536.00 in low res, integral numbers
*Also check this link for the default lists that come with the Vector Engine*
{% content-ref url="/pages/-M4bPkPH-oEwEo0fjLnX" %}
[Classic Vector Lists](/rtcv/rtc/classic-vector-lists)
{% endcontent-ref %}
### Usage
Since the Nintendo DS isn't compliant with IEEE754, the default lists of the Vector Engine cannot be used. The Extended,One,Two,Whole lists should behave like their counterparts. The NOP Lists can be used as Value lists to cause game code to break.
# Rom Corruption (Deprecated)
{% hint style="danger" %}
This guide is for corrupting roms directly with classic corruptors such as the Vinesauce ROM Corruptor and VineCorrupt. Some of this documentation can also apply to RTC when corruping the rom domain with the Blast Generator.
{% endhint %}
{% hint style="info" %}
> #### The [Real Time Corruptor ](http://redscientist.com/rtc)supports this system natively through MelonDS. Some Vector Engine Lists are provided with it to provide support for the NintendoDS's architechture.
>
> [**You can view the wiki pages for the Real Time Corruptor here**](/rtcv/rtc)
> {% endhint %}
## Nintendo DS Rom Corruption
* [Index](/systems/nintendo-ds/nds#index)
* [NDS Corruption with the Vinesauce ROM Corruptor](/systems/nintendo-ds/nds#nds-corruption-with-the-vinesauce-rom-corruptor)
* [Setup](/systems/nintendo-ds/nds#setup)
* [Picking Your ROM](/systems/nintendo-ds/nds#picking-your-rom)
* [Games That Autosave](/systems/nintendo-ds/nds#games-that-autosave)
* [Games That Save Manually](/systems/nintendo-ds/nds#games-that-save-manually)
* [Games with Checksums](/systems/nintendo-ds/nds#games-with-checksums)
* [Corrupting](/systems/nintendo-ds/nds#corrupting)
* [Start/End Byte](/systems/nintendo-ds/nds#startend-byte)
* [Standard Corruption](/systems/nintendo-ds/nds#standard-corruption)
* [Corrupting with Save States](https://github.com/x8bitrain/corrupt-wiki/tree/430148d289135ba52a58a9e30a4c9ac95d616b76/Corrupting%20With%20Save%20States/README.md)
* [References](/systems/nintendo-ds/nds#references)
* [Video Examples](/systems/nintendo-ds/nds#video-examples)
## NDS Corruption with the Vinesauce ROM Corruptor
#### Guide Author: [Chris Byrne (Weinerless Steve)](https://www.youtube.com/user/Sevelix/)
Unlike traditional N64 games, DS can be corrupted both with and without save states effectively. Without save states, it corrupts like a normal game where corruptions are loaded from the start. When save states are used, it works more like N64 corruption where the only data that is being corrupted is data that is being loaded in real time. It is quite difficult to get results either way, as many games give poor results or have checksums you have to avoid. However, with patience you can have great results corrupting Nintendo DS games.
## Setup
Although there are multiple up and coming DS emulators, this guide is based on [version 0.9.11 of DeSMuMe](http://desmume.org/download/) and [version 1.2.2 of the Vinesauce ROM Corruptor](https://web.archive.org/web/20231203005818/http://corruptedbytes.com/vinesauce-rom-corruptor-color-replacement-guide/). Earlier versions of the emulator should work the same. The best way to try corrupting a DS game is without save states, but you could set some during gameplay to go back to later. You’ll figure out the best places to put save states while experimenting during corruption, and we’ll go over this experimentation in later sections. It's also worth noting that the "+" and "-" keys are for fast foward and rewind, and to use your mic for a game like Nintendogs, you go into “Config”, then “Microphone Settings”. Depending on how your game saves, there are also additional steps to take.
### Picking Your ROM
For the best results, you're looking for something not too late after the DS's launch, with a file that isn't huge, with a minimal amount of AI on the screen. Games like Nintendogs, where there are three dogs on the screen at a time, work much better than games like Madden which has over 50 3D AI on the screen at once. Additionally, the larger or more detailed the models the better. This rule doesn't apply to 2D platformers with 3D characters. 2D games, isometric 3D games, and anything without a main character or object, such as a puzzle game, tend to not corrupt well. Even if you follow this criteria, many ROMs may not corrupt well and you’ll just have to move on to another one.
### Games That Autosave

When corrupting a game that autosaves, you need to wipe the save file path for the emulator, so that no corrupted saves are created. If a DS game detects a corrupted save, it will attempt to delete the save and often get stuck doing so, so you want to avoid creating them if you can. To do this, open DeSmuME and click “Config”, then “Path Settings”. Find the text box labeled “SaveRam”, make that box blank, and press OK. Just remember to restore the path to what it was originally if you want to use the emulator to play games normally again. You can also create a save state after the game checks for your save, and load that save every time you corrupt the game.
### Games That Save Manually
For games with manual saving, you'll be fine as long as you don't manually save the game while it is corrupted. Unlike autosaving games, it is recommended that you keep the SaveRam path at it’s default if you want to be able to save manually. For a game like Tomodachi Collection where you are punished for turning the game off without saving too many times you'll want to save the game, shut off the emulator, turn it back on, and make a save state on the start screen. Load this every time you start the game, corrupted or not (unless of course you want to load a state that takes you to a different part of the game). If you save the game again, make sure you replace the start screen state with an updated one. Make sure you don't load old states as well, as this will revert the game to the amount of progress made when you made that state. You can undo this by loading the newest state you made.
### Games with Checksums
Some games will also display a stop screen if they detect that the checksum is off in any way, which will happen if the game is at all corrupted. With some games, you can circumvent this by putting a save state past the checksum point. In other games, it does this constantly and there’s nothing you can do, just try another game.
## Corrupting
There are two methods of corruption used in NDS corruption. Standard corruption is similar to what you would do with a NES/SNES but with a much less frequent corrupt every byte. Corruption with save states is more similar to N64 corruption, where you can set the corrupt every much lower than a standard corruption but because you use a save state, you are only corrupting what loads in real time such as model animations and audio.
### Start/End Byte
150000 is the best estimate for a good start byte. A good way to go from there to the end of the ROM, and use [Rikerz’s bisection method](https://web.archive.org/web/20231203005818/http://corruptedbytes.com/vinesauce-rom-corruptor-color-replacement-guide/) to find the best range. Move the start and end byte closer together until you still consistently get corruption. Using this method, you’ll get the Use this until the game is somewhat stable, while still giving the desired results. Unlike NES corruption though, I would recommend steps of 50000-100000.
### Standard Corruption

For this type of corruption, depending on the game, you should be somewhere between 7000 and 20000 for your corrupt every xth byte. Don't be afraid to experiment with these numbers, and adjust if you're getting frequent crashes. Most games will not work with this method, or will produce minimal corruption, so while it’s an easy starting point it’s often not effective. If you want to try being precise in pinpointing what you want to corrupt, you can use the “replace x with y” option of corrupting instead. Because of the nature of this tool, you’ll want to corrupt much more frequently. Around every 300 bytes is a good place to start. You’ll have to be patient though, and mess around with the x and y values frequently to get the corruptions you want. Once you find a good one, you can create variations of it by changing y and keeping x the same.
If you’re experiencing crashes at or near startup, creating a save state right before a load screen. This helps avoid corruption checks at boot, which will crash the game or get you in a loop of deleting a corrupted save. Generally, you're looking for a load screen that's short, and if possible, loads only a few models and not an entire level. This isn't possible for most roms, so don't let that immediately deter you from trying one. ROMs that work well with the first method will often work even better with this one if there's a loading screen that meets that criteria. Nintendogs is a good example of this. SM64 DS is not a good example of this, despite the fact that it works with the first method because load screens load entire levels. For this method, a good range is 500-3000 for your corrupt every xth byte. For games with many small models, like a sports game, you can go even lower than that. The best way to find a good range is to experiment.
### Corruption with Save States

This is what you should try when the first method fails. In this method, you’re creating a save state during gameplay so that the only corruptions that are happening are happening in real time. This method limits the types of corruptions you see, but tends to be easier and less crash prone than standard corruption. It's best to create the save state as soon as the gameplay starts so corruption can still show. Because almost everything has already loaded, the only things that will corrupt are your character and other objects, once they move, music, and while you move on further in a level you’ll see some graphics, and the ability to collide with the floor corrupt. These can be unstable, and will crash when you advance to another level. A good range is 1-500 for your corrupt every xth byte. If you’re getting frequent crashes, you may have to go higher than my recommended range, but corrupting higher than in that range tends to produce results that aren’t quite as good. Like corruption with save states on other systems, I would recommend only using the “Add” and “Shift” tools, not the “Replace” tool.
## References
This wiki article was adapted from the [DS Corruption Guide V 1.1](https://web.archive.org/web/20160519231420/http://vinesauce.com:80/vinetalk/viewtopic.php?f=34\&t=99). The videos below were made with corruptions by [Weinerless Steve](https://www.youtube.com/channel/UCrtDW6TfvTKUjXMnXVXhJww) and [Ego](https://www.youtube.com/user/Egoangell) respectively. The videos were commentated and edited by [Vinesauce](https://www.youtube.com/user/vinesauce).
## Video Examples
{% embed url="" %}
An example of a game with manual saving corrupted in a variety of ways.
{% embed url="" %}
An example of a game where you have to use save states to bypass save checks.
# Nintendo 3DS
# Corrupting the 3DS
## Corrupting the 3DS
### About the System
The 3DS is an ARM-based Nintendo handheld console that succeeded the Nintendo DS. It shares many attributes, such as a foldable design, while also adding new features for developers to use. Most importantly, Nintendo added a floating-point processor for enhanced 3D graphics. As such, its corruption process is very similar to other 3D systems, such as the GameCube/Wii and PS2.
As of 5.2.0, the best way to corrupt the 3DS is with Bizhawk via the RTC Launcher. For prior versions, you must use the Citra emulator, which is slower and less stable.
### Recommended Settings
Use VMDs extensively
Vector Engine with Default RTC Lists
Limiter: Extended -> Value: Extended
Limiter: One -> Value: Two
Vector Engine with Lists from the Package Downloader: VFP-Specific Lists
Limiter: VFP\_Load and store -> Value: ARM\_NOP
Limiter: VFP\_Math -> Value: ARM\_NOP
The custom VFP lists from the Package Downloader are the best for corrupting the 3DS. They provide consistent results without many crashes. You can also use other ARM lists, but they are less stable and will usually crash.
In addition to the Vector Engine, creating VMDs (#link=Virtual Memory Domains) is crucial for getting results on the system. The target area for each domain is large, and the data is very concentrated. The FCRam domain in the range 7000000-8000000 houses most of the code, so it’s a good idea to create a VMD within that range to start.
# Architecture
### Architecture:
A custom SoC developed by Nintendo. It includes four ARM CPUs of three types: two ARM11 MPCores, an ARM946E-S, and an ARM7TDMI. Fun fact, the latter two were used in the Nintendo DS and GameBoy Advance respectively. It also included a PICA200 GPU, which helped render the 3d graphics.
For more information, visit the following website:
# Memory Domains
## Memory Domains
### Bizhawk
* FCRam(128MB): The main memory (RAM) component where most loaded data is stored. Uses ARMv6K architecture.
* VRAM(6MB): Stores data for the GPU to produce screen visuals. Uses PICA200 shader architecture.
* DSP RAM(512KB): Stores binary audio files used to recognize/produce sounds. Unknown architecture (probably raw sound data).
* N3DS Extra RAM(128MB): Extended FCRam included with the New 3DS (only used in later titles). Uses ARMv6K architecture.
* System Bus: Moves data between the different processors/components on the SoC. Uses a mixed architecture.
### Citra
* FCRam(128MB): The main memory (RAM) component where most loaded data is stored. Uses ARMv6K architecture.
* VRAM(6MB): Stores data for the GPU to produce screen visuals. Uses PICA200 shader architecture.
* DSP(512KB): Stores binary audio files used to recognize/produce sounds. Unknown architecture (probably raw sound data).
* 3DSExRam(128MB): Extended FCRam included with the New 3DS (only used in later titles). Uses ARMv6K architecture.
# Gamecube/Wii
# Corrupting the GC/Wii
### Introduction
Gamecube and Wii corruption are very similar due to the fact the Wii is essentially an upgraded Gamecube at its core.
At the moment, the best way to corrupt Gamecube/Wii is with RTC, through Dolphin-Vanguard.
{% hint style="info" %}
Recommended setup: Vector Engine \
\
Startup vector suggestions:\
**Limiter**: One, **Value**: Two\
**Limiter**: Extended, **Value**: Extended\
**Limiter**: Giga, **Value**: NOP
{% endhint %}
{% hint style="info" %}
Notable Vector Engine Combo for breaking game engine physics:\
**Limiter**: Dolphin\_PT\_FLT\_MATH, **Value**: Dolphin\_PT\_FLT\_DIV\
\*requires "Dolphin Float Passthrough" package from the Package Downloader
{% endhint %}
## Recommended Settings
Systems emulated with Dolphin are arguably the most stable of the emulated 3d consoles. Because of that, you could possibly corrupt a lot with the Classic Vector Lists and turn the game into pulp before it crashes. The Auto-selected domains are the one to use. Avoid old engines such as Nightmare, Hellgenie, Freeze, etc. You can get more results using Dolphin Instruction Lists.
## Expected results
These system exhibit the golden standard in terms of corruption results. The stability of the emulator makes it much simpler to harvest effects. When using instruction lists, expect the classic Wii crash noise.
# Dolphin Memory Domains
{% hint style="info" %}
The Nintendo Gamecube and Wii's architechture supports IEEE754 Floats and are natively compatible with the Vector Engine.
{% endhint %}
Dolphin-Vanguard exposes the following domains in RTC:
* **SRAM** (24MB): Main system memory. Game code is usually stored here.
* **ARAM** (16MB): Mainly used to store data related to audio, can also be used by games to store additional data that isn't related to Audio
* **EXRAM** (64MB): Additional memory exclusive to the Wii.
# Dolphin-Specific Lists
### System-specific Vector Engine Lists that come with Dolphin-Vanguard
* **Dolphin Giga**: Values for JMP, NOP instructions and extra constant numbers
* **Dolphin JMP**: Values for JMP operations
* **Dolphin NOP**: Value for No Operation instruction
*Also check this link for the default lists that come with the Vector Engine*
{% content-ref url="/pages/-M4bPkPH-oEwEo0fjLnX" %}
[Classic Vector Lists](/rtcv/rtc/classic-vector-lists)
{% endcontent-ref %}
### Usage
These are lists that contain many variations of values used by program code. Corrupting using these value lists dramatically increases the chances of hitting game code.
For general purposes, a recommended usage is the Giga list as Limiter and the NOP list as a Value. Play around with the Value lists. You can also swap the Limiter and Value lists for different results.
# Using a real Wiimote with Dolphin
**Guide written by:** PurelyAndy\
**RTC Version used at the time of making this guide:** RTCV 5.0.6
### **There are 2 parts to this guide. If the first part works, you don't need to do the second part.**
First, you have to connect the Wiimote via bluetooth in control panel. To do so, open control panel. Then click “Hardware and Sound”, “Devices and Printers”, and “Add a device” at the top left. Press 1 and 2 at the same time, or the red button underneath the battery cover and wait for it to include “Nintendo RVL-CNT-01”. When it does, click on it and then click “Next” on the bottom right. Click it again if it tells you to enter a passcode, it doesn’t exist. Wait for it to install what it needs, and you’re done with this step.
Next, open Dolphin and click “Controllers” in the top right. Change “Emulated Wii Remote” to “Real Wii Remote” in the new menu, and click “Continuous Scanning” below. When you’ve done that, press 1 and 2 at the same time, or the red button underneath the battery cover and then click “Refresh” to the right of that. Click it a few times if it doesn’t work, and wait for it to give you a notification that “Nintendo RVL-CNT-01” is being set up. If this doesn’t happen or it does and your Wiimote continues to flash, you should continue reading.
## **Only do this next section if your Wiimote did not work with the previous method.**
Next, you need to download **WiimoteHook**. It can be downloaded from . The official website is [**https://epigramx.github.io/WiimoteHook/**](https://epigramx.github.io/WiimoteHook/)**.**
**If you have any issues with this guide, you can also try an alternative guide on the WiimoteHook website**
First, unzip the file you downloaded, preferably to your desktop. Open the folder and run “InstallEmulatedGamepadsDriver(run as admin).bat” as administrator. Press any key to continue, and restart your computer. Next, run “WiimoteHook.exe” (not necessarily as an administrator) and press B. When you’ve done that, press 1 and 2 at the same time, or the red button underneath the battery cover and wait for it to discover your WiiMote. If it says it was paired and it’s unpairing, just try again. You may have to run it as an administrator or get new batteries. You’ll know it’s ready when you get a notification and “USB In” sound effect from your computer, and a bunch of gray text appears in the window. Calibrate the MotionPlus with C on your computer after.
Next, you need to download GlovePIE from here\
[**https://github.com/Ravbug/GlovePIE/releases/download/Release/GlovePIE-0.45.zip**](https://github.com/Ravbug/GlovePIE/releases/download/Release/GlovePIE-0.45.zip)
and unzip it to your desktop. Run “PIEFree.exe” and paste in this code sample in:
```
key.RepeatMultipleFakeKeys = false
key.W = Wiimote.Nunchuk.JoyY <-0.4
key.S = Wiimote.Nunchuk.JoyY> 0.4
key.A = Wiimote.Nunchuk.JoyX <-0.4
key.D = Wiimote.Nunchuk.JoyX> 0.4
key.Q = Wiimote.A
key.E = Wiimote.B
key.One = Wiimote.One
key.Two = Wiimote.Two
key.Comma = Wiimote.Minus
key.Dot = Wiimote.Plus
key.Enter = Wiimote.Home
key.Up = Wiimote.Up
key.Down = Wiimote.Down
key.Left = Wiimote.Left
key.Right = Wiimote.Right
key.Eight = Wiimote.Shake
//key.Nine = Wiimote.Shake
key.Zero = Wiimote.Shake
key.R = Wiimote.Nunchuk.CButton
key.F = Wiimote.Nunchuk.ZButton
if Wiimote.Pitch < -85 {
key.G = true
}
if Wiimote.Pitch > -85 {
key.G = false
}
if Wiimote.Pitch > 85 {
key.B = true
}
if Wiimote.Pitch < 85 {
key.B = false
}
if Wiimote.Roll < -55 {
key.V = true
}
if Wiimote.Roll > -55 {
key.V = false
}
if Wiimote.Roll > 55 {
key.N = true
}
if Wiimote.Roll < 55 {
key.N = false
}
if Wiimote.MotionPlus.PitchSpeed < -800.0 {
key.K = true
}
if Wiimote.MotionPlus.PitchSpeed < -800.0 and Wiimote.MotionPlus.YawSpeed < -800.0 {
key.K = true
key.J = true
}
if Wiimote.MotionPlus.PitchSpeed < -800.0 and Wiimote.MotionPlus.YawSpeed > 800.0 {
key.K = true
key.L = true
}
if Wiimote.MotionPlus.PitchSpeed > -800.0 {
wait 1s
key.K = false
}
if Wiimote.MotionPlus.PitchSpeed > 800.0 {
key.I = true
}
if Wiimote.MotionPlus.PitchSpeed > 800.0 and Wiimote.MotionPlus.YawSpeed < -800.0 {
key.I = true
key.J = true
}
if Wiimote.MotionPlus.PitchSpeed > 800.0 and Wiimote.MotionPlus.YawSpeed > 800.0 {
key.I = true
key.L = true
}
if Wiimote.MotionPlus.PitchSpeed < 800.0 {
wait 0.5s
key.I = false
}
if Wiimote.MotionPlus.YawSpeed < -800.0 {
key.J = true
}
if Wiimote.MotionPlus.YawSpeed > -800.0 {
wait 0.5s
key.J = false
}
if Wiimote.MotionPlus.YawSpeed > 800.0 {
key.L = true
}
if Wiimote.MotionPlus.YawSpeed < 800.0 {
wait 0.5s
key.L = false
}
key.U = Wiimote.Stabbing
if Wiimote.DrumBeat == true {
key.u = false
}
if Wiimote.Nunchuk.Pitch < -45 {
key.Three = true
}
if Wiimote.Nunchuk.Pitch > -45 {
key.Three = false
}
if Wiimote.Nunchuk.Roll > 65 {
key.Four = true
}
if Wiimote.Nunchuk.Roll < 65 {
key.Four = false
}
if Wiimote.Nunchuk.Roll < -65 {
key.Five = true
}
if Wiimote.Nunchuk.Roll > -65 {
key.Five = false
}
if Wiimote.Nunchuk.Roll > 65 {
key.Six = true
}
if Wiimote.Nunchuk.Roll < 65 {
key.Six = false
}
```
(Note: This code sample doesn’t support swinging the Nunchuk. Swinging the Wiimote is already janky enough.)
Next, click “File” in the top left corner and then click “Save As…” in the dropdown. Name it “dolphin wiimote keybinds.PIE” or something to that effect and click “Save” in the bottom right.
Now you have to import the Dolphin settings that work with this. Download this file
[**https://drive.google.com/file/d/1BtVLYKoa1sNDRE9Fb9E9K8Z9JKI\_Kcrj/view?usp=sharing**](https://drive.google.com/file/d/1BtVLYKoa1sNDRE9Fb9E9K8Z9JKI_Kcrj/view?usp=sharing)
**and put it into your Dolphin configs folder. This can be found here**
\[wherever you put your rtc launcher]\VERSIONS\\\[most recent version, such as RTCV\_5.1.1-b2]\Dolphin\User\Config\Profiles\Wiimote
When you’ve done this, you should now be able to open Dolphin and click “Controllers” in the top right. Change “Real Wii Remote” to “Emulated Wii Remote” in the new menu, and click “Configure” to the right of that. In the top right there should be a section labeled “Profile” with an empty rectangle and downward arrow. Click the downward arrow and select “dolphin pie” from the dropdown. Click “Save” to the right and click “Close” at the bottom right.
Finally, you can now put all that you set up together. Close WiimoteHook and reopen it. Do what you learned previously to get your Wiimote connected to it. Then, press M to enable mouse emulation. Next, go to GlovePIE and click “▶ Run” at the top-middle. Finally, click onto Dolphin and open whatever game you want. Fullscreen said game, and you should be good to go.
# Dolphin Narry's mod (Deprecated)
{% hint style="danger" %}
This is documentation for the old "WGH + Dolphin Narry's Mod" method of corruption Gamecube/Wii games. This page is kept for information archival purposes. This documentation is for valid for RTC 3.xx versions only.
{% endhint %}
## Gamecube & Wii Savestate Corruption
## Index
[Index](/systems/gamecubewii/gamecube-and-wii-savestate-corruption#index)
* [Dolphin Narry's Mod](/systems/gamecubewii/gamecube-and-wii-savestate-corruption#dolphin-narrys-mod)
* [The Concept of Savestates](/systems/gamecubewii/gamecube-and-wii-savestate-corruption#the-concept-of-savestates)
* [A Brief Overview of the Consoles](/systems/gamecubewii/gamecube-and-wii-savestate-corruption#a-brief-overview-of-the-consoles)
* [Corrupting the Savestates](/systems/gamecubewii/gamecube-and-wii-savestate-corruption#corrupting-the-savestates)
* [The Savestate Info Tool](/systems/gamecubewii/gamecube-and-wii-savestate-corruption#the-savestate-info-tool)
* [Additional Info](/systems/gamecubewii/gamecube-and-wii-savestate-corruption#additional-info)
## Dolphin Narry's Mod
#### Author: [Narry/Smellyfeetyouhave](https://narry.land)
#### Source:
#### Download:
Dolphin Narry's Mod is a modification of Dolphin which contains various changes dedicated to making the savestate corruption method work. You'll need to use this version of Dolphin if you want to corrupt the savestates.
## The concept of Savestates
A savestate at its core contains the information that the emulator needs to restore itself to a specific "state". Included in this data is a copy of the system memory. That means if we corrupt the memory within the savestate then load the state, we can indirectly corrupt the system memory similar to what you do with the RTC.
## A Brief Overview of the Consoles
### The Gamecube has:
* **24MB** of system ram (**SRAM**)
* **16MB** of audio ram (**ARAM**)
The SRAM is the main system memory. While the ARAM is technically designed to be used for storing data related to audio, through various tricks developers were able to use it as low bandwidth memory.
Not all games utilize the ARAM for storing data. Those that do tend to store geometry data in it as the ARAM is fairly slow.
### The Wii has:
* **24MB** of system ram (**SRAM**)
* **64MB** of external ram (**EXRAM**)
The SRAM is the main system memory. The EXRAM is additional memory which can be used. The EXRAM is slightly slower than the SRAM. Generally, the most important data will be in the SRAM (code, game vital content, etc).
## Corrupting the Savestates
First you'll need to load the Savestate in the Windows Glitch Harvester, once it's loaded, you're going to want to enable caching on the file to speed things up.

### The Savestate Info Tool
Recent versions of the [Windows Glitch Harvester ](broken://pages/-LcqJjoEaoYntHYEFbia)have a tool called the "Savestate Info" tool. This tool gives you information on the addresses of the SRAM, ARAM, and EXRAM within a Dolphin Savestate. Just load up the savestate, press the button, and you'll be able to see the starting addresses.

* The "Domain" column shows the name of the memory domain
* The "Offset" column shows you the starting address. You can calculate the end address by adding the size of the domain to the starting address (domain sizes listed above)
* The "Alignment" column tells you how the memory domain is aligned in the savestate. The Vector Engine hunts for 32-bit aligned floats. If they aren't 4-byte aligned, this will tell you how many bytes off it is. You'll need to set the "Alignment" box in the Vector Engine Config box to match the alignment for it to work properly. If you're using "Target Dolphin", this'll automatically be set for you.
* The "Start Netcore Button" starts the Netcore2 server. If the Netcore2 server is already started, the button will restart the server.
### Target Dolphin
WGH 0.9.3 bring a new feature with Netcore Implementation called "Target Dolphin". If you swap your target mode to Target Dolphin, you can connect directly with Dolphin Narry's Mod via Netcore and it'll automatically load your corrupted savestate when you blast/inject.
### Additional Info
The Gamecube and Wii are both based on the PowerPC architecture, so they're **Big Endian**. Be sure to check the Big Endian box in the vector engine. If you're using "Target Dolphin", this should be handled for you.
A good starting value for the Intensity is around 50,000-100,000 and you can go from there. Here's an example screenshot of what your config may look like:

# Playstation 1
# Corrupting the PSX
by Mismagius
## Corrupting the PSX
### Introduction
Corrupting the PSX is quite complex when compared to NES and SNES, and can be more difficult than floating point based systems such as the GC/Wii, but it’s still quite feasible for beginners.
|
|
| --------------------------------------------------------------------------------------------------------------------------------------------------------------------------------------------------------------------------------------------------------------------------------------------- |
### Recommended Settings
For most games it is rarely ever worth messing with anything other than the MainRAM. The GPURAM will specifically target textures and sprites. The SPURAM will only mess with the audio, but doesn’t do much other than popping sound and maybe stuttering. BiosROM won’t do anything other than crash the system when corrupting a game. DCache won’t usually do anything worthwhile and the System Bus is simply all of these together.
\
For Vector Engine settings, any of the MIPS lists into MIPS\_NOP (same as Zero) will work most optimally. AllBranches also works into AllBranches as well as it does with NOP. You can also take the \_\[AnySystem]\_AnyFixedPoint (or Any32) lists and pair them with a NOP, but these will usually need very low intensity. In general we’re talking anywhere from 10 intensity to 200.
### Expected Results
Most of the effects you will notice when corrupting the PSX with the MIPS lists will affect the game’s logic, differently than the NES/SNES, where it is more common to get clown vomit and audio corruptions. Since games will often store audio, video and models using raw data, you can mostly affect the way they are rendered on screen, but hardly ever change their properties with lists alone.
|  |
|
|  | An example of code corruption effects. |
# Advanced corruptions
by Mismagius
## Corrupting the PSX (Advanced)
### Introduction
The Sony PlayStation (PS1/PSX) is a 32-bit system released in 1994 in Japan and 1995 in North America and Europe. With a focus on 3D polygon graphics rather than sprite-based rendering, the system achieved massive success through its lifespan, being the birthplace of many of the staple franchises in the gaming landscape. The PlayStation was the main focus point when transitioning from cartridges to compact discs, as it could hold a much larger amount of data, allowing streamed content such as audio and video sequences to appear much more frequently.
|
|
| -------------------------------------------------------------------------------------------------------------------------------------------------------------------------------------------------------------------------------------------------------------------------------------- |
### Recommended Settings
The PSX is much more finicky than systems such as the NES/SNES due to its complexity and usage of MIPS architecture. As it does not use floating point values, most of the default RTC lists will not work for the system. A good starting point is to download the “MipsInstructions” and “MipsLoadAndStore” lists from the RTC Package Downloader, as well as the “VectorClassicLists” and “MIPS Immediate” packages. The “Wildcards” and “RandomBitFlipLists” packages can be useful as well, albeit rarely, and only once you know what you are doing.
\
With its 2MB of RAM, 32-bit MIPS architecture and BIOS exception/opcode handler, you will struggle to get anything other than a crash with most engines (namely Nightmare, Hellgenie, Pipe, Freeze, and Distortion engine). 90% of the time, you will be using the Vector Engine. The Cluster Engine can be very useful as well, but it requires some understanding of the engine itself as well as the memory areas you are messing with. For starters, it is better to stick with Vector Engine until you get your footing. With proper usage of VMDs, even the other engines can be useful, so if you already have that knowledge from other consoles, it will be useful.
\
We will talk about the PSX MainRAM in more detail later, but in short, for most games it is rarely ever worth messing with anything other than the MainRAM. For starters, you can keep it as your only selected domain. The GPURAM will specifically target textures and sprites. The SPURAM will only mess with the audio, but keep in mind that we’re messing with streamed audio here, which doesn’t allow for much other than popping sound and maybe repeating audio lines. BiosROM, unless you’re messing with the BIOS itself and not a game, won’t do anything other than crash the system. DCache won’t usually do anything worthwhile and the System Bus is simply all of these together.
\
As for Vector Engine settings, you will notice “Limiter” and “Value” lists. You can read more about it in the Vector Engine section of the wiki, but when talking about Vector Engine settings, always assume the format \[Limiter list] -> \[Value list]. Regarding Intensity, you will usually end up with very low values, often under 100, but you can always adjust based on how often you are getting no results or crashes. It’s also important to check the Stash History and right-click the latest iteration to check how many units are being affected by your current settings. Also don’t forget to lock your precision to 32-bit and alignment to 0!
\
For a starting point, pretty much any of the MIPS lists will work as a limiter using MIPS\_NOP as a Value list (or Zero, which is the same thing).
\
Branch lists (AllBranches, BEQ, BLTZ, BNE, J, JAL) will mostly work with NOP. You can attempt playing around with using BEQ -> BNE and vice-versa, or even AllBranches -> AllBranches, but this will be much more unstable and prone to crashing, although useful at times..
\
Memory Access lists (SB, SH, SW, LB, LBU, LH, LHU, LW) will pretty much only work with NOP due to the way the MIPS architecture is set up. There’s always a possibility you can get a unique result using a list into itself, but you’ll have to be patient (and lucky).
\
Fixed Point register lists (Extended, One, Two, Whole) are heavily dependent on the game you are corrupting. Some games tend to use these values more often especially when corrupting data (models, images, pointers) rather than code. These lists are less prone to crashing when playing around between themselves, but Extended and Whole as limiter lists -> One, Two, NOP as value lists should be the more consistent setting for these.
### Expected Results
As previously mentioned, the PSX is a very, very crashy system. However, this is due to the way it allocates its memory. When corrupting the MainRAM, you aren’t just focusing on 3D models, images, sounds or data, you’re taking on everything at the same time and often switching around data that is completely incompatible. As the PSX has a pretty hefty exception handler, the game will 99% of the time just completely freeze once something wrong is detected. You can easily check whether the system is dead by enabling the “View -> Display FrameCounter” setting on BizHawk and noticing when the numbers go red and stop counting up.
With the recommended settings above, you will hopefully have a bit more luck playing around with the system. However, there are many other ways you can avoid smashing your head into a wall repeatedly for 30 minutes until you get a missing polygon. Most of them will require some basic knowledge of RTC and/or the system’s architecture, but it is definitely worth it!
Most of the effects you will notice when corrupting the PSX with the MIPS lists will affect the game’s logic, differently than the NES/SNES, where it is more common to get clown vomit and audio corruptions. Since games will often store audio, video and models using raw data, you can mostly affect the way they are rendered on screen, but hardly ever change their properties with lists alone.
As for intensity, it can be hard to gauge exactly how much is a good amount. Usually you can do some guesswork. If it instantly crashes, it’s too high. If it does nothing, it’s too low. Try to find an in-between until results start appearing. It doesn’t mean it won’t crash or always produce an effect, but it should be the optimal intensity amount.
|  |
|
|  | An example of code corruption effects. |
## PSX: Working with the MainRAM
When we delve into the PlayStation’s MainRAM, we are working with 2MB of data, which means 2,097,152 bytes where the current state of the game is loaded, including all current code, animations, models, sounds and everything else the game feels like it needs to have on hand. This may seem overwhelming at first, but don’t worry! When corrupting memory addresses, we will have to get used to hexadecimal notation as it is used internally, so the MainRAM constitutes everything between the addresses 0x80000000 and 0x80200000. For the sake of corruptions, it’s easier to simplify it to 0 until 200000.
Remember that we are dealing with a CD-based system and CDs can hold up to about 700MB of data! This means that we probably won’t be loading/storing anything more than 10% of the CD’s contents into RAM, so there is no easy way we can effectively “perma-mod” a game’s data using corruptions, as corruptions will just take the current game state and replace things until the game loads something else into the system RAM and move on. The most we can do in this case is target the base code to make it so the game will always be loading/storing data in a certain way.
Back into the addresses, instructions are stored in 32-bit chunks, usually aligned evenly. That means that, unless you are targeting an instruction individually with 8bit corruptions, the RTC will always default to hitting 4-byte precision addresses ending in 0, 4, 8 and C. For example, this is how a Vector Engine blast -> NOP will look like. Notice the addresses and the amount of zeros we are replacing the data with:
This means that, between the addresses xxx00 and xxx10, there are 4 possible instructions we can target: xxx0, xxx4, xxx8 and xxxC.
Considering the MainRAM, the area between addresses 0 and 10000 is reserved for the PSX BIOS. Attempting to corrupt anything in there will almost always result in either nothing or a crash. Therefore, if you have any knowledge about VMDs at this point, you already know where we are heading into!
This is an example of a VMD you could make to remove that part of the RAM when corrupting. As we will see in a moment, it won’t be the most accurate way to target things, but it’s a good start, already taking out 3% of the memory that would be essentially useless to corrupt.
After the BIOS segment, games are free to handle memory as the programmers see fit. This means that there is no standard way to divide things from now on, so be aware that this is completely game specific! What works in a game will most definitely not work on another game, especially regarding specific address ranges. The best we can do is define a couple common things that happen in PSX games.
First of all, starting on address 10000, unless specified by the developers, the game will often contain the main executable. This is the first file in the disc that will be read, and often contains basic functions and instructions for the game to start running. There is no set amount of data for this main executable, as there are games that hold the entire thing in it. You can try searching the internet to see if anyone has made a memory map of the game you want to corrupt, or try and open the contents of the game’s ISO and identify the main executable and its size (it will often be called something like PSX.EXE or SLUS\_12.345).
After that, PSX games will often use “overlays”, which are chunks of code or data that are loaded separately from the main program. As they are often not listed in the CD-ROM directory and each game has its own completely separate layout, there is no real way to identify these without disassembling the code itself. So what’s the point of everything written up until this point? Well, we can establish a fairly decent way of guessing what we are messing with, based on the results we see on each corruption and looking at the address they are located in.
1. BIOS (0-10000);
2. Game main executable (starting on 10000, often basic functions, such as VSync, video rendering, and loading everything else);
3. Game specific functions will usually be loaded after this, which will define how characters, animations, audio, behaviour, etc. are defined on screen.
4. After everything else, the game may contain the raw files of images, models, animation data, and MIDI sequences. These are generally stored in common PSX file formats such as .TIM, .ANM, .VAB, etc. As such, targeting specifically instructions here will often not hit anything!
\
Again, this does not cover every possible PSX game! There is a massive amount of games that use all kinds of different methods of storing into RAM. As the PSX has a rather limited amount of RAM for everything it is trying to load, the usage of memory can be very dynamic and some addresses will not always reflect the same thing depending on game state. Not to mention things such as the VRAM buffer, stack and other parts that will be constantly shifting data around every single frame.
A common, helpful practice for people messing with PSX corruptions is to create VMDs for sequential chunks of memory. This helps on mapping out what parts of memory you can mess with to achieve certain results. For example, having 20 VMDs, with 16k of RAM each. VMD1\[0…10000], VMD2\[10000…20000], VMD3\[20000…30000], and so on. Soon, you’ll end up getting used to which VMDs target what parts of the code, and locate yourself whenever you want to look for an effect.
## PSX Architecture
Did you know that there are many other instructions you can target besides the ones in the default lists? The MIPS I architecture has a multitude of other instructions and pseudo-instructions that are often used for PSX games. For the scope of this writeup, we’ll try and keep things mostly simple and focused on corruptions, so expect some heavy simplification, but at the same time you are expected to understand basic computer architecture concepts such as binary and assembly code. This is not at all necessary if you just want to get some basic corruptions, but it will be extremely helpful if you want to have as much control as possible over the state of the game.
\
Arithmetic Logic Unit: ADD, ADDI, ADDIU, ADDU, AND, ANDI, LUI, NOR, OR, ORI, SLT, SLTI, SLTIU, SLTU, SUB, SUBU, XOR, XORI
\
Shifter: SLL, SLLV, SRA, SRAV, SRL, SRLV
Multiply: DIV, DIVU, MFHI, MFLO, MTHI, MTLO, MULT, MULTU
Branch: BEQ, BGEZ, BGEZAL, BGTZ, BLEZ, BLTZ, BLTZAL, BNE, BREAK, J, JAL, JALR, JR, MFC0, MTC0, SYSCALL
Memory Access: LB, LBU, LH, LHU, LW, SB, SH, SW
What these all have in common is that their last 6 bits (as the PSX uses little-endian) store the opcode of each function. After that, we can separate them into three different groups:
R-Type instructions (Shifter, Multiply, JR, JALR, ADD, ADDU, SUB, SUBU, AND, OR, XOR, NOR, SLT, SLTU): These instructions are identified by an opcode of 0, and are differentiated by their funct values. Except for SLL/SRL/SRA, these operations only use registers.
J-Type instructions (J, JAL): These instructions are identified and differentiated by their opcode numbers (2 and 3). The rest of the bit fields are used for the target address.
I-Type instructions (everything else): These instructions are identified and differentiated by their opcode numbers (any number greater than 3). All of these instructions feature a 16-bit immediate.
\
Alright, so what does any of this mean for corrupting? Well, first of all, it means that rarely ever you’d want to use two different types of instructions on Vector Engine blasts. As the bit fields have different purposes, you’ll just end up losing a lot of time by not knowing you weren’t supposed to use something such as SLL -> J.
This also helps in identifying what you are currently blasting. By disabling your blast units and opening the Hex Editor in the desired addresses, you can check what you ended up hitting and how to take maximum advantage of blasting that address. Say you got an interesting effect by blasting NOP on a SLL instruction. Who’s to say you can’t keep it as a SLL and only change the registers you are targeting, or the amount of shifting? The possibilities are endless.
In the Resources section, you will find more information on how these instructions work and lists for each instruction. Keep in mind some of these will not bring you any results for corruptions, but others may surprise you with different effects than what you’d get on the default lists.
## Resources
[Plasma - most MIPS I(TM) opcodes :: OpenCores](https://opencores.org/projects/plasma/opcodes) - List of most common MIPS I opcodes. Useful for when you want to identify what is the instruction in a specific address, and how to alter it without crashing the game.
[Exploring Tokimeki Memorial: Main Index](https://tetracorp.github.io/tokimeki-memorial/) - Very interesting project focused on reverse-engineering the PSX game Tokimeki Memorial, gives a rundown on how to analyze a game’s code and find points of interest in the RAM and executables.
[psx-spx](https://psx-spx.consoledev.net/) - Extremely detailed documentation on everything about the PSX’s internals, built from years of guesswork and development.
[MIPS Converter](https://www.eg.bucknell.edu/~csci320/mips_web/) - Hex/Instruction converter, useful to quickly get what’s happening in a specific address, as well as converting your own assembly code to hex to put it back into the game.
[MIPS Reference Sheet](https://inst.eecs.berkeley.edu/~cs61c/resources/MIPS_help.html) - More in-depth explanation for each instruction in the MIPS set.
[MIPS Multiply Lists](https://cdn.discordapp.com/attachments/901853587557204041/1176556924809003068/MIPS_MLT.zip?ex=656f4d06\&is=655cd806\&hm=2ef652fccc9974f9510ee988d72ed5c3ba8ec9c3b477c38027b9ff0c133298ab&) - Lists that cover the Multiply instructions in the MIPS set.
[MIPS ALU Lists](https://cdn.discordapp.com/attachments/901853587557204041/1176557940283547779/MIPS_ALU.zip?ex=656f4df8\&is=655cd8f8\&hm=246b3c145d9d487b6174668b61b79d76e4b3f48f25fb183978f4327b7f301c94&) - Lists that cover the Arithmetic Logic Unit instructions in the MIPS set.
[MIPS Shift Lists](https://cdn.discordapp.com/attachments/901853587557204041/1176558242432823376/MIPS_SHIFT.zip?ex=656f4e40\&is=655cd940\&hm=44a53a97006b30b2dd553f84b2a688f44d18a80382a542d07528ce629f6942ee&) - Lists that cover the Shifter instructions in the MIPS set.
[MIPS Branch Lists](https://cdn.discordapp.com/attachments/901853587557204041/1176558651448754206/MIPS_BRANCH.zip?ex=656f4ea1\&is=655cd9a1\&hm=b308ba82ace2830df871be38c92ede8873e38a9debad34edfb47e3e9ed1631a3&) - Lists that cover the Branch instructions in the MIPS set.
[MIPS Memory Access Lists](https://cdn.discordapp.com/attachments/901853587557204041/1176558896643592232/MIPS_LS.zip?ex=656f4edc\&is=655cd9dc\&hm=f5bc5ffe066a550ecb9d2270798f275943deb438380546dd1e4394833079dbb0&) - Lists that cover the Memory Access instructions in the MIPS set.
[BradCorrupts' Patched PSX BIOS](https://cdn.discordapp.com/attachments/479047343589687308/1160363792744599562/scph1001_-_exception_bypass_-_1.0.ips?ex=656bc2fe\&is=65594dfe\&hm=edb183d457e3e5f7a3b532096ac7e475c7bdb9018ea123cfa6019745db755b7a&) - WIP. Patches your PSX BIOS to try and bypass the exception handler, avoiding game crashes. [Requires specific setup.](https://cdn.discordapp.com/attachments/901853587557204041/1176559588049436782/image.png?ex=656f4f81\&is=655cda81\&hm=2eecd003c3e6da350c15aa055298ecf17b3492b9dd88446f6d7bf81bde7b051a&)
# Playstation 2
# Corrupting the PS2
### Introduction
The PlayStation 2 (officially branded as PS2) is a home video game console developed and marketed by Sony Computer Entertainment. The console builds on its home entertainment value by doubling as a DVD player and accommodating most of the original PlayStation's vast library of games.
At the moment, the best way to corrupt PS2 is with RTC, through PCSX2-Vanguard.
{% hint style="info" %}
Recommended setup: Vector Engine \
\
Startup vector suggestions:\
**Limiter**: One, **Value**: Two\
**Limiter**: Extended, **Value**: Extended\
**Limiter**: PCSX2\_BALL, **Value**: PCSX2\_NOP
{% endhint %}
## Recommended Settings
The PS2 corrupts very similarly to the Gamecube and Wii. PCSX2 is less stable than Dolphin but it is still sort of comparable. EERAM being the only exposed domain, there's no other domain to corrupt. You can get more results using MIPS Instruction Lists.
# PCSX2 Memory Domains
{% hint style="info" %}
The Playstation 2's architechture supports IEEE754 Floats and is natively compatible with the Vector Engine.
{% endhint %}
PCSX2-Vanguard exposes the following domains in RTC:
* **EERAM**: This is the main memory of the system. It currently is the only domain that is exposed in RTC but should contain everything
# PCSX2-specific Lists
### System-specific Vector Engine Lists that come with PCSX2-Vanguard
* **PCSX2 BALL**: (Branch ALL) Contains all the Branch lists
* **PCSX2 BEQ**: (Branch Equal) Multiple possible values for code branching with IF EQUAL operation
* **PCSX2 BG**: (Branch Greater) Multiple possible values for code branching with IF GREATER operation
* **PCSX2 BL**: (Branch Less) Multiple possible values for code branching with IF LESS operation
* **PCSX2 BNE**: (Branch Not Equal) Multiple possible values for code branching with IF NOT EQUAL operation
* **PCSX2 NOP**: (No Operation) Contains the value 0x00000000 which is used to cancel an operation
*Also check this link for the default lists that come with the Vector Engine*
{% content-ref url="/pages/-M4bPkPH-oEwEo0fjLnX" %}
[Classic Vector Lists](/rtcv/rtc/classic-vector-lists)
{% endcontent-ref %}
### Usage
These are lists that contain many variations of values used by program code. Corrupting using these value lists dramatically increases the chances of hitting game code.
For general purposes, a recommended usage is any Branch lists as Limiter and the NOP list as a Value. Play around with the Branch lists. You can also swap the Limiter and Value lists for different results.
### Limitations of the lists
The PCSX2 lists were added in 5.0.4. The Branch lists currently only a limited amount of possible values (-200 to +200 generally).
### Extra documentation on PS2 Architechture
: General documentation on the Mips Instruction set\
: Arithmetic-specific documentation on the MIPS Instruction set (French)
# Playstation 3
# Playstation 3 Executable Corruptions
by Foifur
This guide explains the process of corrupting PS3 executables using FileStub and RPCS3, the PS3 emulator. The PS3 used two different types of cores, with one main processor called the *Power Processing Element (PPE)* and eight co-processors called *Synergistic Processing Element (SPE)*. These used different instruction sets, with the PPE using PowerPC (PPC), and the SPE using a unique instruction set simply called SPU ISA.
As corrupting PS3 games is a bit more laborious, this guide expects the user to already have an understanding of how to corrupt other game engines (especially GC/Wii games in Dolphin, as these use the same instruction lists).
## Why this guide?
With RPCS3, the PPC instructions are unfortunately precompiled with Ahead-of-Time (AOT) instead of Just-in-Time (JIT). What this means is that the instructions are not available to RPCS3-Vanguard for corruption (unlike the SPU ISA, which can be targeted by loading the SPE memory domains). The workaround to this is corrupting the PPC instructions before compilation using FileStub, and then running the game. The benefit to this is being able to use a newer version of RPCS3, which has added new features/better optimization over the years.
## Preparing the workflow
This guide assumes that you have already dumped your game and installed it into RPCS3.
An important first step if you are corrupting a disc based game: navigate to the folder the game is installed in (RPCS3/games/$game\_name) and rename $game\_name to the product code of that game (this can been seen under the *Serial* label in the *Game List*). This is required if you are using the helper .bat file described later in this guide.
Navigate to *Utilities* > *Decrypt PS3 Binaries*, then navigate to the folder that contains EBOOT.BIN (RPCS3/dev\_hdd0/game/$product\_code/USRDIR for HDD based games, and RPCS3/games/$product\_code/PS3\_GAME/USRDIR for disc based games). The folder containing the EBOOT.BIN will create a new file called EBOOT.elf.
Decrypt Binaries Path
Newly created EBOOT.elf file
One thing to note is that if there is a .self file in the folder (as seen above), you’ll want to either remove it from the folder or change it’s filetype so it is not .self. Without doing this, the cache will not generate correctly.
After this, you can navigate to *File* > *Boot (S)Elf* > *Boot SELF/ELF* and select the EBOOT.elf to start the game. Let this finish compiling the modules, then close out of the game and RPCS3.
Boot SELF/ELF path
The final step is to create a helper batch script that will automate the process of changing the compiled folder to the correct name. Whenever you apply a corruption, the cache folder’s name will change. The following code block is an example of a .bat file placed in the USRDIR folder, where the EBOOT.elf file is.
```batch
@echo off
::close RPCS3 if it was already running, and wait to confirm it's been terminated
taskkill /im rpcs3.exe /f /t
:loop
Timeout /t 1 >NUL
tasklist.exe /FI "ImageName eq rpcs3.exe" /NH |find /i "rpcs3.exe" >NUL && Goto :loop
::find the product code for the selected game
::we also need to check if the game is HDD or Disc based
cd..
echo %cd%
for %%I in (.) do set "folder_name=%%~nxI"
echo %folder_name%
if %folder_name% NEQ PS3_GAME (
echo hdd game
set "game_type=0"
for %%I in (.) do set "product_code=%%~nxI"
cd../../..
)
if %folder_name%==PS3_GAME (
echo disc game
set "game_type=1"
cd..
for %%I in (.) do set "product_code=%%~nxI"
cd../..
)
echo %product_code%
::start RPCS3
if %game_type% ==0 start rpcs3 --no-gui %cd%\dev_hdd0\game\%product_code%\USRDIR\EBOOT.ELF
if %game_type% ==1 start rpcs3 --no-gui %cd%\games\%product_code%\PS3_GAME\USRDIR\EBOOT.ELF
::wait until the new cache folder is created by RPCS3
cd %cd%\cache\%product_code%
setlocal enableextensions
echo waiting for new cache folder...
:watch_for_new_folder
set count=0
for /D %%A in (*-EBOOT.ELF) do set /a count+=1
if not %count%==2 goto watch_for_new_folder
endlocal
::once we have the new folder, close RPCS3 and store the hash code in the folder name
taskkill /im rpcs3.exe /f /t
for /f "delims=" %%i in ('dir /b /ad-h /t:c /od') do set "new_cache=%%i"
echo %new_cache%
for /f "tokens=2 delims=-" %%i in ("%new_cache%") do set "cache_hash=%%i"
echo %cache_hash%
::delete the new folder, then rename the original folder with the new hash code
RMDIR /S /Q %cd%\ppu-%cache_hash%-EBOOT.ELF
move "ppu-*-EBOOT.ELF" ppu-%cache_hash%-EBOOT.ELF
::restart RPCS3
echo starting RPCS3...
cd ..\..
if %game_type% ==0 rpcs3 %cd%\dev_hdd0\game\%product_code%\USRDIR\EBOOT.ELF
if %game_type% ==1 rpcs3 %cd%\games\%product_code%\PS3_GAME\USRDIR\EBOOT.ELF
```
Once you’ve done all this, you’re ready to start corrupting the game!
## A note on the cache folder
Depending on the type of list you use, RPCS3 may still have to recompile some modules. From current tests, it appears that anything from the classic vector lists (Extended, One, Two, etc.) will not require recompilation, while lists that change instructions (such as math instructions/branches) will require it, with the intensity increasing the number of modules affected. As this causes new files to be generated, the folder can start to grow quite quickly. It’s recommended to keep a backup of the originally cached folder so that you can easily return to a smaller folder size after corrupting for a while.
## Corrupting EBOOT.elf with FileStub
Now that our workflow is set up, you can open the RTC launcher and install both Dolphin (for the PPC instruction lists) and FileStub if you have not already, then start FileStub. The first thing you will want to do is click on the gear wheel in the top right and select *Big Endian*.
After this, click on *Advanced Options* and under *Target execution*, select *Execute other program* from the dropdown and then click *Edit Exec*. Select your .bat file created earlier so that it will run every time a corruption is applied.
The final step is to click Browse target and select the EBOOT.elf file, then click *Load targets into RTCV* to begin corrupting.
FileStub setup
Now in the *Real-Time Corruptor* window, click on *Engine Config*, and then under *Advanced Tools and Plugins* click on *Package Downloader*. Click on *Lists* and then download both the *DolphinFloatInstructions\_by\_NullShock78* and *DolphinFloatPassthrough\_by\_NullShock78*.
Go back to *Engine Config* and then click *My Lists*. Click *Import List File*, then go to your RTC folder and find the path to the Dolphin installation (usually found at *RTC/VERSIONS/RTCV\_version/Dolphin/LISTS*) and import all lists in the folder. Finally, click *Refresh Lists*.
One last time, go back to *Engine Config* and under *Corruption Engine* select *Vector Engine*. You are now ready to select your limiter/value lists and hit corrupt. Once clicked, the .bat file should run and automatically open up RPCS3.
# Xbox 360
# Xbox 360 Executable Corruptions (Real Console)
by Snuffles
using a JTAGed/RGHed Xbox 360 and FileStub
This guide explains how to get Xbox 360 corruptions working using FileStub and a JTAGed/RGHed Xbox 360. This method allows for Xbox 360 corruptions, but ultimately it is a slow and tedious process due to the lack of savestates.
**DISCLAIMER: THIS IS THE GUIDE FOR REAL CONSOLE. IF YOU WANT TO USE XENIA PLEASE FOLLOW THE OTHER GUIDE.**
## **Extracting the Files**
### Disc
This guide is assuming you have Aurora as your modded dashboard on your Xbox 360, as well as a FAT32 formatted USB drive to reliably transfer and edit files between your Xbox 360 and PC. Insert your disc into your Xbox 360. Press the select button to open the system menu and go into the file manager. Go to the DVD drive and select all folders and files. Copy the files and go to your USB drive. Create a folder for your game and paste the files in that folder. You should now have the files for the game you want to corrupt. Note that if the disc default.xex just launches an XBLA title file (disc games like Minecraft) you will need to follow the XBLA guide instead.
A screenshot of the Minecraft disc. Notice the small Default.xex and Content folder? That most likely means that the disc is an XBLA game and the XBLA title in the Content folder should be extracted instead.
### **GOD/Games on Demand**
This guide is assuming you have Aurora as your modded dashboard on your Xbox 360, as well as a FAT32 formatted USB drive to reliably transfer and edit files between your Xbox 360 and PC. Press the select button to open the system menu and go to HDD1 -> Content -> 0000000000000000. Here are all your installed XBLA, GOD and Indie games installed on your Xbox 360. The way to tell the difference between if the game is a GOD, XBLA or Indie game is to see the contents of the folders. GOD games have a 00007000 folder and inside that folder is a file that is a bunch of letters and numbers and a folder that is the same name just with “.data” at the end. Inside that folder is a bunch of data files starting with “Data0000”. XBLA games have a 000D000 (Indie games are 00000002) folder that just contains a file with a bunch of letters and numbers.

The folders will be the title ids of the games. Aurora should automatically show the actual game name next to the title id but if for whatever reason it’s not showing up you can go to [Microsoft Xbox 360 games list with Title ID (gamesdatabase.org)](https://www.gamesdatabase.org/xbox_360_games_list_with_title_ids) to see what title id the game you want is.

After you find the game you are looking for you can copy the title id folder containing the game and paste it onto your USB drive. After the files are done copying, put the USB drive into your PC. Next, you’re going to want to download a program called “god2iso” in order to convert the file into iso format. You can get it from here: [God2ISO - Xbox 360 Games on Demand to CD Image Converter | Digiex](https://digiex.net/threads/god2iso-xbox-360-games-on-demand-to-cd-image-converter.7115/#google_vignette). Launch the “God2Iso.exe” file from the download and add a GOD package. Go to your USB drive and open the folder of the game you put on there. Go into the 00007000 folder and add the file that is a bunch of letters and numbers (not the folder that has .data at the end).

Choose an output directory and press the “Go!” button.

After it is done you will find an iso that has the same name as the GOD package you added. Now you need to download a program called “isoextract” which you can get from here: [Xbox 360 XISO Extract - BEST an easiest XDG3 extraction tool, with GUI + FTP. | Digiex](https://digiex.net/threads/xbox-360-xiso-extract-best-an-easiest-xdg3-extraction-tool-with-gui-ftp.9711/). Launch the “XBOX360 ISO Extract.exe” file from the downloaded program. Choose the ISO folder and the destination for the extracted files to go. After you are done choosing, press the “go” button.

You should now have the files of the game you want to corrupt.
### **XBLA/Xbox Live Arcade**
This guide is assuming you have Aurora as your modded dashboard on your Xbox 360, as well as a FAT32 formatted USB drive to reliably transfer and edit files between your Xbox 360 and PC. Press the select button to open the system menu and go to HDD1 -> Content -> 0000000000000000. Here are all your installed XBLA, GOD and Indie games installed on your Xbox 360. The way to tell the difference between if the game is a GOD, XBLA or Indie game is to see the contents of the folders. GOD games have a 00007000 folder and inside that folder is a file that is a bunch of letters and numbers and a folder that is the same name just with “.data” at the end. Inside that folder is a bunch of data files starting with “Data0000”. XBLA games have a 000D000 (Indie games are 00000002) folder that just contains a file with a bunch of letters and numbers.The folders will be the title ids of the games. Aurora should automatically show the actual game name next to the title id \[Image 3] but if for whatever reason it’s not showing up you can go to [Microsoft Xbox 360 games list with Title ID (gamesdatabase.org)](https://www.gamesdatabase.org/xbox_360_games_list_with_title_ids) to see what title id the game you want is. After you find the game you are looking for you can copy the folder containing the game and paste it onto your USB drive. After the files are done copying, put the USB drive into your PC. Next, you’re going to want to download a program called “wxPirs” in order to extract the files of the XBLA title. You can get it from here: [Wxpirs - extract content from Xbox 360 Demos, Video DLC and Arcade game containers | Digiex](https://digiex.net/threads/wxpirs-extract-content-from-xbox-360-demos-video-dlc-and-arcade-game-containers.9464/#google_vignette). Launch the “wxPirs.exe” file from the program you downloaded. Press open file in the program and go to the folder where you copied your XBLA title file to. Go to the 000D0000 folder and open the file there. After opening the file in the program, extract all files into a folder on your USB drive (preferably with the name of the game you are extracting).

You should now have the files of the game you want to corrupt.
### **Indie Games**
The process for extracting files from Indie games is similar to XBLA but there is currently no way to corrupt them. There may be some way some time in the future.
## **Decompressing and Unencrypting the XEX**
No matter the method you used to extract the files, you should have a “default.xex” file in the root folder of the game you extracted. This file needs to be decompressed and unencrypted before being able to be corrupted. In order to do this, you’re going to need a tool called “XexTool”, which you can get here: [XEXTool 6.3 Download | Digiex](https://digiex.net/threads/xextool-6-3-download.9523/). Alternatively, if you prefer to use a GUI tool, you can use a program called “Xbox 360 Game Hack”, which you can download here: [Xbox 360 Game Hack 6.3 - Patch Xbox 360 .xex files (patch region, media, kinect) | Digiex](https://digiex.net/threads/xbox-360-game-hack-6-3-patch-xbox-360-xex-files-patch-region-media-kinect.7430/#post38498), although note that this guide will be using the command line tool. Copy over the default.xex file to the folder where “xextool.exe” is stored.

In file explorer, there is a bar to the left of the search bar that shows the path to the current directory you’re in (should be the XexTool folder). Click the empty space in that bar,

The red arrows point to the empty space.
type “cmd”

and press enter. Command prompt should now open. To keep things simple, just type in “xextool -c u -e u -o !.xex default.xex” without the quotes.

“!.xex” can be whatever you want, but it is recommended that you keep it as “!.xex” as the ! character shows up the highest in file explorers and it could take a while to launch the XEX file every time if it isn’t at the top of the file list. Copy the “!.xex” file to the root of the extracted game folder on your USB drive. The unmodified default.xex should be there alongside your newly decompressed and unencrypted !.xex file.
## **Corrupting and Loading**
### **Corrupting the XEX**
First thing’s first, you should make 4 copies of the !.xex so you have 5 modified XEX files. This is recommended as you will have to unplug and replug the USB drive into your PC and Xbox 360 over and over again and having multiple different corrupted files lowers the downtime between corruption attempts a lot.

Open the RTC launcher and download Dolphin. Download FileStub if you haven’t already and open it. Click the settings icon in the top right corner of FileStub and turn Big Endian on. Change the target type to multiple files (many domains). Add the modified !.xex and the 4 copies you have created into FileStub. Click load targets into RTCV.

Change the blast radius to normalized and the corruption engine to vector. Click the “My Lists” button and then click “Import List File”. Go to your RTC folder and go into VERSIONS -> RTCV\_(version) -> Dolphin -> LISTS and import all of the lists in this folder.

Go back to engine config and click on the “Package Downloader” button. Go to LISTS and download the following lists: [DolphinFloatInstructions\_by\_NullShock78.pkg](http://cc.r5x.cc/rtc/packages/CATALOG_3/LISTS/DolphinFloatInstructions_by_NullShock78.pkg) and [DolphinFloatPassthrough\_by\_NullShock78.pkg](http://cc.r5x.cc/rtc/packages/CATALOG_3/LISTS/DolphinFloatPassthrough_by_NullShock78.pkg).

Go back to “My Lists” and click “Refresh List Files”. Go back to engine config. The new list files should be there now. Now it’s finally time to do your first test corruption. For the limiter, set the list to be \_Dolphin\_PT\_FLT\_MATH and set the value to be the same. This is a great beginning combo.

The guide will detail other list combinations later. Open up the Glitch Harvester. You’re going to want to go for a layer size of around 500 (around 100 units for each of the XEXs).

Play around with the intensity to see if you can get around that range. Too little and you’re not going to see much broken stuff, too much and all you’ll see is bars stretched across your screen. The amount of blast units you’ll get depends on the lists you use and the XEX size. If you’re getting way too many or way too little, make sure you have Big Endian set in FileStub or didn’t accidentally increase the alignment past 0. Once you feel like you have the right layer size, proceed to the next step.
### **Loading the Corrupt XEX**
Once you have corrupted the files you should be ready to load them. Double check to make sure you have the extracted files on your USB drive and the corrupted XEX files are in the root game folder along with the uncorrupted default.xex. Plug the USB drive into your Xbox 360. Press the select button to open the system menu and open the file manager. Go to your USB drive and go to the extracted game folder. Launch one of the 5 corrupted XEX files.

Congratulations! You have (hopefully) successfully done your first Xbox 360 corruption. If the game crashes on the first one you load, try another one, you may have gotten unlucky. If you want to load another corruption you don’t even have to quit back to the Aurora menu. Press the Xbox button, go to File Browser, navigate to your USB drive and game folder and you can load a different XEX from there.

## **List Combinations and Info**
Here are some of the lists and combinations that have been tested and work well. If a list is not listed here, that probably means it should be avoided unless you know what you're doing.\
Guide: (limiter) -> (value)
\_Dolphin\_PT\_FLT\_MATH -> \_Dolphin\_PT\_FLT\_MATH\
This is what you should use if you’re just beginning, it is the least crashy out of everything that will be here but it is not completely crash proof.
\_Dolphin\_FLT\_DBL\_GIGA -> \_Dolphin\_FLT\_DBL\_GIGA\
Medium crashiness. Gives various unique results when compared to other things on here.
\_Dolphin\_FLT\_DBL\_MATH -> \_Dolphin\_FLT\_DBL\_MATH\
Medium crashiness. Gives less results than \_Dolphin\_FLT\_DBL\_GIGA.
\_Dolphin\_FLT\_LOAD -> \_Dolphin\_NOP\
Most crashy. One of the most difficult ones there are here while still at least semi-consistently being able to get results. Requires lower intensity than others to not get crashes.
\_Dolphin\_FLT\_STORE -> \_Dolphin\_NOP\
Most crashy. One of the most difficult ones there are here while still at least semi-consistently being able to get results. Requires lower intensity than others to not get crashes.
\_Dolphin\_FMR -> \_Dolphin\_NOP\
Not all that crashy, but results mostly consist of unplayable and unwatchable screen warping. Results and success very much vary per game. Requires high intensity to get even remotely anything. Provides the most unique effects out of anything here when you aren’t looking at an enlarged concrete texture covering your entire screen.
## **Potential Weird Scenarios**
Sometimes, it’s not as simple as decompressing and decrypting the default.xex and corrupting it. There may be some scenarios where you need to do more.
### **Corrupting Games With Title Updates**
You should generally avoid trying to use Title Updates while corrupting games. Applying the Title Update while also corrupting is highly inconvenient and unnecessary for most games as most are only bug fixes. There are some games however, with massive amounts of Title Updates that make the game what it is (Minecraft, Terraria etc.) If you insist on corrupting games with Title Updates, first of all you need to obtain the Title Update file. If you did the GOD or XBLA method, you may already find that the Title Update folder (000B0000) is already there. If you have used the Disc method go to HDD1 -> Content -> 0000000000000000 and find the title id of the game on your disc. If you downloaded the Title Update, inside the title id folder should be the Title Update folder (000B0000). Go into the Title Update folder and copy the Title Update file onto your USB drive. If you were using this guide for corrupting an XBLA game, you should already have the wxPirs tool. If not, you can download it from here: [Wxpirs - extract content from Xbox 360 Demos, Video DLC and Arcade game containers | Digiex](https://digiex.net/threads/wxpirs-extract-content-from-xbox-360-demos-video-dlc-and-arcade-game-containers.9464/#google_vignette). Do what you would for the XBLA title but instead open the Title Update file. Extract the Title Update files to the same folder as the game (if it overwrites files don’t worry about it).

You will notice how there is now a “default.xexp” file next to the normal default.xex file. This is the patch file for the default.xex file. Copy over both files to the xextool folder.

To patch it, type in the following command: “xextool -p default.xexp default.xex”
without quotation marks. After you do that you’re going to need to fix it so it doesn’t need a separate patch file. To do that type “xextool -u default.xex”.
Then, you’re going to want to remove all XEX limitations. To do that type “xextool -r a default.xex”.
Finally, after all that you can decompress and unencrypt the XEX file. Remember, you can do that by typing “xextool -c u -e u -o !.xex default.xex”. Now, copy the XEX five times, corrupt them and put your USB drive into the Xbox 360.
This time, you can’t just run the XEX file directly. In order for the Title Update to get applied you need to launch the original unmodified game (the one that was on your Xbox 360 already, not the extracted one)
Launch the game through here (or the disc if you are using a disc).
and then from there you can open the file browser while in the game and launch the corrupted XEX file.
Only then will the Title Update be applied to the corrupted XEX.
### **Corrupting Games With “DLL” Files**
There is this weird case scenario with Valve games on the Xbox 360 (and Terraria with no Title Update) where there are “DLL” files (they’re just XEX files disguised as a DLL file) running alongside the normal default.xex. Valve games are currently the only known games that are like this, but there are more than likely other games on the Xbox 360 that are like this that this guide would help with. To tell if you should be corrupting the “DLL” files and not the default.xex, look at the size of the default.xex compared to the “DLL” files. If the default.xex doesn’t even reach the megabyte range, the “DLL” files are more than likely the files you want to corrupt. In order to corrupt these types of games, you need to decompress and decrypt the “DLL” files like any normal XEX file. You don’t even want to touch the default.xex as it will cause the game to crash on boot when loading a modified one. For this guide, we will be using the game “Portal: Still Alive”. The common “DLL” files you want to corrupt are “engine\_360.dll”, “vphysics\_360.dll”, “MaterialSystem\_360.dll”, “shaderapidx9\_360.dll” and “stdshader\_dx9\_360.dll”. You can corrupt the other “DLL” files if you want. Decompress and decrypt those files, but you may want to decompress all the “DLL” files just in case you want to have those at the ready.
Being able to have all “DLL” at the ready to corrupt is very useful.
After you decompress and decrypt the “DLL” files, you will need to straight up replace the unmodified “DLL” files with the modified ones. Therefore, it is impossible to do the method of creating multiple copies of the files in order to decrease the downtime of corruptions. After you have replaced all of the “DLL” files of the game on the USB drive, you will need to add all of the “DLL” files into RTC.
The corruption settings you should use are like before except for a few things. Instead of using a normalized blast radius, you’ll want to use a spread or even blast radius. You’ll also want to have a layer size of around 80 if you’re only corrupting the common “DLL” files mentioned earlier as the game is a lot more sensitive than most. This may not be the case for other games. You may want to try to get a bigger layer size if you are corrupting more of them. After you are done corrupting the files plug the USB drive into your Xbox 360 and load the normal default.xex and the game should be corrupted.
## **Notes**
You don’t have to just use 5 copies of the XEX. Create as many as you see fit. Just make sure that you increase the intensity and the layer size you should be looking for the more copies you add.
You may sometimes find that the XBLA games you own are in trial mode now. This is due to the fact that you are offline **(at least you should be offline, don’t use corruptions while connected online).** To fix this, in Aurora press Y on the game that is forcing you into trial mode. Stay on the launch button and press the d-pad left 2 times. Instead of launch it should say settings now. Press A and enable the settings override. For the DashLaunch Settings turn on Content Patching, XBLA Patching and License Patching.
You need to download Dolphin as the \_Dolphin\_NOP list is only accessible if Dolphin Vanguard is downloaded.
The \_Dolphin\_PT\_FLT\_MATH, \_Dolphin\_PT\_FLT\_ADD, \_Dolphin\_PT\_FLT\_SUB and \_Dolphin\_PT\_FLT\_DIV lists can be mixed around (MATH is the only one that can be used against itself though). For example, Use \_Dolphin\_PT\_FLT\_ADD with \_Dolphin\_PT\_FLT\_SUB to turn addition floats into subtraction floats.
Sanitization is possible but not recommended as you will have to constantly switch between devices and unplugging and replugging in the USB drive. You can do it if you want but expect 30 minutes to an hour of tedious work.
With how unique the Xbox 360 can be with what developers can do with it there may be some extra weird scenarios that may not be mentioned in this guide. We don’t own everything/can’t test everything so if you find something odd that prevents your corrupting experience please join the RTC Discord so we can help solve issues and add solutions to the Wiki.
# Xbox 360 Executable Corruptions (Xenia)
by Snuffles
using Xenia and FileStub
This guide explains how to get Xbox 360 corruptions working using FileStub and Xenia. This method allows for Xbox 360 corruptions, but ultimately it is a slow and tedious process due to the lack of savestates.
**This guide presupposes that the game is already operational on the emulator. If you haven't gotten your game to run in Xenia, stop reading this guide and figure this one out.**
## **Dumping the Files on Stock**
The Xenia quickstart guide has a great guide to dumping your own games on stock consoles.
## **Extracting the Files**
### **GOD/Games on Demand**
After you have dumped the games you want to corrupt you need to extract the files to get the XEX. You’re going to want to download a program called “god2iso” in order to convert the file into iso format. You can get it from here: [God2ISO - Xbox 360 Games on Demand to CD Image Converter | Digiex](https://digiex.net/threads/god2iso-xbox-360-games-on-demand-to-cd-image-converter.7115/#google_vignette). Launch the “God2Iso.exe” file from the downloaded program and add a GOD package from your USB drive. Choose an output directory and press the “Go!” button.

After it is done you will find an iso that has the same name as the GOD package you added. Now you need to download a program called “isoextract” which you can get from here: [Xbox 360 XISO Extract - BEST an easiest XDG3 extraction tool, with GUI + FTP. | Digiex](https://digiex.net/threads/xbox-360-xiso-extract-best-an-easiest-xdg3-extraction-tool-with-gui-ftp.9711/). Launch the “XBOX360 ISO Extract.exe” file from the downloaded program. Choose the ISO folder and the destination for the extracted files to go. After you are done choosing, press the “go” button.

You should now have the files of the game you want to corrupt.
### **XBLA/Xbox Live Arcade**
After you have dumped the games you want to corrupt you need to extract the files to get the XEX. You’re going to want to download a program called “wxPirs” in order to extract the files of the XBLA title. You can get it from here: [Wxpirs - extract content from Xbox 360 Demos, Video DLC and Arcade game containers | Digiex](https://digiex.net/threads/wxpirs-extract-content-from-xbox-360-demos-video-dlc-and-arcade-game-containers.9464/#google_vignette). Launch the “wxPirs.exe” file from the program you downloaded. Click open file in the program and go to the folder where the XBLA title file is. Extract all the files somewhere on your hard drive.

You should now have the files of the game you want to corrupt.
## **Decompressing and Unencrypting the XEX**
You should have a “default.xex” file in the root folder of the game you extracted. This file needs to be decompressed and unencrypted before being able to be corrupted. In order to do this, you’re going to need a tool called “XexTool”, which you can get here: [XEXTool 6.3 Download | Digiex](https://digiex.net/threads/xextool-6-3-download.9523/). Alternatively, if you prefer to use a GUI tool, you can use a program called “Xbox 360 Game Hack”, which you can download here: [Xbox 360 Game Hack 6.3 - Patch Xbox 360 .xex files (patch region, media, kinect) | Digiex](https://digiex.net/threads/xbox-360-game-hack-6-3-patch-xbox-360-xex-files-patch-region-media-kinect.7430/#post38498), although note that this guide will be using the command line tool. Copy over the default.xex file to the folder where “xextool.exe” is stored.

This is what the XexTool folder should look like when preparing to decompress and unencrypt.
In file explorer, there is a bar to the left of the search bar that shows the path to the current directory you’re in (should be the XexTool folder). Click the empty space in that bar,

The red arrows point to the empty space.
type “cmd”

and press enter. Command prompt should now open. To keep things simple, just type in “xextool -c u -e u -o default2.xex default.xex” without the quotes.“default2.xex” can be whatever you want. Copy the “default2.xex” file to the root of the extracted game folder. The unmodified default.xex should be there alongside your newly decompressed and unencrypted default2.xex file.
## **Corrupting and Loading**
Open the RTC launcher and download Dolphin. Download FileStub if you haven’t already and open it. Click the settings icon in the top right corner of FileStub and turn Big Endian on. Add the modified default2.xex into FileStub. Click load targets into RTCV.

Change the blast radius to normalized and the corruption engine to vector. Click the “My Lists” button and then click “Import List File”. Go to your RTC folder and go into VERSIONS -> RTCV\_(version) -> Dolphin -> LISTS and import all of the lists in this folder.

Go back to engine config and click on the “Package Downloader” button. Go to LISTS and download the following lists: [DolphinFloatInstructions\_by\_NullShock78.pkg](http://cc.r5x.cc/rtc/packages/CATALOG_3/LISTS/DolphinFloatInstructions_by_NullShock78.pkg) and [DolphinFloatPassthrough\_by\_NullShock78.pkg](http://cc.r5x.cc/rtc/packages/CATALOG_3/LISTS/DolphinFloatPassthrough_by_NullShock78.pkg).

Go back to “My Lists” and click “Refresh List Files”. Go back to engine config. The new list files should be there now. Now it’s finally time to do your first test corruption. For the limiter, set the list to be \_Dolphin\_PT\_FLT\_MATH and set the value to be the same. This is a great beginning combo.

The guide will detail other list combinations later. Open up the Glitch Harvester. You’re going to want to go for a layer size of around 100.
Too little and you’re not going to see much broken stuff, too much and all you’ll see is bars stretched across your screen. The amount of blast units you’ll get depends on the lists you use and the XEX size. If you’re getting way too many or way too little, make sure you have Big Endian set in FileStub or didn’t accidentally increase the alignment past 0. After you have corrupted the file, drag and drop the “default2.xex” into Xenia to load the corrupted XEX. Alternatively you can set the target execution in the FileStub advanced settings to open Xenia every time you corrupt the file.
## **List Combinations and Info**
Here are some of the lists and combinations that have been tested and work well. If a list is not listed here, that probably means it should be avoided unless you know what you are doing.\
Guide: (limiter) -> (value)
\_Dolphin\_PT\_FLT\_MATH -> \_Dolphin\_PT\_FLT\_MATH\
This is what you should use if you’re just beginning, it is the least crashy out of everything that will be here but it is not completely crash proof.
\_Dolphin\_FLT\_DBL\_GIGA -> \_Dolphin\_FLT\_DBL\_GIGA\
Medium crashiness. Gives various unique results when compared to other things on here.
\_Dolphin\_FLT\_DBL\_MATH -> \_Dolphin\_FLT\_DBL\_MATH\
Medium crashiness. Gives less results than \_Dolphin\_FLT\_DBL\_GIGA.
\_Dolphin\_FLT\_LOAD -> \_Dolphin\_NOP\
Most crashy. One of the most difficult ones there are here while still at least semi-consistently being able to get results. Requires lower intensity than others to not get crashes.
\_Dolphin\_FLT\_STORE -> \_Dolphin\_NOP\
Most crashy. One of the most difficult ones there are here while still at least semi-consistently being able to get results. Requires lower intensity than others to not get crashes.
\_Dolphin\_FMR -> \_Dolphin\_NOP\
Not all that crashy, but results mostly consist of unplayable and unwatchable screen warping. Results and success very much vary per game. Requires high intensity to get even remotely anything. Provides the most unique effects out of anything here when you aren’t looking at an enlarged concrete texture covering your entire screen.
## **Potential Weird Scenarios**
Sometimes, it’s not as simple as decompressing and decrypting the default.xex and corrupting it. There may be some scenarios where you need to do more.
### **Corrupting Games With Title Updates**
You should generally avoid trying to use Title Updates while corrupting games. Applying the Title Update while also corrupting is highly inconvenient and unnecessary for most games as most are only bug fixes. There are some games however, with massive amounts of Title Updates that make the game what it is (Minecraft, Terraria etc.) If you insist on corrupting games with Title Updates, you will need to obtain the Title Update. This guide will not go over how to obtain it. After you have obtained the Title Update, you will need to install it into Xenia. In order to do this you just need to click File -> Install Content and then install the Title Update file. Go to the content folder in Xenia, you will find the Title ID of the game you installed the Title Update for. Navigate that folder until you find a folder containing a “default.xexp” file.

Copy all of the files in the Title Update into the folder with your base game (if it overwrites files don’t worry about it). You will notice how there is now a “default.xexp” file next to the normal default.xex file. This is the patch file for the default.xex file. Copy over both files to the xextool folder.

To patch it, type in the following command: “xextool -p default.xexp default.xex” without quotation marks. After you do that you’re going to need to fix it so it doesn’t need a separate patch file. To do that type “xextool -u default.xex”. Then, you’re going to want to remove all XEX limitations. To do that type “xextool -r a default.xex”. Finally, after all that you can decompress and unencrypt the XEX file. Remember, you can do that by typing “xextool -c u -e u -o default2.xex default.xex”. After all of that you can finally corrupt the newly patched XEX file and drag and drop it into Xenia.
### **Corrupting Games With “DLL” Files**
There is this weird case scenario with Valve games on the Xbox 360 (and Terraria with no Title Update) where there are “DLL” files (they’re just XEX files disguised as a DLL file) running alongside the normal default.xex. Valve games are currently the only known games that are like this, but there are more than likely other games on the Xbox 360 that are like this that this guide would help with. To tell if you should be corrupting the “DLL” files and not the default.xex, look at the size of the default.xex compared to the “DLL” files. If the default.xex doesn’t even reach the megabyte range, the “DLL” files are more than likely the files you want to corrupt. In order to corrupt these types of games, you need to decompress and decrypt the “DLL” files like any normal XEX file. You don’t even want to touch the default.xex as it will cause the game to crash on boot when loading a modified one. For this guide, we will be using the game “Portal: Still Alive”. The common “DLL” files you want to corrupt are “engine\_360.dll”, “vphysics\_360.dll”, “MaterialSystem\_360.dll”, “shaderapidx9\_360.dll” and “stdshader\_dx9\_360.dll”. You can corrupt the other “DLL” files if you want. Decompress and decrypt those files, but you may want to decompress all the “DLL” files just in case you want to have those at the ready.


After you decompress and decrypt the “DLL” files, you will need to straight up replace the unmodified “DLL” files with the modified ones. Therefore, it is impossible to do the method of creating multiple copies of the files in order to decrease the downtime of corruptions. After you have replaced all of the “DLL” files of the game on the USB drive, you will need to add all of the “DLL” files into RTC.

The corruption settings you should use are like before except for a few things. Instead of using a normalized blast radius, you’ll want to use a spread or even blast radius. You’ll also want to have a layer size of around 80 if you’re only corrupting the common “DLL” files mentioned earlier as the game is a lot more sensitive than most. This may not be the case for other games. You may want to try to get a bigger layer size if you are corrupting more of them. After you are done corrupting the files just drag and drop the normal default.xex into Xenia.
## **Notes**
You will find that XBLA games are in trial mode. In order to solve this you will need to change the “license\_mask” setting in the “xenia-(master/canary).config.toml” file to 1 or -1.
You need to download Dolphin as the \_Dolphin\_NOP list is only accessible if Dolphin Vanguard is downloaded.
The \_Dolphin\_PT\_FLT\_MATH, \_Dolphin\_PT\_FLT\_ADD, \_Dolphin\_PT\_FLT\_SUB and \_Dolphin\_PT\_FLT\_DIV lists can be mixed around (MATH is the only one that can be used against itself though). For example, Use \_Dolphin\_PT\_FLT\_ADD with \_Dolphin\_PT\_FLT\_SUB to turn addition floats into subtraction floats.
Sanitization is possible but not recommended due to the lack of savestates.
With how unique the Xbox 360 can be with what developers can do with it there may be some extra weird scenarios that may not be mentioned in this guide. We don’t own everything/can’t test everything so if you find something odd that prevents your corrupting experience please join the RTC Discord so we can help solve issues and add solutions to the Wiki.
# Nintendo Switch
# Switch ROM Corruptions
using unmodded Ryujinx and FileStub
This guide explains how to get Nintendo Switch corruptions working using FileStub and Ryujinx the Nintendo Switch emulator. This method allows for Switch corruptions, but ultimately it is a slow and tedious process due to the lack of savestates.
**This guide presupposes that the game is already operational on the emulator.**\
**If you haven't gotten your game to run in Ryujinx, stop reading this guide and figure this one out.**
*This guide will not show you how to setup the firmware and your prod.keys.*
## Preparing the Corrupt mod
In the main Ryujinx menu, right-click on your game and select Open Mods Directory.
*If you have been opening your games using "File -> Load application from file" and your game doesn't appear in the main screen, you need to go in the Ryujinx settings and setup the Game Directories to where your game file is.*
In this directory, you will create a folder called "Corrupt". Inside the Corrupt folder, you will create a folder called "exefs". It is very important that this one is written in lower case.
Go back to the main screen in Ryujinx and right-click on your game and select Extract Data -> ExeFS. Make it extract the data in the "exefs" folder you just created.
You should now have a "main" file in the "exefs" folder alongside a few other files.
## Preparing the main file
Get the "nsnsotool" program from Github at \
Put the tool in the "exefs" folder and open a command prompt to the "exefs" folder.
Run the following command:
> nsnsotool.exe main main.decompressed
This will create a decompressed executable. Delete the "main" file and rename the .decompressed one to "main".
## **Preparing the File Corruptor**
The new bigger uncompressed "main" file in that "exefs" folder is the rom that you will corrupt.\
Open FileStub and load that "main" file as your target for RTC.
You will want to use the Vector Engine and realistically only the Classic vector lists.
If you haven't done it already, go to RTC Settings and Uncap the intensity. You'll need massive blasts for the Switch executables.
## **Finding the alignment**
Nintendo Switch executables are rarely aligned on the 32-bit grid. In most cases, you will need to set your Alignment to "1" for them. If you want to be 100% sure of the alignment needed for your game, you can do the following to test it.
* Set your alignment to 0
* Set your Vector Engine to One/Two
* Open the Glitch Harvester
* Blast at maximum intensity
* Note how big is the generated BlastLayer
* Repeat for Alignment 1,2,3
After having probed all 4 alignments (0,1,2,3), you'll know which one is the right one from which BlastLayer had the most units.
## Blast away
You should now have a setup ready for Switch Corruptions. When you blast using the Glitch Harvester, it will alter the "main" file. To get the results, you have to stop the emulated game and restart it. Because of this, sanitizing is an extremely slow process and is not recommended.
Play around with the Classic Vector lists and you'll find effects. Go ham.
# Computers & Mobile
# Corrupting Android Unity games
For use on Android devices such as Phones, Tablets, VR Headsets.
**Guide written by:** bloqhead\
**Software used in guide:** RTCV, FileStub, Sidequest, APK Easy Tool, 7zip
### WARNING: **This guide was written for corrupting games made for the Oculus Quest. The Quest devices run android and support sideloading APKs but this guide could also apply to other Android devices or Android software running on Bluestacks. Thank you for understanding.**
This document aims to cover the process of corrupting Unity Android games. I use 7zip (to extract the apks since they are just renamed zips), APK Easy Tool (to sign the apks with the corrupted content), Sidequest to sideload the signed apks back to the device (Sidequest is made for mainly Oculus Quest usage, however \[in short] it is just adb with a gui so any android device will work) and the latest dev build of RTCV with Filestub. For something to automate this process, other tools may be considered over the ones I use to do this manually. Links to the tools I have used can be found at the bottom of the document.
To start, you need the apk of the game that you want to corrupt. For this example, I am corrupting the Quest port of Beat Saber, so I connect my headset to my pc over cable. This is the same process for android phones, just connect it to your pc with a cable. Just to note that for android phones, you may need to enable Developer mode, developer mode is required for Oculus Quest.
Now you need to grab the apk. With your android device connected to your pc, open sidequest and click on the icon with the 9 small squares. It should show a list of all of the apps installed on the device. Now you need to find your game, either scroll down until you see it, or type it’s name in the Search Package box, but keep in mind this searches for app package names and not their actual names (for example Beat Saber is com.beatgames.beatsaber). Once you have found your game, click on it’s cog on the right hand side, and it should pull up a menu. Scroll down and you will see a button labeled “Backup APK File”. Click this, and a after a while the apk will be saved to C:\Users\usernamehere\AppData\Roaming\SideQuest\backups\packagenamehere\apks (obviously usernamehere will be your windows username and packagenamehere will be your app package name). Inside this folder, there will be an apk which has the date it was “backed up” to your pc and at the end, the app version number. With 7zip, right click this apk then select 7zip -> Extract files. Click OK on the 7zip prompt that shows up
You’ll now have a folder with the same name as the apk, with the apk contents inside of it. Open RTCV and then open Filestub. Click on the target type box and select Multiple files (One domain). Then click on the Add button in the Select Multiple Files window, then navigate to your folder with the apk contents. Since Beat Saber is a Unity game, you’ll need to navigate to assets\bin\Data. Select all of the files there (the other folders in Data are excluded) and click Open. Then click “Load Multiple Files in Filestub”, then click Load Targets into RTCV. The main RTC window will now have a domain titled “Multiple files”.
This is where the fun stuff begins.
First, change your Corruption Engine to the Vector engine. This is absolutely required as any other engine will only cause crashes or nothing will happen.
Changing the limiter and value lists are completely optional, so I will be sticking with the standard Extended lists. If you want to obliterate the game right off the bat, crank the intensity super high then click Corrupt. To stack corruptions, you can press “Bake All Dirty” in the filestub window every time you corrupt the files. If you want minimal corruptions, try setting the intensity low.
Once you’ve done corrupting the files to your liking, navigate to the root of the game folder, drag click and select them all, then click 7zip -> Add to foldername.zip. Rename to the extension to .apk, then open APK Easy Tool. Drag and drop the apk onto the “Sign APK” button, and after a while another apk will be produced, with the same name as the og one but with “signed” added onto the end of it. This apk may have a different file size to the og one, but this is nothing to worry about as this is completely normal.
Now it’s time to sideload this signed apk back over to your android device. With sidequest still on the Installed apps tab, click the cog on your selected app again and click Uninstall App. Then drag the signed apk over to the sidequest window, which should cause it to install the apk. After a while a green notification should pop up saying “Task Completed!”. You can now safely disconnect your android device. When you open your now corrupted game, you should see corrupted assets. These can vary from a lot of things, such as models, Text assets and much, much more.
Links: 7zip: ;
Sidequest: ;
APK Easy Tool: (links can be found at the bottom of the post)
P.S.: If you’re using alternate apk signing methods you need a signing key to sign them!
# Corrupting Files with FileStub
For general use with files, directories, and more.
**Guide written by:** Mistsofnowh3r3\
**Software used in guide:** RTCV, FileStub
## Assumptions
This guide will assume the following things:
You know the basics of using RTC.
You understand basic RTC terminology.
## Forewarning
Do not ever corrupt a file you are not prepared to lose.
While FileStub has safeties in place to restore files, it is better to act as if corrupting a file would leave it permanently corrupted. This means it is good to make backups of what you will be corrupting prior to corrupting them.
Do not upload corrupt media directly to Discord or similar.
It is unlikely, but possible, that when trying to display a corrupt image, audio, or video file Discord could freak out and crash for anyone that tries to view the media. So for this reason it is better to externally capture the corrupt media using something like OBS or the Snipping Tool.
Another reason to externally capture the media is that it will likely be displayed differently in different applications, so externally capturing it is better.
## General Usage
FileStub acts as a middle point between files on your computer and RTC. Start by loading one or multiple files in FileStub using its interface and then use the Load targets to RTC button to send them to RTC. These will appear in the Memory Domains the same way as Emulators show their memory areas. When loading multiple files, you can change parameters to display files as separate memory domains or consolidating them to a single one.
## Basic Layout

### Left side
#### Status
Shows info on the currently loaded target(s)
### Session
**Restore Targets**
Restores a backup of the file(s) currently loaded into RTCV from the Vault.
**Reset Backups**
Creates a new backup from the current state of the file(s) currently loaded into RTCV. If they are currently corrupt, you will lose the original backup.
### Vault Data
Shows how many files are currently corrupt or “dirty”.
#### Restore All Dirty
Restores all backups in the Vault. This includes backups of things from previous sessions which are not currently loaded as targets.
#### Bake All Dirty
Bakes the corruptions of all dirty files. Currently, clicking this will automatically permanently corrupt all currently dirty files with no warning.
#### Clear Vault Data
Clears all data in the Vault and unloads all targets. Cannot be done if any files are dirty
### Top
#### Install Templates from Package Downloader
Opens the Package Downloader.
#### Advanced Options
Expands the view to show extra options. Will go over below.
### ⚙️Cog
**Big endian**
Likely unneeded. Sets the endianness in cases where that is needed.
**Auto-Uncorrupt**
When enabled, reloading a backup performs an uncorruption on the corrupted files instead of copying the file from the Vault. This has a minimal effect when working with small files, but speeds up the backup restoration process as the files get larger.
**Use Caching + Multithreading**
When on, current loaded targets are cached in RAM. Turning off makes the program slower, but is recommended when targeting files larger than the amount of RAM available on your device.
## Target Type
#### Single File
Allows only one file to be selected and corrupted.
#### Multiple files (One domain)
Allows multiple files to be selected and corrupted. All files are added to a memory blob and are laid out one after another, this blob is then represented as a single domain in RTC.
#### Multiple files (Many domains)
Allows multiple files to be selected and corrupted, gives each file a separate Domain.
#### Multiple files (Many domains + Full path)
The same as Multiple files (Many domains) but file path is shown in the domain list. Useful if you're targeting multiple files with the same name.
Installed Templates will also show up under this menu.
## Target Loading
This is where you select what you will be corrupting.
#### Target List
Unlabeled in the program, but this shows a list of all the files you have currently selected.
#### Browse Target
Browse Target opens a file dialog allowing you to pick which file(s) you will be corrupting.
If any of the Multiple Files are selected as the Target Type this will open a separate file picker which I will explain below.
#### Quick Load drag and drop zone
Automatically selects and loads files you drag and drop here into RTCV
#### Set base dir
Theoretically, all files in the selected folder will be added to the Vault backup. Considered unfinished and should not be used.
#### Load targets into RTCV
Loads all targets in the list into RTCV. This button becomes the Unload button afterwards and will unload all targets from RTC.
#### Clear targets
Removes all targets from the list
## Multiple Files Select Dialog

#### File Selection List
Unlabeled in the program, but this shows a list of all the files you have currently selected.
#### Add
Opens another separate file dialog to select a file to add to the File Selection List.
#### Add Folder
Open another different file dialog, choose a folder and add all the files contained in it to the File Selection List. Adds files from all sub folders in the selected folder as well.
#### Remove Selected
Remove the highlighted file from the File Selection List.
#### Clear
Clears all files from the File Selection List.
#### Save list to File
Saves the current File Selection List to a .txt in a location of your choice. This .txt will contain the file path of all the files in the File Selection List.
#### Load list from File
Opens a file dialog to select a previously saved List.
#### Cancel
Closes the Multiple Files Select Dialog.
#### Load Multiple Files in FileStub
Loads all files in the File Selection List into FileStubs Target List.
#### Ignore loading errors
Suppresses error messages when loading files. Useful if you are loading a folder that contains multiple files that otherwise would display an error when trying to load
## Advanced Layout

### Loaded target information
Shows info on the currently loaded target(s).
### Target execution
Depending on the selection, the options “Edit Exec”, “Kill Process”, and “args” will be shown
#### No execution
Nothing is executed upon corruption of target. No options shown.
#### Execute corrupted file
Will attempt to execute the targeted file upon corruption.
“Edit Exec” is shown in error and has no effect.
“Kill Process” listed but has no effect
**Execute with**
Will attempt to execute the targeted file with a selected program upon corruption.
“Edit Exec” allows you to choose which program to attempt to execute with.
“Kill Process” kills the selected program when it is running.
#### Execute other program
Will execute the selected program upon corruption of target.
“Edit Exec” allows you to choose which program to execute.
“Kill Process” kills the selected program when it is running.
“Args” adds arguments to be added to the selected program upon execution.
#### Script
Unimplemented.
### Selected Target settings
#### Header padding & Footer padding
Set the length in bytes of padding of each for the currently highlighted target. Each Target can have its own header and footer offset. This will be explained in Concepts.
#### Save target padding
Saves the inputted paddings to the Vault
### Global Target settings
Unimplemented.
## The RTC window
RTC will be much the same as it usually is with only a few key differences:
There is no button to Auto-Corrupt.
The Savestate Manager in Glitch Harvester is blanked out.
The Manual Blast button is replaced with a Corrupt button which is linked to the Glitch Harvester corrupt button. This works the same as the Glitch Harvester corrupt button and will add items to the Stash.
## Closing FileStub
When FileStub is being closed it will check if there are any dirty files in the vault. If there are, FileStub will warn you that there are dirty files and ask you if you would like to restore them or not.
If there are dirty files in the Vault when the program is closed and this message is not shown either due to a crash or something similar. The Vault should still be able to restore any dirty files the next time that FileStub is reopened.
## Concepts
### The Vault
The Vault is a system used to create virtual ROMs which can hold entire file structures in them. This is useful for creating Stockpiles. A new Vault copy is created when saving a Stockpile.
### Templates
Templates make corrupting certain things easier. Each template has different options and settings and I will not be going over them in this guide. These act similarly to RTC Plugins and are created in a similar way. Due to this, typical users will not be able to create or edit these.
### Session
A session is everything that happens between loading a target(s) into RTC and unloading that target(s) from RTC.
### File structure
#### Simple File Structure

Above is a simple example of a file’s structure.
#### Header
The header stores information about the file such as: the file type, the file size, and many other things. Because of this, corrupting the header will usually cause the file to become unreadable even if none of the data is corrupt.
#### Data
The data, in most cases, is what we actually want to corrupt.
#### Footer
The footer, like the header, contains info on the file. It will also contain a section to mark the end of a file.
### Realistic File Structure

Above is a more realistic depiction of a file structure, we will use it for learning purposes, but it should not be referenced for usage.
Here’s a more realistic depiction of a file’s structure. The footer and header have been rendered with more detail. Still, the only thing we want to touch is the data. So, In this example, the header should be set to 28 and the footer to 20.
## A note on stockpile creation
It is not recommended to use header and footer padding when creating a stockpile is the goal. Anyone else who would open the stockpile would have to have their header and footer settings exactly the same as you do to get the same results.
\
# Corrupting PC Games with ProcessStub
This is a guide for corrupting a specific Unity game using ProcessStub, however this is good enough to be a great starter for using ProcessStub on any PC game.
ProcessStub is now an optional component of RTC and is not distributed via the Launcher anymore. You can download ProcessStub as a launcher PKG file at
{% embed url="" %}
**Guide written by:** Jack7D1\
**Software used in guide:** RTCV, ProcessStub
## Corrupting Bug Fables and other Unity games
### Jack7D1, May 2021
**Abstract:**
This paper will discuss the process of corrupting Unity games using the Real Time Corrupter (RTC) and provide documentation of methods and techniques that may be used. This paper largely serves as documentation and as a guide for consequent Unity corruptions. This paper pertains to the use of the RTC and it’s Process Stub and largely to the corruption of Bug Fables. However techniques pre- sented therein have been observed to be helpful in corrupting a wide variety of modern Unity games.
### Preface:
**WARNING:** Corrupting programs is likely to cause **LOUD** noises and **FLASHING LIGHTS** from the corrupted program. Assume that corrupting a program will result in **DATA LOSS** for said program, it should be assumed that corruption of a Unity game is destructive in nature in every case.
Take this into consideration before corrupting any program.
### Tools Used:
It has become experimentally apparent that the RTC is best suited for modern, complex games such as Bug Fables. As such this documentation pertains to the use of the RTC with the Process Stub enabled.
Download and install the RTC online. This portion is currently well documented on the aforementioned website and is therefore beyond the scope of this documentation.1
### Setup:
Begin by opening the RTC Launcher.
*Figure 1: RTC Launcher after successful start*
Ensure that ProcessStub is installed, then click on it’s icon to open the corrupter.
It is imperitive to heed all warnings pre- sented by the tools. However the use of a Virtual Machine (VM) is generally not required as Windows provides ample security against collateral damage from process failure.
*Figure 2: Initial configuration of a fresh started Process*
*Stub*
1. See Extra Resources #1
It is important that the target game is fully started and in the run state before proceeding.23 At- taching the stub prior to completely loading the game may result in the game hanging or otherwise fail- ing to start or load, as such the use of Auto-attach is highly discouraged.4 In the game Bug Fables this is achieved by running the game, awaiting the main menu and then loading/creating a save. Once all loading is completed the process stub may be attached.
Attaching the stub can be done simply. Click Browse and select the game in the resulting menu.
This Figure is largely an example, and appearance can vary widely. In this scenario the desired program is:
“Bug Fables : 14636”
The number following the process name is the Process ID (PID) and can be ignored for this purpose, however may prove useful for cross identification with a Command Line Interface.
Once the desired game is selected click Hook Process to proceed.
*Figure 3: Process Stub Browse Window, Bug Fables selected.*
If the corrupter window does not look like this ensure it is not in Easy mode by Clicking the ‘Normal Mode’ button in the bottom right.
The Addresses in the Memory Domains section can vary greatly on circumstance and are largely non-useful for the purpose at hand.
Configure the Corruption Engine to Vec- tor Engine and the Blast Radius to Pro- portional.
*Figure 4: RTC window after successful attach with Bug Fables.*
1. Unity performs most all file integrity checks during program initialization, the use of Process Stub during runtime serves to bypass these checks.
2. Hooking prior to full load will result in malformed address spaces as the data block domains are too small
3. Auto attach uses the window title as a discriminator.
The window should now look like this.

At this time setup is complete and a corruption can be properly applied.
### Corrupting:
The proper use of Memory Domains is important for successful corrupting, each dll and data block is considered a domain, however they should be organized into two “Super-Domains”.
This table has been determined experimentally.
| Super-Domain Name | Dll | Resources |
| ----------------------- | ---------------------------------------------------------------------------------------------------------------------------------------------- | ----------------------------------------------------------------------------------------------------------------------- |
| Filter text: | .dll | “UNKNOWN” |
| Corruption effects: | Physics, loading zones, base logic, nu- merical handling, events and story pro- gression, movement. | Sprites and textures, sounds and music, normal maps, lighting maps, animations, text, events, level geometry, movement. |
| File Domains: | All .dll files. | “data.unity3d” or ∑ ”level###” files |
| Stability: | Exceptionally touchy, responsible for all computation, corruption is likely to lead to crashes, however opens many corrup- tion possibilities. | Very stable, to the point of re- quiring a large bolus of intensity for observable effect to be no- ticed. |
| Suggested Blast Radius: | SPREAD, EVEN, PROPORTIONAL | PROPORTIONAL, BURST, NORMALIZED |
| Suggested Intensity: | \~2000 | \~100000 |
| Mode Size: | 0x1000 bytes | 0x401000 bytes |
Corrupting both super-domains simultaneously is highly unstable and a proper method had not been found.
Switching between them can be done by entering the filter text of the target super domain into the filter text entry of the Process Stub.
Experimentation is highly encouraged by excluding certain domains via deselection or by adjusting in- tensity, blast radius, limiter list, and value list.
To apply the corruption click Manuel Blast, the corruption should now be applied. If a success then this guide is complete and may be repeated for an additional corruption.5
If the game crashes upon application then consider reducing the intensity, changing other settings or simply trying again.
1. Manual blasts stack, however additional corruptions exponentially increase the risk of crash.
### Extra Resources:
For aquiring the RTC.
Further guides and documentation that are outside of the scope of this paper.
# Corrupting VMware snapshots
Safely destroying operating systems using Virtual Machines
**Guide written by:** Modnark\
**Software used in guide:** RTCV, FileStub,VMware Workstation 16
### WARNING: **This is a community-made guide for corrupting Operating Systems (windows,mac,linux) by blasting a VMware snapshot using FileStub. This is not a magic technique for windows destruction, you have to play around with it and results may vary from a system to another. Thank you for understanding.**
How to corrupt virtual machine snapshots
What you need:
* VMware Workstation, this guide was made using VMware Workstation 16, as far as I know the version does not matter.
* A virtual machine that has an operating system installed. If you do not know how to do this, please refer to this page:
Notice:
* If you have VMware installed, it is necessary that you know the directory where you are storing VMs in. This can be found by clicking Edit > Preferences, and then look for "Default location for virtual machines". This path indicates where your VMs are stored.
* If the RAM amount is greater than 1GB you may have to disabled caching & multithreading on the file stub by clicking the cog button that sits next to the "Advanced Options" button and then unticking the "Use Caching + Multithreading" option.
With that out of the way, you can now learn how to corrupt virtual machines with VMware and RTCV!
Virtual machine snapshots (at least in VMware) are dumps of memory saved to a file within the directory of a vm. These snapshots can be created by clicking on the button with an icon of a clock with a little orange "+" image. The name specified for the snapshot does not matter.
After clicking "Take Snapshot" you will have to wait for it to finish saving or else you will not be able to load it into the file stub for corrupting. You can see the current status by looking at the bottom left-hand corner of the VMware window.
Once it has finished saving, you can now load it into the file stub by first clicking on the "Browse target" window, which will make a file open dialog appear. Navigate to the aforementioned "Default location for virtual machines", and locate the folder with the same name as you gave the VM. Open up this folder and locate the newest file that has a ".vmem" file extension, and once you've found it, highlight it and click the "Open" button.
Now you should see the path to the file show up inside of the file stub window, and the last step to setting the corrupting up is to click "Load targets into RTCV". Now you're able to corrupt this like anything else, and once you've blasted it you can head back over to VMware and click the button with an orange arrow pointing to the left to load the corrupted snapshot. And voilà! just like that you have now corrupted a VM! Pretty simple eh?
You can get better and more wacky results by creating a VMD that has a range from 0 to some other lower number, possibly a few ten thousand more bytes from 0, and then use said VMD when corrupting. For more information on creating VMDs you can visit this page:
# Java
---
[Next Page](/llms-full.txt/1)